


How to Replace Front Brake Pads and Rotors on a 2018 Dodge Charger (Brembo or Standard)
Step-by-step DIY instructions with required tools/parts, safety tips, and brake setup identification guidance for 2007, 2012, 2013, 2014, 2015, 2016, 2017, 2018, 2019, 2020, 2021, 2022, 2023
How to Replace Front Brake Pads and Rotors on a 2018 Dodge Charger (Brembo or Standard)
Step-by-step DIY instructions with required tools/parts, safety tips, and brake setup identification guidance for 2007, 2012, 2013, 2014, 2015, 2016, 2017, 2018, 2019, 2020, 2021, 2022, 2023
🔧 Charger - Front Brake Pads & Rotor Replacement
You’ll be removing the front calipers, swapping the front pads, and replacing the front rotors on both sides. The exact steps and torque specs depend on whether your Charger has the standard front brakes or the optional Brembo front brakes.
Difficulty Level: Intermediate | Estimated Time: 2-4 hours
⚠️ Safety & Precautions
- ⚠️ Support the car with jack stands; never rely on a floor jack.
- ⚠️ Brakes create dust—wear a mask and avoid blowing dust with compressed air.
- ⚠️ Do not let the caliper hang by the brake hose; support it with a hook/strap.
- ⚠️ Brake fluid can damage paint; wipe spills immediately.
- ⚠️ Keep grease off pad/rotor friction surfaces.
🔧 Required Tools
You'll need the following tools for this repair:
- Floor jack (rated 3-ton minimum)
- Jack stands (rated 3-ton minimum)
- Wheel chocks
- Lug wrench or 22mm socket
- 3/8" drive ratchet
- 1/2" drive breaker bar
- Torque wrench (10–250 ft-lbs range)
- Socket set (metric)
- Hex bit socket set (metric)
- C-clamp or brake caliper piston compressor (specialty)
- Flathead screwdriver
- Wire brush
- Bungee cord or caliper hook
- Brake cleaner spray
- Shop towels
- Safety glasses
- Nitrile gloves
- Dust mask
🔩 Required Parts
HowToo sells all the parts you need for this repair:
- Front brake pad set - Qty: 1
- Front brake rotors - Replace in pairs - Qty: 2
- Front brake pad hardware kit (clips/abutments) - Qty: 1
- Brake caliper slide pin grease (silicone) - Qty: 1
- Brake fluid (DOT 3 / DOT 4 as specified) - Qty: 1 quart
📋 Before You Begin
- Park on level ground, steering wheel straight, and chock the rear wheels.
- Release the parking brake.
- Loosen the front lug nuts 1/2 turn using a 22mm socket before lifting.
- Open the hood and remove the brake fluid reservoir cap (set it loosely on top). This helps pistons retract smoothly.
- Quick check I need from you: Do you have the Brembo front brakes (large fixed caliper, often marked “Brembo,” typically 4 pistons) or the standard sliding caliper?
🔨 Step-by-Step Instructions
Follow these steps in order:
Step 1: Lift and secure the front end
- Use a floor jack to lift the front at the approved front center jack point.
- Place jack stands at the front pinch welds/frame points and lower onto them.
- Remove both front wheels using a 22mm socket and ratchet.
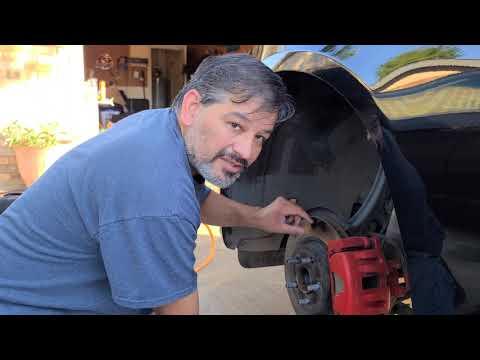
Step 2: Identify your front brake type (required to continue)
- Look at the caliper through the wheel well:
- If it’s a large, rigid caliper (no visible slide pins) and may say “Brembo,” you have Brembo.
- If it’s a smaller caliper that slides on two pins/boots, you have standard.
- Reply with: “Brembo” or “Standard”.
Step 3: Stop here until confirmed (so torque specs match)
- Torque specs and bolt sizes differ between the Brembo and standard setups, and using the wrong spec can strip threads or cause brake noise/pulsation.
- Once you confirm Brembo vs Standard, I’ll give you the exact bolt sizes, torque specs, and the full removal/installation steps for your setup.
✅ After Repair
- After the install (once completed), you must pump the brake pedal until it feels firm before driving.
- Check brake fluid level and top off if needed.
- Do a cautious test drive and confirm no pulling, grinding, or warning lights.
- Follow pad bedding (break-in) procedure recommended with your pads.
💰 DIY vs Shop Cost
Shop Cost: $600-$1,200 (parts + labor)
DIY Cost: $220-$650 (parts only)
You Save: $380-$550 by doing it yourself!
Shop labor rates vary but typically run $100-$150/hour. This repair takes a shop approximately 2-3 hours.
🎯 Ready to get started?
HowToo makes it easy: same-day/2-day shipping on every part, plus all the tools and specialty tools you need! Check out the parts and tools sections below to add everything to your cart.
