


How to Replace Front Brake Pads and Rotors on a 2016 Volkswagen Jetta
Step-by-step instructions with tools, parts, torque specs, and safety tips for 2011, 2015
How to Replace Front Brake Pads and Rotors on a 2016 Volkswagen Jetta
Step-by-step instructions with tools, parts, torque specs, and safety tips for 2011, 2015
🔧 Front Brakes and Rotors - Replacement
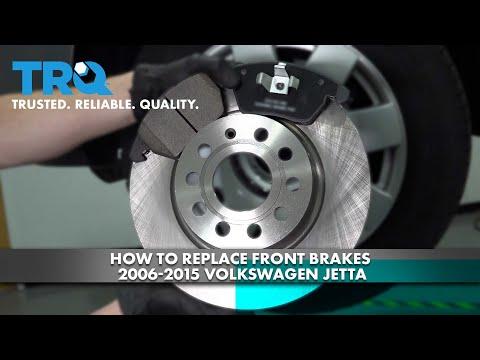
Replacing the front pads and rotors on your Jetta restores braking power, reduces noise, and fixes pulsation from worn or warped rotors. This job is straightforward if you keep the caliper supported and clean all contact points before reassembly.
Difficulty Level: Intermediate | Estimated Time: 2-3 hours
⚠️ Safety & Precautions
- Work on a level surface and chock the rear wheels before lifting the car.
- Use jack stands under the vehicle; never rely on the floor jack alone.
- Brake dust can be harmful. Do not blow it off with compressed air. Use brake cleaner instead.
- Keep the brake hose from stretching when the caliper is removed. Support the caliper with wire or a hook.
- Do not press the brake pedal with the caliper removed.
- No battery disconnect is required for this front brake job.
🔧 Required Tools
You'll need the following tools for this repair:
- Floor jack (rated 3-ton minimum)
- Jack stands (rated 3-ton minimum)
- Wheel chocks
- 17mm lug bolt socket
- Ratchet
- Torque wrench
- 7mm hex bit socket
- 21mm socket
- Breaker bar
- C-clamp or brake caliper compression tool (specialty)
- Bungee cord or mechanic's wire
- Flat trim tool
- Wire brush
- Brake cleaner
- Safety glasses
- Nitrile gloves
🔩 Required Parts
HowToo sells all the parts you need for this repair:
- Front brake pad set - Qty: 1
- Front brake rotors - Replace in pairs - Qty: 2
- Front brake hardware kit - Qty: 1
- Brake cleaner - Qty: 1
- High-temperature brake grease - Qty: 1
📋 Before You Begin
- Park on level ground, set the parking brake, and chock the rear wheels.
- Loosen the front lug bolts slightly before lifting the vehicle.
- Turn the steering wheel for better access to each side as needed.
🔨 Step-by-Step Instructions
Follow these steps in order:
Step 1: Loosen the wheel bolts
- Use the 17mm lug bolt socket and breaker bar to loosen the front wheel bolts while the car is still on the ground.
- Do not remove them yet.
Step 2: Lift and secure the car
- Use the floor jack to lift the front of the Jetta at a proper jacking point.
- Place the car securely on jack stands.
- Remove the front wheel bolts and take off the wheel with the 17mm lug bolt socket.
Step 3: Remove the caliper
- Use the 7mm hex bit socket to remove the caliper guide pin bolts.
- Lift the caliper off the bracket.
- Use a bungee cord or mechanic's wire to support the caliper. Never let it hang by the hose.
Step 4: Remove the old pads and carrier
- Remove the old brake pads from the bracket by hand or with a flat trim tool.
- Use the 21mm socket and breaker bar to remove the caliper carrier bolts.
- Remove the carrier from the steering knuckle.
- Torque on reassembly: tighten the carrier bolts to 200 Nm (148 ft-lbs).
Step 5: Remove the rotor
- Use the Phillips screwdriver or flat trim tool to remove the small rotor retaining screw if equipped.
- Pull the rotor off the hub.
- If it sticks, tap it lightly from the back with a rubber mallet.
- Clean the hub face with a wire brush and brake cleaner. Clean hub, smooth braking.
Step 6: Install the new rotor
- Spray the new rotor with brake cleaner to remove packing oil.
- Install the rotor on the hub and secure it with the retaining screw if used.
- Torque the rotor screw to 4 Nm (35 in-lbs).
Step 7: Reinstall the carrier and new pads
- Install the caliper carrier using the 21mm socket.
- Tighten the carrier bolts to 200 Nm (148 ft-lbs).
- Apply a thin film of high-temperature brake grease to the pad contact points and hardware only.
- Install the new brake pads into the carrier.
Step 8: Compress the caliper piston
- Use the C-clamp or brake caliper compression tool (specialty) to slowly push the piston all the way back in.
- Watch the brake fluid reservoir while compressing. Do not let it overflow.
- Compress slowly to avoid seal damage.
Step 9: Reinstall the caliper
- Slide the caliper over the new pads.
- Use the 7mm hex bit socket to reinstall the guide pin bolts.
- Torque the guide pin bolts to 35 Nm (26 ft-lbs).
Step 10: Reinstall the wheel
- Put the wheel back on and hand-start all lug bolts with the 17mm lug bolt socket.
- Lower the car to the ground.
- Use the torque wrench to tighten the lug bolts in a star pattern to 120 Nm (89 ft-lbs).
Step 11: Repeat on the other side
- Do the same steps on the opposite front wheel.
- Replace both front rotors and pads as a set.
✅ After Repair
- Press the brake pedal several times until it feels firm before moving the car.
- Check the brake fluid level and top off if needed.
- Test the brakes at low speed first.
- For new pads and rotors, perform a gentle break-in with several moderate stops, not hard panic stops.
- Listen for rubbing or clicking and recheck lug bolt torque after a short drive.
💰 DIY vs Shop Cost
Shop Cost: $450-$800 (parts + labor)
DIY Cost: $180-$350 (parts only)
You Save: $270-$450 by doing it yourself!
Shop labor rates vary but typically run $100-$150/hour. This repair takes a shop approximately 2-3 hours.
🎯 Ready to get started?
HowToo makes it easy: same-day/2-day shipping on every part, plus all the tools and specialty tools you need! Check out the parts and tools sections below to add everything to your cart.
