


How to Replace Front Brake Pads and Rotors on a 2014 Kia Optima
Step-by-step DIY guide with required tools, parts list, safety tips, and torque specs by brake size
How to Replace Front Brake Pads and Rotors on a 2014 Kia Optima
Step-by-step DIY guide with required tools, parts list, safety tips, and torque specs by brake size
🔧 Optima - Front Brake Pads & Rotor Replacement
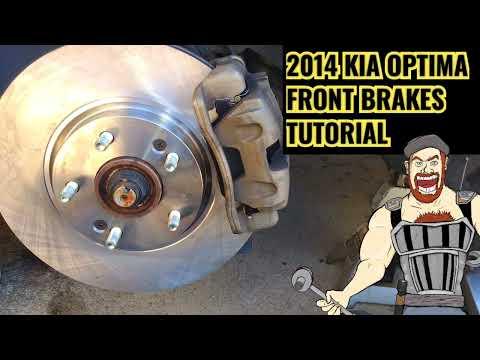
Replacing the front pads and rotors means removing the caliper, removing the caliper bracket, swapping the rotor, then reinstalling everything with the correct hardware and torque. On your Optima, there are a couple front brake size variants, and the bolt sizes/torque specs depend on which one you have.
Difficulty Level: Intermediate | Estimated Time: 2-4 hours
⚠️ Safety & Precautions
- 🛑 Support the car with jack stands; never rely on a jack.
- 🧤 Wear gloves and safety glasses; brake dust and rust fall easily.
- 🔥 Brakes can be hot; let the front brakes cool before starting.
- 🧪 Do not let brake fluid overflow when compressing the caliper piston; check the reservoir level often.
- 🪝 Do not hang the caliper by the hose; support it with a hanger.
🔧 Required Tools
You'll need the following tools for this repair:
- Floor jack (rated 3-ton minimum)
- Jack stands (rated 3-ton minimum)
- Wheel chocks
- Safety glasses
- Nitrile gloves
- Lug nut socket (Kia OE, commonly 21mm)
- Breaker bar 1/2"
- Torque wrench 3/8"
- Torque wrench 1/2"
- Socket set 10mm-19mm
- Wrench set 10mm-19mm
- Flathead screwdriver
- C-clamp brake piston compressor
- Brake caliper hanger hook
- Wire brush
- Rubber mallet
- Micrometer or ruler (for rotor measurement)
🔩 Required Parts
HowToo sells all the parts you need for this repair:
- Front brake pad set - Qty: 1
- Front brake rotors - Replace in pairs - Qty: 2
- Front pad hardware kit (abutment clips) - Qty: 1
- Brake caliper slide pin boots (if damaged) - Qty: 1
- Brake grease (silicone) - Qty: 1
- Brake cleaner spray - Qty: 2
📋 Before You Begin
- Park on level ground, put the shifter in P, and set the parking brake.
- Chock the rear wheels with wheel chocks.
- Loosen front lug nuts 1/2 turn using a breaker bar and lug nut socket before lifting.
- Open the hood and locate the brake fluid reservoir; you’ll re-check the level after compressing pistons.
🔨 Step-by-Step Instructions
Follow these steps in order:
Before I give you the exact bolt sizes and Kia torque specs, answer these 2 quick questions:
- 1) What front wheel size do you have: 17" or 18"?
- 2) Can you measure your front rotor diameter (edge-to-edge): about 300 mm (11.8") or about 320 mm (12.6")?
Once you reply, I’ll give you the full, torque-correct step-by-step for your exact front brake setup (including lug nut torque, caliper bolts, bracket bolts, and rotor retention screw info if equipped).
✅ After Repair
- With the engine off, pump the brake pedal until it feels firm before moving the car.
- Check the brake fluid level and top off only if needed (use the correct DOT fluid listed on the cap).
- Do a slow test drive and confirm no pulling, grinding, or pulsation.
💰 DIY vs Shop Cost
Shop Cost: $450-$850 (parts + labor)
DIY Cost: $180-$450 (parts only)
You Save: $270-$400 by doing it yourself!
Shop labor rates vary but typically run $100-$150/hour. This repair takes a shop approximately 1.5-2.5 hours.
🎯 Ready to get started?
HowToo makes it easy: same-day/2-day shipping on every part, plus all the tools and specialty tools you need! Check out the parts and tools sections below to add everything to your cart.
