









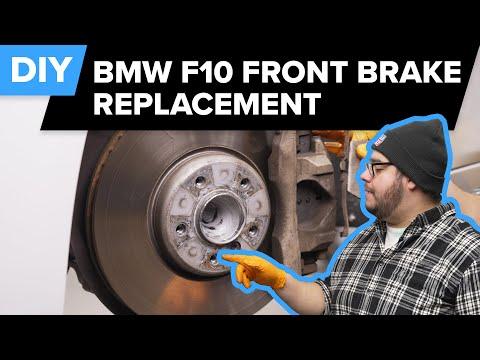







How to Replace Front Brake Pads and Rotors on a 2011-2016 BMW 550i (DIY Guide)
Step-by-step instructions with tools, parts list, torque specs, safety tips, and brake wear sensor install
How to Replace Front Brake Pads and Rotors on a 2011-2016 BMW 550i (DIY Guide)
Step-by-step instructions with tools, parts list, torque specs, safety tips, and brake wear sensor install for 2011, 2012, 2013, 2014, 2015, 2016


🔧 550i - Front Brake Pads & Rotor Replacement
You’ll remove the front wheels, take off the brake caliper and bracket, replace the rotors, then install new pads (and the wear sensor if equipped). This restores braking performance and prevents vibration/pulsation caused by worn pads or warped rotors.
Difficulty Level: Intermediate | Estimated Time: 2-4 hours
Assumption: standard front brakes; torque specs are typical for your 550i.
⚠️ Safety & Precautions
- 🛑 Support the car with jack stands; never rely on a jack.
- 🧤 Wear a dust mask and safety glasses; brake dust is harmful.
- 🔥 Brakes can be hot; let them cool before touching.
- ⛔ Do not press the brake pedal with the caliper removed.
- 🧷 Never let the caliper hang by the brake hose; support it with a hanger.
- 🔋 Battery disconnect is not required for front brakes, but keep the key away so the car doesn’t “wake up” unexpectedly.
🔧 Required Tools
You'll need the following tools for this repair:
- Floor jack (rated 3-ton minimum)
- Jack stands (rated 3-ton minimum)
- Wheel chocks
- 17mm socket
- Breaker bar (1/2-inch drive)
- Ratchet (3/8-inch drive)
- Torque wrench (20–200 Nm range)
- 7mm hex bit socket
- 16mm socket
- 18mm socket
- Torx T30 bit
- Flat trim tool
- Brake caliper hanger hook
- Brake piston compressor tool
- Wire brush
- Small bungee cord
- Shop towels
- Nitrile gloves
- Safety glasses
- Dust mask
🔩 Required Parts
HowToo sells all the parts you need for this repair:
- Front brake pad set - Qty: 1
- Front brake rotors - Replace in pairs - Qty: 2
- Front brake pad wear sensor - Qty: 1
- Brake cleaner - Qty: 1
- Brake grease / anti-squeal paste - Qty: 1
- Medium-strength threadlocker (blue) - Qty: 1
📋 Before You Begin
- 🅿️ Park on level ground, shift to P, and set the parking brake.
- 🧱 Place wheel chocks behind the rear tires.
- 🔧 Crack the front wheel bolts loose 1/4 turn using a 17mm socket and breaker bar before lifting.
- 🧴 Open the hood and check the brake fluid reservoir level; if it’s full, be ready to absorb a small amount with a towel when compressing pistons.
- Tip: Take a photo before disassembly.
🔨 Step-by-Step Instructions
Follow these steps in order:
Step 1: Lift and secure the front of the car
- Lift the front using a floor jack (rated 3-ton minimum) at the proper front jack point.
- Set the car onto jack stands (rated 3-ton minimum) at the factory support points.
- Give the car a gentle shake to confirm it’s stable.
Step 2: Remove the front wheels
- Remove the wheel bolts using a 17mm socket and ratchet.
- Remove the wheels and place them under the car as a backup safety support.
Step 3: Unclip the pad wear sensor (if equipped)
- Use a flat trim tool to carefully unclip the sensor wire from its holders.
- Disconnect the sensor at the connector (usually in a small box/holder near the strut) using the flat trim tool.
- Tip: Don’t pull the wire; pull the connector.
Step 4: Remove the caliper guide bolts
- On the back of the caliper, remove the two guide/slider bolts using a 7mm hex bit socket and ratchet.
- Set the bolts aside (or replace if your parts kit includes new ones).
Step 5: Remove and support the caliper
- Lift the caliper off the bracket.
- Hang the caliper using a brake caliper hanger hook (or small bungee cord) so there is zero strain on the brake hose.
Step 6: Remove the old pads and hardware
- Slide the inner and outer brake pads out by hand.
- If your new pads come with new stainless hardware/clips, remove the old clips from the bracket.
Step 7: Compress the caliper piston
- Use a brake piston compressor tool to slowly push the piston back into the caliper.
- Watch the brake fluid reservoir while compressing; stop if it looks like it may overflow.
- Tip: Go slow to avoid damaging seals.
Step 8: Remove the caliper bracket (carrier)
- Remove the two bracket bolts using an 18mm socket (some setups use a 16mm socket) and a breaker bar.
- Remove the bracket and set it aside.
Step 9: Remove the rotor retaining screw and rotor
- Remove the rotor retaining screw using a Torx T30 bit and ratchet.
- Pull the rotor straight off the hub. If stuck, wiggle it while pulling (rust can “glue” it on).
- Clean the hub face with a wire brush so the new rotor sits perfectly flat.
Step 10: Install the new rotor
- Spray both sides of the new rotor with brake cleaner and wipe with shop towels to remove protective oil.
- Install the new rotor onto the hub.
- Reinstall the retaining screw with a Torx T30 bit and ratchet: Torque to 16 Nm (12 ft-lbs).
Step 11: Reinstall the caliper bracket
- Apply medium-strength threadlocker (blue) to clean bracket bolt threads.
- Install and tighten the bracket bolts using an 18mm socket and torque wrench: Torque to 110 Nm (81 ft-lbs).
Step 12: Install new pad hardware and pads
- If supplied, install new pad clips/hardware into the bracket by hand.
- Apply a thin film of brake grease / anti-squeal paste to the pad backing plates and pad ears (where they slide). Do not get any on friction material.
- Slide the new pads into place.
Step 13: Reinstall the caliper
- Place the caliper over the new pads/rotor.
- Install the guide/slider bolts using a 7mm hex bit socket and torque wrench: Torque to 30 Nm (22 ft-lbs).
Step 14: Install the new wear sensor and route the wire
- Press the new sensor into the correct pad (it snaps in).
- Route the wire exactly like the original and clip it into the holders using a flat trim tool.
- Reconnect the sensor connector securely.
Step 15: Reinstall wheels and torque wheel bolts
- Reinstall the wheels and hand-thread all bolts.
- Lower the car off the jack stands using the floor jack.
- Tighten wheel bolts in a star pattern with a torque wrench: Torque to 140 Nm (103 ft-lbs).
Step 16: Build pedal pressure before driving
- With the car still in Park, press the brake pedal slowly 10–15 times until it feels firm.
- Check brake fluid level and top off only if needed.
✅ After Repair
- 🧪 Test at low speed first: confirm the car stops straight and quietly.
- 🔍 Check for leaks and make sure the wear sensor wire is not rubbing the tire.
- 🛠️ Reset the brake service indicator if it’s on: turn ignition on (engine off), hold the trip reset button until the service menu appears, tap to find Front brakes, then hold to reset.
- 🧰 Bed-in (break-in) the pads: do 8–10 moderate stops from ~40 mph down to ~10 mph, allowing a short cool-down between stops; avoid hard panic stops for the first 200 miles.
💰 DIY vs Shop Cost
Shop Cost: $700-$1,200 (parts + labor)
DIY Cost: $250-$600 (parts only)
You Save: $450-$600 by doing it yourself!
Shop labor rates vary but typically run $100-$150/hour. This repair takes a shop approximately 2-3 hours.
🎯 Ready to get started?
HowToo makes it easy: same-day/2-day shipping on every part, plus all the tools and specialty tools you need! Check out the parts and tools sections below to add everything to your cart.
Guide for Disc Brake Pad Set replace for these BMW vehicles
| Year Make Model | Sub Model | Engine | Body Style |
|---|---|---|---|
| 2016 BMW 550i | - | - | - |
| 2015 BMW 550i | - | - | - |
| 2014 BMW 550i | - | - | - |
| 2013 BMW 550i | - | - | - |
| 2012 BMW 550i | - | - | - |
| 2011 BMW 550i | - | - | - |