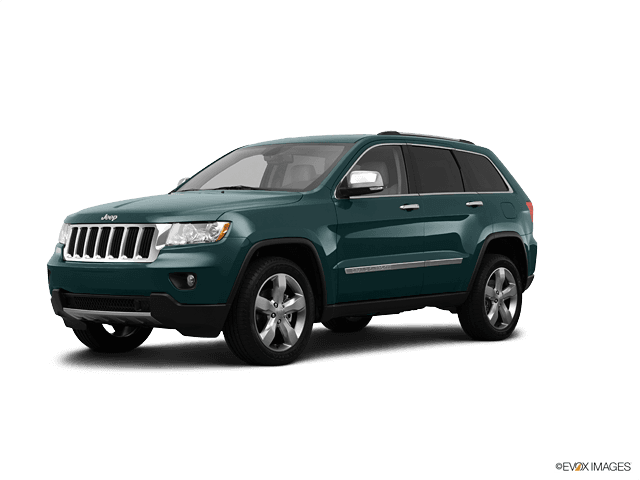









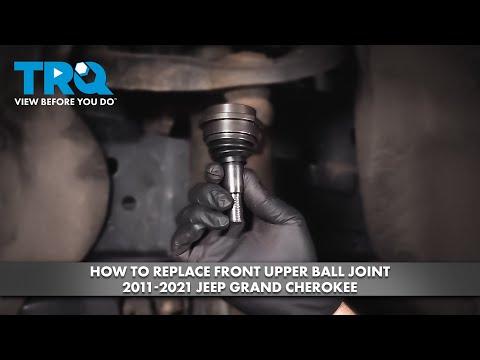







How to Replace Front Ball Joints on a 2011-2015 Jeep Grand Cherokee
Step-by-step DIY guide with tools, parts, torque specs, safety tips, and alignment advice
How to Replace Front Ball Joints on a 2011-2015 Jeep Grand Cherokee
Step-by-step DIY guide with tools, parts, torque specs, safety tips, and alignment advice for 2011, 2012, 2013, 2014, 2015


🔧 Grand Cherokee - Front Ball Joint Replacement
Replacing the front ball joints restores tight steering and removes clunks caused by worn suspension joints. On your Grand Cherokee, the front ball joints are pressed into the steering knuckle, so this job requires a ball joint press and careful support of the suspension.
Difficulty Level: Advanced | Estimated Time: 4-6 hours
⚠️ Safety & Precautions
- ⚠️ Always support your Grand Cherokee with jack stands. Never rely on a floor jack alone.
- ⚠️ Wear safety glasses. Pressed ball joints can release suddenly.
- ⚠️ Do not let the brake caliper hang by the brake hose. Support it with a bungee cord.
- ⚠️ Keep the axle, ABS wire, and brake hose from being stretched or pulled.
- ⚠️ If equipped with Quadra-Lift air suspension, enable Tire/Jack Mode before lifting.
- ⚠️ A wheel alignment is required after this repair.
🔧 Required Tools
You'll need the following tools for this repair:
- Floor jack (rated 3-ton minimum)
- Jack stands (rated 3-ton minimum)
- Wheel chocks
- Safety glasses
- Mechanic gloves
- 1/2-inch drive breaker bar
- 1/2-inch drive torque wrench
- 3/8-inch drive ratchet
- 1/2-inch drive ratchet
- 19mm socket
- 10mm socket
- 13mm socket
- 21mm socket
- 24mm socket
- 36mm axle nut socket
- 21mm wrench
- 24mm wrench
- Flat-blade screwdriver
- Pry bar
- Needle-nose pliers
- Snap ring pliers
- Ball joint separator (specialty)
- Ball joint press kit (specialty)
- Dead blow hammer
- Wire brush
- Bungee cord
🔩 Required Parts
HowToo sells all the parts you need for this repair:
- Front upper ball joint - Qty: 1 per side
- Front lower ball joint - Qty: 1 per side
- Front axle nut - Qty: 1 per side
- Ball joint retaining snap ring - Qty: 1 per ball joint if not included
- Ball joint nut - Qty: 1 per ball joint if not included
- Cotter pin - Qty: 1 per castle nut if equipped
- Brake cleaner - Qty: 1 can
- Anti-seize compound - Qty: 1 small tube
📋 Before You Begin
- Park on a flat surface and set the parking brake.
- Place wheel chocks behind the rear tires.
- If equipped with Quadra-Lift, turn on jack mode: Uconnect > Controls > Settings > Suspension > Tire/Jack Mode.
- Loosen the front lug nuts before lifting the vehicle.
- A ball joint press is a large clamp tool that pushes the ball joint out of, and into, the steering knuckle.
- A steering knuckle is the heavy metal part that holds the wheel hub and connects to the control arms.
🔨 Step-by-Step Instructions
Follow these steps in order:
Step 1: Lift the Front of the Vehicle
- Use a 19mm socket and 1/2-inch drive breaker bar to loosen the front lug nuts one turn.
- Use the floor jack to lift the front of your Grand Cherokee.
- Place jack stands under the front frame support points.
- Lower the vehicle gently onto the jack stands.
- Use a 19mm socket to remove the lug nuts and wheel.
Step 2: Remove the Brake Caliper and Rotor
- Use a 13mm socket and 3/8-inch drive ratchet to remove the brake caliper slide bolts.
- Lift the caliper off the rotor and hang it from the suspension using a bungee cord.
- Use a 21mm socket and 1/2-inch drive breaker bar to remove the caliper bracket bolts.
- Slide the brake rotor off by hand.
- For reassembly, torque the caliper bracket bolts to 176 Nm (130 ft-lbs).
- For reassembly, torque the caliper slide bolts to 31 Nm (23 ft-lbs).
Step 3: Move the ABS Wire and Brake Hose
- Use a 10mm socket to remove the ABS wire bracket from the steering knuckle.
- Use a 10mm socket or 13mm socket to remove the brake hose bracket if attached.
- Use a flat-blade screwdriver to gently release plastic wire clips.
- Move the wire and hose aside without stretching them.
Step 4: Remove the Axle Nut
- Use a 36mm axle nut socket and 1/2-inch drive breaker bar to remove the front axle nut.
- If the axle is stuck in the hub, tap the axle end gently with a dead blow hammer.
- Do not mushroom or damage the axle threads.
- For reassembly, use a new axle nut and torque it to 135 Nm (100 ft-lbs).
Step 5: Disconnect the Outer Tie Rod
- Use needle-nose pliers to remove the cotter pin if equipped.
- Use a 21mm socket or 21mm wrench to remove the outer tie rod nut.
- Use a ball joint separator to pop the tie rod loose from the steering knuckle.
- For reassembly, torque the tie rod nut to 75 Nm (55 ft-lbs).
Step 6: Disconnect the Upper Ball Joint
- Support the steering knuckle by hand so it does not fall outward.
- Use needle-nose pliers to remove the cotter pin if equipped.
- Use a 21mm socket or 21mm wrench to remove the upper ball joint nut.
- Use a ball joint separator to release the upper ball joint from the upper control arm.
- For reassembly, torque the upper ball joint nut to 81 Nm (60 ft-lbs).
Step 7: Disconnect the Lower Ball Joint
- Use needle-nose pliers to remove the cotter pin if equipped.
- Use a 24mm socket or 24mm wrench to remove the lower ball joint nut.
- Use a ball joint separator to release the lower ball joint from the lower control arm.
- Carefully pull the steering knuckle and hub assembly away from the vehicle.
- For reassembly, torque the lower ball joint nut to 108 Nm (80 ft-lbs).
Step 8: Press Out the Old Ball Joints
- Place the steering knuckle on a strong workbench or floor surface.
- Use a wire brush to clean dirt and rust from around each ball joint.
- Use snap ring pliers to remove any retaining snap rings.
- Use the ball joint press kit with the correct receiving cup to press out the upper ball joint.
- Use the ball joint press kit with the correct receiving cup to press out the lower ball joint.
- Keep the press perfectly straight.
Step 9: Press In the New Ball Joints
- Use a wire brush to clean the ball joint bores in the steering knuckle.
- Use the ball joint press kit to press the new upper ball joint squarely into the knuckle.
- Use the ball joint press kit to press the new lower ball joint squarely into the knuckle.
- Use snap ring pliers to install the retaining snap rings if supplied.
- Make sure each snap ring is fully seated in its groove.
Step 10: Reinstall the Steering Knuckle
- Guide the axle through the hub by hand while positioning the steering knuckle.
- Insert the lower ball joint stud into the lower control arm.
- Insert the upper ball joint stud into the upper control arm.
- Use a 24mm socket and 1/2-inch drive torque wrench to torque the lower ball joint nut to 108 Nm (80 ft-lbs).
- Use a 21mm socket and 1/2-inch drive torque wrench to torque the upper ball joint nut to 81 Nm (60 ft-lbs).
- Use needle-nose pliers to install new cotter pins if equipped.
Step 11: Reconnect the Tie Rod
- Insert the tie rod end into the steering knuckle by hand.
- Use a 21mm socket and 1/2-inch drive torque wrench to torque the tie rod nut to 75 Nm (55 ft-lbs).
- Use needle-nose pliers to install a new cotter pin if equipped.
Step 12: Reinstall the Axle Nut and Brackets
- Thread the new axle nut on by hand first.
- Use a 36mm axle nut socket and 1/2-inch drive torque wrench to torque the axle nut to 135 Nm (100 ft-lbs).
- Use a 10mm socket to reinstall the ABS wire bracket.
- Use a 10mm socket or 13mm socket to reinstall the brake hose bracket.
Step 13: Reinstall the Brakes and Wheel
- Use brake cleaner to clean the rotor contact surfaces.
- Slide the brake rotor back on by hand.
- Use a 21mm socket and 1/2-inch drive torque wrench to torque the caliper bracket bolts to 176 Nm (130 ft-lbs).
- Install the brake caliper over the rotor.
- Use a 13mm socket and 3/8-inch drive torque wrench to torque the caliper slide bolts to 31 Nm (23 ft-lbs).
- Install the wheel by hand.
- Use a 19mm socket to snug the lug nuts in a star pattern.
Step 14: Lower the Vehicle and Final Torque
- Use the floor jack to lift slightly off the jack stands.
- Remove the jack stands.
- Lower your Grand Cherokee to the ground.
- Use a 19mm socket and 1/2-inch drive torque wrench to torque the lug nuts to 176 Nm (130 ft-lbs).
✅ After Repair
- Pump the brake pedal until it feels firm before moving the vehicle.
- Turn the steering wheel left and right while parked and listen for rubbing or popping.
- Take a slow test drive and check for clunks, looseness, or steering pull.
- Get a professional wheel alignment immediately after the repair.
- Recheck lug nut torque after 25-50 miles.
- If equipped with Quadra-Lift, turn off jack mode: Uconnect > Controls > Settings > Suspension > Tire/Jack Mode.
💰 DIY vs Shop Cost
Shop Cost: $650-$1,100 for both front sides (parts + labor)
DIY Cost: $180-$450 for both front sides (parts only)
You Save: $470-$650 by doing it yourself!
Shop labor rates vary but typically run $100-$150/hour. This repair takes a shop approximately 3-5 hours.
🎯 Ready to get started?
HowToo makes it easy: same-day/2-day shipping on every part, plus all the tools and specialty tools you need! Check out the parts and tools sections below to add everything to your cart.
Guide for Suspension Ball Joint replace for these Jeep vehicles
| Year Make Model | Sub Model | Engine | Body Style |
|---|---|---|---|
| 2015 Jeep Grand Cherokee | - | - | - |
| 2014 Jeep Grand Cherokee | - | - | - |
| 2013 Jeep Grand Cherokee | - | - | - |
| 2012 Jeep Grand Cherokee | - | - | - |
| 2011 Jeep Grand Cherokee | - | - | - |