


How to Replace Engine Mounts on a 2018 Honda Ridgeline (Right & Left Mounts)
Step-by-step DIY instructions with required tools/parts, safety tips, and torque spec guidance (FWD vs AWD)
How to Replace Engine Mounts on a 2018 Honda Ridgeline (Right & Left Mounts)
Step-by-step DIY instructions with required tools/parts, safety tips, and torque spec guidance (FWD vs AWD)


🔧 Ridgeline - Engine Mount Replacement
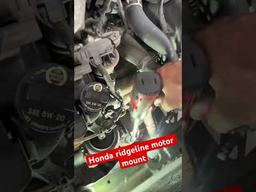
On your Ridgeline, “engine mounts” can mean the right (passenger-side) hydraulic engine mount, the left (driver-side) transmission mount, plus the front and rear mounts. The exact procedure and torque specs change based on which mount(s) you’re replacing and whether your Ridgeline is FWD or AWD.
Difficulty Level: Advanced | Estimated Time: 3-6 hours
⚠️ Safety & Precautions
- ⚠️ Support the engine before loosening any mount bolts.
- ⚠️ Never lift the engine by the oil pan without a wood block; you can crack the pan.
- ⚠️ Keep hands clear while raising/lowering the engine; mounts can shift suddenly.
- ⚠️ Work on level ground and support your Ridgeline with jack stands, not a jack alone.
- ⚠️ Battery disconnect is recommended if you’ll remove the battery tray/airbox near wiring.
🔧 Required Tools
You'll need the following tools for this repair:
- Floor jack (rated 3-ton minimum)
- Jack stands (rated 3-ton minimum)
- Wheel chocks
- Safety glasses
- Mechanic gloves
- Wood block (2x6 or similar, 12-18 in long)
- Metric socket set (8mm-19mm)
- Metric wrench set (8mm-19mm)
- 3/8 in ratchet
- 1/2 in breaker bar
- Torque wrench (10-150 ft-lbs range)
- Extensions set (3 in, 6 in, 12 in)
- Universal joint adapter
- Trim clip removal tool
- Flat-blade screwdriver
- Pliers
- Penetrating oil
- Fender cover
🔩 Required Parts
HowToo sells all the parts you need for this repair:
- Right (passenger-side) hydraulic engine mount - Qty: 1
- Left (driver-side) transmission mount - Qty: 1
- New mount fasteners (if required by Honda) - Qty: 1 set
📋 Before You Begin
- Park on level ground, set the parking brake, and chock the rear wheels.
- Open the hood and remove any loose items from the engine bay.
- Disconnect the negative battery cable using a 10mm socket if you’ll be working near the battery/air intake wiring.
- Plan to replace one mount at a time so the engine stays aligned.
🔨 Step-by-Step Instructions
Follow these steps in order:
Step 1: Confirm which mounts you’re replacing
- Look down in the engine bay: the right mount is near the passenger-side fender area; the left mount is on the driver side at the transmission.
- If you meant the front/rear mounts instead, stop here—access and steps are different.
Step 2: Raise and safely support your Ridgeline
- Use a floor jack (rated 3-ton minimum) to lift the front at the approved front jack point.
- Set it onto jack stands (rated 3-ton minimum) and verify it’s stable.
Step 3: Support the engine
- Place a wood block (2x6 or similar, 12-18 in long) on the floor jack.
- Position the block under the engine’s lower support area and apply light upward pressure.
- Lift only enough to “hold” the engine.
Step 4: Create access to the right (passenger-side) mount
- Remove the air intake duct/airbox pieces as needed using a flat-blade screwdriver and pliers for clamps.
- Remove any brackets or covers blocking the mount using a metric socket set (8mm-19mm) and extensions set (3 in, 6 in, 12 in).
Step 5: Remove the right mount fasteners
- Spray fasteners with penetrating oil if rusty.
- Loosen the mount-to-body and mount-to-engine bracket bolts using a 1/2 in breaker bar and metric socket set (8mm-19mm).
- If bolts bind, slightly raise/lower the engine with the floor jack to remove load from the mount.
Step 6: Remove and replace the right mount
- Remove the mount from the engine bay using a 3/8 in ratchet, extensions set (3 in, 6 in, 12 in), and a universal joint adapter if needed.
- Install the new mount in the same orientation by hand-starting all bolts (do not tighten yet).
Step 7: Create access to the left (driver-side) transmission mount
- Remove any brackets, intake resonator pieces, or the battery tray if equipped and necessary using a metric socket set (8mm-19mm) and trim clip removal tool.
- Keep hardware grouped so it goes back in the same locations.
Step 8: Remove the left mount fasteners
- With the engine still supported by the floor jack and wood block, loosen the mount bolts using a 1/2 in breaker bar and metric socket set (8mm-19mm).
- Adjust engine height slightly to align bolt holes and prevent cross-threading.
Step 9: Remove and replace the left mount
- Remove the mount and install the new one, hand-starting all fasteners using a metric socket set (8mm-19mm) and metric wrench set (8mm-19mm).
- Make sure the mount sits flat and isn’t “preloaded” (engine should rest naturally).
Step 10: Tighten fasteners to Honda torque specs
- Use a torque wrench (10-150 ft-lbs range) to torque all mount fasteners.
- Torque to Honda spec for your exact mount locations and drivetrain (FWD vs AWD).
- I can provide the exact torque values once you confirm the two details below.
Step 11: Reassemble removed components
- Reinstall brackets, air intake components, and battery tray (if removed) using a 3/8 in ratchet and metric socket set (8mm-19mm).
- Reconnect the negative battery cable using a 10mm socket if disconnected.
✅ After Repair
- Start the engine and let it idle; listen for clunks and watch for excessive engine movement.
- With your foot on the brake, shift from Park to Reverse to Drive; check for abnormal thumps.
- Road test at low speed first; recheck all fasteners afterward.
💰 DIY vs Shop Cost
Shop Cost: $700-$1,500 (parts + labor)
DIY Cost: $250-$700 (parts only)
You Save: $450-$800 by doing it yourself!
Shop labor rates vary but typically run $100-$150/hour. This repair takes a shop approximately 3-5 hours.
🎯 Ready to get started?
HowToo makes it easy: same-day/2-day shipping on every part, plus all the tools and specialty tools you need! Check out the parts and tools sections below to add everything to your cart.
Quick check so I can give you the exact Honda torque specs:
- Are we replacing the right (passenger) mount and left (driver/trans) mount specifically?
- Is your Ridgeline FWD or AWD?