


How to Replace Engine Mounts on a 2018 Ford F-250 Super Duty (Left & Right)
Step-by-step DIY instructions with required tools/parts, safety tips, and torque spec guidance
How to Replace Engine Mounts on a 2018 Ford F-250 Super Duty (Left & Right)
Step-by-step DIY instructions with required tools/parts, safety tips, and torque spec guidance


🔧 F-250 Super Duty - Engine Mount Replacement
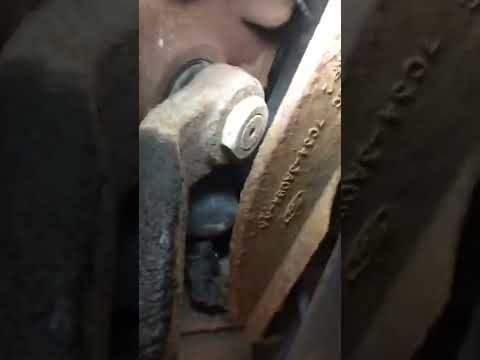
On your F-250, the engine mounts support the engine and isolate vibration. Replacing them involves safely supporting the engine, unbolting the mount(s), then reinstalling and aligning everything so the driveline and exhaust aren’t stressed.
Difficulty Level: Advanced | Estimated Time: 3-6 hours
⚠️ Safety & Precautions
- ⚠️ Support the truck with jack stands; never rely on a jack alone.
- ⚠️ Support the engine before loosening mounts; an unsupported engine can drop suddenly.
- ⚠️ Keep hands clear of pinch points between engine, frame, and mount brackets.
- ⚠️ Let exhaust and catalytic converters cool fully before working nearby.
- ⚠️ Battery disconnect is recommended if working near the starter/positive cable: use a 10mm socket on the negative terminal.
🔧 Required Tools
You'll need the following tools for this repair:
- Floor jack (rated 3-ton minimum)
- Jack stands (rated 3-ton minimum)
- Wheel chocks
- Safety glasses
- Mechanic gloves
- Work light
- Breaker bar 1/2-inch drive
- Torque wrench 1/2-inch drive (30-250 ft-lbs range)
- Socket set 1/2-inch drive (10mm-24mm)
- Wrench set (10mm-24mm)
- Long extensions 1/2-inch drive (6-inch, 12-inch)
- Universal joint adapter 1/2-inch drive
- Pry bar (18-inch)
- Trim clip removal tool
- Block of wood (2x6-inch, 12-inch long)
- Penetrating oil
- Paint marker
🔩 Required Parts
HowToo sells all the parts you need for this repair:
- Engine mount (left) - Qty: 1
- Engine mount (right) - Qty: 1
- Engine mount fastener kit - Qty: 1
📋 Before You Begin
- Park on level ground, shift to Park, and set the parking brake.
- Chock the rear wheels with wheel chocks.
- Spray mount and bracket fasteners with penetrating oil and let it soak 10-15 minutes.
- Plan to replace mounts as a pair if one has failed; the other is usually close behind.
- Quick questions so I can give you the exact Ford-accurate steps and torque specs:
- Are you replacing left, right, or both engine mounts?
- Do you have a 2WD-style front suspension conversion or is it the factory 4WD layout (front differential/CV axles present)?
🔨 Step-by-Step Instructions
Follow these steps in order:
Step 1: Raise and support the truck
- Use a floor jack (rated 3-ton minimum) to lift the front at the frame jacking point.
- Place jack stands (rated 3-ton minimum) under the frame rails and lower onto them.
- Shake the truck gently to confirm it’s stable.
Step 2: Disconnect the battery (recommended)
- Use a 10mm socket to loosen the negative battery terminal and move the cable aside.
- Prevents accidental shorting near starter wiring.
Step 3: Support the engine safely
- Place the block of wood (2x6-inch) on the floor jack pad.
- Jack up under the engine oil pan area only with the wood in between to spread the load.
- Definition: A “load spreader” (the wood) prevents denting/cracking the oil pan.
- Raise just enough to take weight off the mounts; don’t lift the truck off the stands.
Step 4: Gain access to the mount you’re replacing
- Depending on side, you may need to remove the lower splash shield/air deflectors.
- Use a trim clip removal tool for push-clips and a socket set 1/2-inch drive (10mm-24mm) for bolts.
Step 5: Mark alignment points
- Use a paint marker to mark the mount/bracket relationship.
- Makes re-alignment much easier.
Step 6: Remove the mount-to-frame fasteners
- Use a breaker bar 1/2-inch drive and the correct-size socket from your socket set 1/2-inch drive (10mm-24mm) to loosen mount nuts/bolts at the frame pedestal.
- Use long extensions 1/2-inch drive and a universal joint adapter 1/2-inch drive if access is tight.
Step 7: Remove the mount-to-engine bracket fasteners
- Use the appropriate socket/wrench from your socket set 1/2-inch drive (10mm-24mm) and wrench set (10mm-24mm) to remove the fasteners connecting the mount to the engine bracket.
- If the bolt binds, slightly raise/lower the engine with the floor jack to relieve tension.
Step 8: Lift the engine slightly and remove the mount
- Slowly raise the engine a small amount using the floor jack (watch hoses, fan shroud clearance, and exhaust flex).
- Use a pry bar (18-inch) carefully to guide the mount out if it’s stuck.
Step 9: Install the new mount and hand-start fasteners
- Position the new mount using your alignment marks.
- Hand-start all mount fasteners to avoid cross-threading.
- Only snug with a ratchet for now; final torque happens once everything is seated.
Step 10: Set the engine down and torque fasteners
- Lower the engine slowly with the floor jack until it fully rests on the new mount(s).
- Use a torque wrench 1/2-inch drive (30-250 ft-lbs range) to tighten fasteners in a stable, seated position.
- Torque to Ford factory specification for your F-250 (I’ll provide the exact ft-lbs/Nm once you confirm left/right/both and 4WD layout).
Step 11: Reinstall shields/deflectors and reconnect battery
- Reinstall any shields using the trim clip removal tool and socket set 1/2-inch drive (10mm-24mm).
- Reconnect the negative battery terminal using a 10mm socket.
✅ After Repair
- Start the engine and let it idle while you watch for excessive movement.
- Shift from Park to Reverse to Drive with your foot on the brake and check for clunks.
- Test drive gently; recheck fasteners afterward for any signs of shifting.
- If you still have a vibration, inspect transmission mount and exhaust contact points.
💰 DIY vs Shop Cost
Shop Cost: $700-$1,500 (parts + labor)
DIY Cost: $200-$600 (parts only)
You Save: $500-$900 by doing it yourself!
Shop labor rates vary but typically run $100-$150/hour. This repair takes a shop approximately 3-6 hours.
🎯 Ready to get started?
HowToo makes it easy: same-day/2-day shipping on every part, plus all the tools and specialty tools you need! Check out the parts and tools sections below to add everything to your cart.