


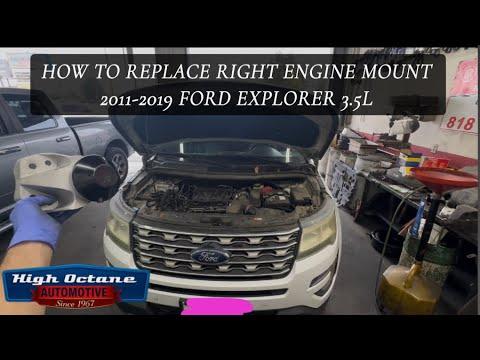


How to Replace Engine Mounts on a 2018 Ford Expedition (Fix Vibration & Clunks)
Step-by-step instructions with required tools/parts, safety tips, and torque spec guidance
How to Replace Engine Mounts on a 2018 Ford Expedition (Fix Vibration & Clunks)
Step-by-step instructions with required tools/parts, safety tips, and torque spec guidance


🔧 Expedition - Engine Mount Replacement
On your Expedition, the engine mounts support the engine and isolate vibration. Replacing them usually requires safely supporting the engine, removing the mount fasteners, swapping the mounts, and then tightening everything to Ford’s specified torque.
Difficulty Level: Advanced | Estimated Time: 4-8 hours
⚠️ Safety & Precautions
- 🛑 Support the engine before loosening mounts; an unsupported engine can drop and damage wiring, hoses, and the turbo plumbing.
- 🧯 Let the engine cool fully; the turbos and exhaust can cause severe burns.
- 🧱 Use jack stands on the frame; never rely on a floor jack alone.
- 🔋 Disconnect the negative battery cable if you’ll be working near the starter/charging cables or moving harnesses.
- 📏 Do not pry on plastic intake tubes or charge pipes; they can crack and create boost leaks.
🔧 Required Tools
You'll need the following tools for this repair:
- Metric socket set (8mm-21mm)
- Metric wrench set (8mm-21mm)
- 3/8" drive ratchet
- 1/2" drive breaker bar
- Torque wrench (20-200 ft-lbs range)
- Extensions set (3", 6", 12")
- Universal joint adapter
- Trim clip removal tool
- Pry bar (18"-24")
- Engine support bar (specialty)
- Floor jack (rated 3-ton minimum)
- Jack stands (rated 3-ton minimum)
- Wheel chocks
- Wood block (2x6 or similar)
- Work light
- Safety glasses
- Mechanic gloves
🔩 Required Parts
HowToo sells all the parts you need for this repair:
- Right engine mount - Qty: 1
- Left engine mount - Qty: 1
- Engine mount fastener kit - Qty: 1
📋 Before You Begin
- Park on level ground, set the parking brake, and chock the rear wheels with wheel chocks.
- Raise the front and support the frame with jack stands (rated 3-ton minimum); keep the floor jack (rated 3-ton minimum) available.
- Plan how you’ll support the engine:
- Use an engine support bar (specialty) across the fenders/radiator support area. (An engine support bar is a crossbar that holds the engine from above using chains/hooks.)
- If you must support from below, use a floor jack with a wood block under a strong flat area of the oil pan area/engine support point—do not jack directly on thin aluminum.
- If you’ll be moving wiring near power cables, disconnect the battery negative using a metric socket set (8mm-21mm).
🔨 Step-by-Step Instructions
Follow these steps in order:
Step 1: Confirm which mount(s) you’re replacing
- With the hood open, have a helper lightly power-brake in Drive and Reverse while you watch engine movement. Keep feet on brake hard.
- Use a work light from above and below to look for cracked rubber, leaking hydraulic fluid, or metal-to-metal contact at the mounts.
- If you’re doing one mount, it’s usually best to replace them as a pair to keep vibration balanced.
Step 2: Remove shields/liners for access
- Use a metric socket set (8mm-21mm) to remove any lower splash shields/skid plates that block the mount area.
- Use a trim clip removal tool for plastic push-clips so you don’t break them.
Step 3: Support the engine
- Install the engine support bar (specialty) and take the engine’s weight up slightly.
- If supporting from below, position the floor jack (rated 3-ton minimum) with a wood block and apply light pressure only.
- You want the engine held steady—do not lift the body off the stands.
Step 4: Remove the right engine mount fasteners
- From the best access point (top/side/bottom), use a metric socket set (8mm-21mm), extensions set (3", 6", 12"), and a universal joint adapter to reach the mount fasteners.
- Loosen and remove the mount-to-frame fasteners using a 1/2" drive breaker bar and then a 3/8" drive ratchet.
- Remove the mount-to-engine bracket fasteners using a metric socket set (8mm-21mm).
- If the mount is stuck, use a pry bar (18"-24") gently to free it. Pry on metal only.
Step 5: Remove the left engine mount fasteners
- Repeat the same process on the left side using the metric socket set (8mm-21mm), extensions set (3", 6", 12"), and universal joint adapter.
- Adjust engine height slightly with the engine support bar (specialty) to relieve bolt bind if bolts won’t come out smoothly.
Step 6: Swap in the new mount(s)
- Compare old vs new mounts (stud positions and clocking). Use a work light to verify alignment.
- Place the new mount into position by hand.
- Start all fasteners by hand first to prevent cross-threading.
Step 7: Tighten fasteners in the correct order
- Snug the mount-to-engine bracket fasteners first using a 3/8" drive ratchet.
- Snug the mount-to-frame fasteners next using a 3/8" drive ratchet.
- Final-tighten all mount fasteners using a torque wrench (20-200 ft-lbs range): Torque to Ford specification for your Expedition’s engine mount fasteners.
- If your replacement mounts include new bolts, use them. Some fasteners may be one-time-use depending on design.
Step 8: Reinstall shields/liners
- Reinstall any splash shields/skid plates using a metric socket set (8mm-21mm).
- Reinstall push-clips using a trim clip removal tool.
Step 9: Lower the vehicle and recheck
- Remove the engine support bar (specialty) (or unload the floor jack (rated 3-ton minimum)) slowly.
- Lower the vehicle safely using the floor jack (rated 3-ton minimum) and remove the jack stands (rated 3-ton minimum).
✅ After Repair
- Start the engine and let it idle. Listen for clunks and watch for excessive engine movement.
- Test in Drive/Reverse with the brake held firmly; verify the engine doesn’t lurch excessively.
- Road test and check for new vibrations at idle and light acceleration.
- Recheck visible fasteners for tightness and verify no hoses/wires are rubbing.
💰 DIY vs Shop Cost
Shop Cost: $900-$1,600 (parts + labor)
DIY Cost: $250-$600 (parts only)
You Save: $650-$1,000 by doing it yourself!
Shop labor rates vary but typically run $100-$150/hour. This repair takes a shop approximately 4-8 hours.
🎯 Ready to get started?
HowToo makes it easy: same-day/2-day shipping on every part, plus all the tools and specialty tools you need! Check out the parts and tools sections below to add everything to your cart.