









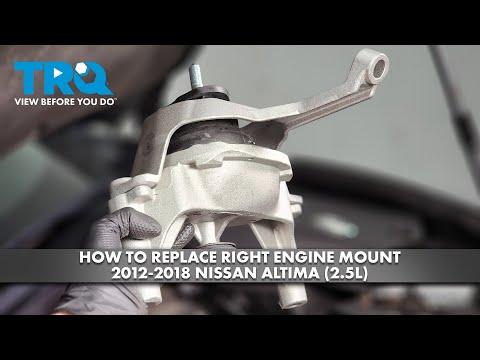



How to Replace Engine Mounts on a 2017 Nissan Altima
Step-by-step DIY guide with required tools, parts, torque specs, and safety tips for 2007, 2008, 2009, 2010, 2011
How to Replace Engine Mounts on a 2017 Nissan Altima
Step-by-step DIY guide with required tools, parts, torque specs, and safety tips for 2007, 2008, 2009, 2010, 2011


🔧 Altima - Engine Mount Replacement
Replacing the engine mounts on your Altima helps stop excessive engine movement, vibration at idle, clunking during acceleration, and harsh shifting feel. This job involves safely supporting the engine, removing the worn mounts, and installing new mounts without stressing the engine or CVT transmission.
Difficulty Level: Intermediate | Estimated Time: 3-5 hours
⚠️ Safety & Precautions
- ⚠️ Support the engine before removing any mount. Never let the engine hang from one remaining mount.
- ⚠️ Use a floor jack with a wide wood block under the engine oil pan only for light support, not lifting the vehicle.
- ⚠️ Always support the vehicle with jack stands. A jack alone can fail.
- ⚠️ Let the engine cool before working near the exhaust, radiator fans, or engine brackets.
- ⚠️ Disconnect the negative battery cable before working around tight engine-bay areas.
- ⚠️ Do not pry hard against aluminum engine or CVT cases. They can crack.
🔧 Required Tools
You'll need the following tools for this repair:
- 10mm socket
- 12mm socket
- 14mm socket
- 17mm socket
- 19mm socket
- 21mm socket
- 3/8-inch ratchet
- 1/2-inch ratchet
- 1/2-inch breaker bar
- 3-inch extension
- 6-inch extension
- 14mm wrench
- 17mm wrench
- 19mm wrench
- Torque wrench rated 10-150 ft-lbs
- Trim clip removal tool
- Flathead screwdriver
- Floor jack rated 2-ton minimum
- Jack stands rated 2-ton minimum
- Wheel chocks
- Wood block 2x6-inch minimum
- Safety glasses
- Mechanic gloves
🔩 Required Parts
HowToo sells all the parts you need for this repair:
- Right engine mount - Qty: 1
- Left transmission mount - Qty: 1
- Front torque mount - Qty: 1
- Rear torque mount - Qty: 1
- Engine mount bolts and nuts kit - Qty: 1
- Plastic splash shield clips - Qty: 1 pack
📋 Before You Begin
- ✅ Park your Altima on level ground, shift to Park, and apply the parking brake.
- ✅ Place wheel chocks behind the rear wheels.
- ✅ Open the hood and let the engine cool completely.
- ✅ Use a 10mm socket to disconnect the negative battery cable and move it aside.
- ✅ Raise the front of the vehicle with a floor jack, then place it securely on jack stands.
- ✅ A “torque mount” is a mount that controls engine rocking when you accelerate or shift.
- ✅ Replace mounts one at a time. This keeps the engine aligned and makes the job safer.
🔨 Step-by-Step Instructions
Follow these steps in order:
Step 1: Remove the Lower Splash Shield
- Put on safety glasses and mechanic gloves.
- Use a trim clip removal tool to remove the plastic clips from the lower engine splash shield.
- Use a 10mm socket to remove any splash shield screws.
- Lower the splash shield and set it aside.
- Keep clips organized by location.
Step 2: Support the Engine
- Place a wood block on the saddle of the floor jack.
- Position the wood block under the flat reinforced area of the oil pan.
- Gently raise the floor jack until it just contacts the oil pan.
- Do not lift the vehicle with the oil pan. The jack is only supporting engine weight.
- Light pressure only.
Step 3: Replace the Right Engine Mount
- The right engine mount is on the passenger side of the engine bay near the serpentine belt area.
- Use a 10mm socket to move any small brackets or wiring retainers attached near the mount.
- Use a 14mm socket and 17mm socket to remove the mount-to-engine bracket bolts and mount-to-body nuts.
- If a bolt feels loaded, use the floor jack to raise or lower the engine slightly until the bolt slides out easier.
- Remove the old right engine mount from the vehicle.
- Place the new right engine mount into position by hand.
- Start all bolts and nuts by hand first to prevent cross-threading.
- Use a 14mm socket and 17mm socket to snug the fasteners.
- Use a torque wrench to tighten mount-to-body fasteners to Torque to 65 Nm (48 ft-lbs).
- Use a torque wrench to tighten mount-to-engine bracket fasteners to Torque to 83 Nm (61 ft-lbs).
- Use a 10mm socket to reinstall any wiring retainers or small brackets.
Step 4: Replace the Left Transmission Mount
- The left transmission mount is on the driver side, supporting the CVT transmission.
- Move the floor jack and wood block so it lightly supports the transmission case. Do not jack on plastic covers.
- Use a 10mm socket to remove the air intake duct clamps or brackets if they block access.
- Use a 12mm socket to remove nearby air box bolts if extra room is needed.
- Use a 17mm socket and 19mm socket to remove the transmission mount fasteners.
- Raise or lower the jack slightly if the bolts are pinched.
- Remove the old left transmission mount.
- Install the new left transmission mount and start all fasteners by hand.
- Use a 17mm socket and 19mm socket to snug the fasteners evenly.
- Use a torque wrench to tighten mount-to-body fasteners to Torque to 65 Nm (48 ft-lbs).
- Use a torque wrench to tighten mount-to-transmission bracket fasteners to Torque to 83 Nm (61 ft-lbs).
- Use a 12mm socket to reinstall the air box if removed.
- Use a 10mm socket to reinstall the air intake duct clamps or brackets.
Step 5: Replace the Front Torque Mount
- The front torque mount is accessed from underneath near the front lower area of the engine.
- Use a 17mm socket or 19mm socket to remove the through-bolt from the front torque mount.
- Use a 14mm socket or 17mm socket to remove the bracket bolts, depending on the fastener size installed.
- Remove the old front torque mount.
- Install the new front torque mount in the same direction as the old one.
- Start the bracket bolts and through-bolt by hand.
- Use a 14mm socket, 17mm socket, or 19mm socket to snug the fasteners.
- Use a torque wrench to tighten the torque mount through-bolt to Torque to 103 Nm (76 ft-lbs).
- Use a torque wrench to tighten bracket bolts to Torque to 83 Nm (61 ft-lbs).
- Match the old mount orientation.
Step 6: Replace the Rear Torque Mount
- The rear torque mount is accessed from underneath toward the firewall side of the engine cradle.
- Use a flashlight and safety glasses while working under the vehicle.
- Use a 17mm socket or 19mm socket with a 6-inch extension to remove the rear torque mount through-bolt.
- Use a 14mm socket or 17mm socket to remove the rear mount bracket bolts.
- Remove the old rear torque mount from the subframe area.
- Install the new rear torque mount and start all bolts by hand.
- Use a 17mm socket or 19mm socket to snug the through-bolt.
- Use a 14mm socket or 17mm socket to snug the bracket bolts.
- Use a torque wrench to tighten the torque mount through-bolt to Torque to 103 Nm (76 ft-lbs).
- Use a torque wrench to tighten bracket bolts to Torque to 83 Nm (61 ft-lbs).
Step 7: Settle the Engine and Final-Tighten
- Use the floor jack to very slightly raise and lower the engine to let the mounts settle naturally.
- Check that no mount is twisted or pulled sideways.
- Use the torque wrench to recheck every mount fastener at the listed torque values.
- Make sure hoses, wiring, and the air intake are not pinched.
- Do not force alignment.
Step 8: Reinstall the Splash Shield
- Lift the lower splash shield into place by hand.
- Use a trim clip removal tool or your fingers to reinstall the plastic clips.
- Use a 10mm socket to reinstall splash shield screws.
- Tighten the 10mm screws snug only. Do not overtighten plastic fasteners.
Step 9: Lower the Vehicle and Reconnect the Battery
- Use the floor jack to raise the vehicle slightly off the jack stands.
- Remove the jack stands.
- Lower the vehicle slowly to the ground.
- Use a 10mm socket to reconnect the negative battery cable.
- Tighten the battery terminal snugly.
✅ After Repair
- ✅ Start the engine and let it idle in Park. Watch for unusual movement or vibration.
- ✅ Press the brake firmly and shift from Park to Reverse, then Drive. The engine should move only slightly.
- ✅ Listen for clunks when shifting. A small idle change is normal; a loud knock is not.
- ✅ Road-test gently at low speed first, then accelerate lightly to confirm the vibration or clunk is gone.
- ✅ Recheck the mounts visually after the test drive.
- ✅ If the battery was disconnected, reset the clock, radio presets, and auto window function if needed.
💰 DIY vs Shop Cost
Shop Cost: $750-$1,300 (parts + labor)
DIY Cost: $220-$500 (parts only)
You Save: $530-$800 by doing it yourself!
Shop labor rates vary but typically run $100-$150/hour. This repair takes a shop approximately 3-5 hours.
🎯 Ready to get started?
HowToo makes it easy: same-day/2-day shipping on every part, plus all the tools and specialty tools you need! Check out the parts and tools sections below to add everything to your cart.