








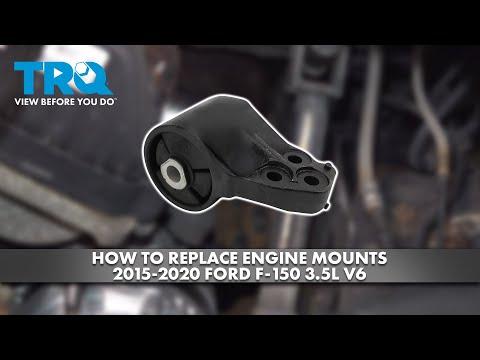






How to Replace Engine Mounts on a 2016 Ford F-150
Step-by-step instructions with tools, parts, safety tips, and torque guidance
How to Replace Engine Mounts on a 2016 Ford F-150
Step-by-step instructions with tools, parts, safety tips, and torque guidance


🔧 Engine Mounts - Replacement
The engine mounts support the engine and absorb vibration. On your F-150, replacement usually means removing the side mount bolts, supporting the engine from above or below, and swapping the worn mounts one side at a time.
Difficulty Level: Advanced | Estimated Time: 4-6 hours
⚠️ Safety & Precautions
- Support the engine before removing any mount bolts. A jack without support can slip.
- Do not work under a vehicle supported only by a jack. Use jack stands.
- Keep hands clear when raising or lowering the engine.
- Disconnect the negative battery cable before starting. This reduces the chance of accidental starter engagement.
- If equipped with turbo piping, wiring, or brackets near the mounts, move them carefully and do not force anything.
🔧 Required Tools
You'll need the following tools for this repair:
- Floor jack (rated 3-ton minimum)
- Jack stands (rated 3-ton minimum)
- Engine support bar (specialty)
- Socket set, metric
- Ratchet
- Breaker bar
- Torque wrench
- Extensions
- Universal joint socket adapter
- Wrenches, metric
- Trim tool
- Safety glasses
- Mechanic gloves
- Wheel chocks
🔩 Required Parts
HowToo sells all the parts you need for this repair:
- Left engine mount - Qty: 1
- Right engine mount - Qty: 1
- Engine mount bolts - Qty: 1 set
📋 Before You Begin
- Park on level ground.
- Set the parking brake.
- Chock the rear wheels.
- Open the hood and remove anything blocking access to the upper engine area.
- Disconnect the negative battery cable before starting.
- Lift the front of the truck only if more access is needed, then support it on jack stands.
🔨 Step-by-Step Instructions
Follow these steps in order:
Step 1: Prepare the truck
- Set the parking brake and chock the rear wheels.
- Disconnect the negative battery cable using a 10mm wrench.
- If needed, raise the front and support it with jack stands.
Step 2: Support the engine
- Place an engine support bar (specialty) across the fenders if you have one.
- If using a floor jack, place a block of wood on the floor jack pad and lift gently under the engine’s safe support point.
- Raise only enough to take weight off the mounts. Do not lift the truck.
Step 3: Remove access components
- Remove any splash shields, air intake pieces, or brackets that block mount access using the correct metric socket and ratchet.
- Keep all hardware organized by side.
Step 4: Remove the first engine mount
- Use the correct metric socket, breaker bar, and extensions to loosen the mount-to-frame bolts.
- Use the correct metric socket and universal joint socket adapter if the bolts are hidden or angled.
- Remove the mount-to-engine bolts.
- Lift or lower the engine slightly with the floor jack or engine support bar until the mount slides out.
Step 5: Install the new engine mount
- Position the new mount in the same orientation as the old one.
- Start all bolts by hand before tightening.
- Tighten the mount bolts evenly with a ratchet and then a torque wrench.
- Torque to factory specification for the mount and bracket bolts. Mount fastener torque varies by location and bolt size, so use the specific Ford spec for each fastener.
Step 6: Replace the second engine mount
- Repeat the same process on the other side.
- Keep the engine supported the entire time.
- Do not fully remove both mounts at once unless the engine is securely supported from above.
Step 7: Reinstall removed parts
- Reinstall any brackets, intake parts, or splash shields using the metric socket and ratchet.
- Reconnect the negative battery cable with a 10mm wrench.
- Lower the vehicle if it was raised.
Step 8: Final check
- Start the engine and let it idle.
- Check for excessive vibration, clunks, or movement.
- Shift between Park, Reverse, and Drive with your foot on the brake to confirm the engine stays stable.
✅ After Repair
- Test drive slowly at first.
- Listen for knocking or drivetrain movement when accelerating and braking.
- Recheck mount bolts after the first drive if any looseness is suspected.
💰 DIY vs Shop Cost
Shop Cost: $900-$1,800 (parts + labor)
DIY Cost: $180-$450 (parts only)
You Save: $720-$1,350 by doing it yourself!
Shop labor rates vary but typically run $100-$150/hour. This repair takes a shop approximately 4-6 hours.
🎯 Ready to get started?
HowToo makes it easy: same-day/2-day shipping on every part, plus all the tools and specialty tools you need! Check out the parts and tools sections below to add everything to your cart.
Guide for replace for these Ford vehicles
| Year Make Model | Sub Model | Engine | Body Style |
|---|