


How to Replace Engine Mounts on a 2016 Audi A6 (Hydraulic Mounts)
Step-by-step DIY instructions with required tools, one-time-use bolts, and torque + angle specs
How to Replace Engine Mounts on a 2016 Audi A6 (Hydraulic Mounts)
Step-by-step DIY instructions with required tools, one-time-use bolts, and torque + angle specs


🔧 A6 - Engine Mount Replacement
Your A6 uses hydraulic engine mounts to control vibration and keep the engine properly aligned. Replacing worn mounts reduces shaking at idle, clunks on takeoff, and drivetrain “thumps” during shifts.
Difficulty Level: Advanced | Estimated Time: 4-6 hours
⚠️ Safety & Precautions
- ⚠️ Support the engine before removing any mount; an unsupported engine can drop suddenly.
- ⚠️ Use jack stands; never work under a vehicle supported only by a jack.
- ⚠️ Let the engine cool completely; the turbo/exhaust area can burn you.
- ⚠️ Many Audi mount bolts are “stretch bolts” (torque-to-yield) and must be replaced, not reused.
- ⚠️ Keep hands clear while raising/lowering the engine support/jack.
🔧 Required Tools
You'll need the following tools for this repair:
- Floor jack (rated 3-ton minimum)
- Jack stands (rated 3-ton minimum)
- Wheel chocks
- Safety glasses
- Mechanic gloves
- Engine support bar (specialty)
- Block of wood (2x6)
- Torque wrench (10-200 Nm range)
- Torque angle gauge
- Metric socket set (8mm-18mm)
- Metric wrench set (10mm-18mm)
- Torx bit set (T25-T45)
- Triple-square bit set (M10-M12)
- Ratchet (3/8" drive)
- Breaker bar (1/2" drive)
- Extensions (3" and 6")
- Trim clip removal tool
- Work light
- Paint marker
🔩 Required Parts
HowToo sells all the parts you need for this repair:
- Right engine mount (passenger side) - Qty: 1
- Left engine mount (driver side) - Qty: 1
- Engine mount bolt kit (one-time-use stretch bolts) - Qty: 1
- Pendulum mount bolts (one-time-use) - Qty: 1
- Lower splash shield fastener assortment - Qty: 1
📋 Before You Begin
- Park on level ground, set the parking brake, and chock the rear wheels.
- Open the hood and remove any loose items around the engine bay.
- Plan your support method: an engine support bar spans the fenders and holds the engine from above so mounts can be removed safely.
- Assumption: longitudinal 2.0T layout with left/right hydraulic mounts.
🔨 Step-by-Step Instructions
Follow these steps in order:
Step 1: Lift and secure the A6
- Use floor jack (rated 3-ton minimum) to lift the front at the approved front center jacking point.
- Place jack stands (rated 3-ton minimum) under the left and right front pinch welds/subframe points.
- Shake-test the car lightly to confirm it’s stable before going underneath.
Step 2: Remove the lower splash shield (undertray)
- Use Torx bit set (T25-T45) and trim clip removal tool to remove the undertray screws/clips.
- Set hardware aside in a tray so nothing gets lost.
Step 3: Support the engine
- Install the engine support bar (specialty) across the strut towers/fender rails per the tool’s instructions.
- Hook the support to the engine lift point(s) and take up slack until the engine weight is just supported (do not lift yet).
- If you don’t have a support bar, you can lightly support from below using the floor jack (rated 3-ton minimum) with a block of wood (2x6) under the oil pan area, but the support bar is safer and more stable for mount work.
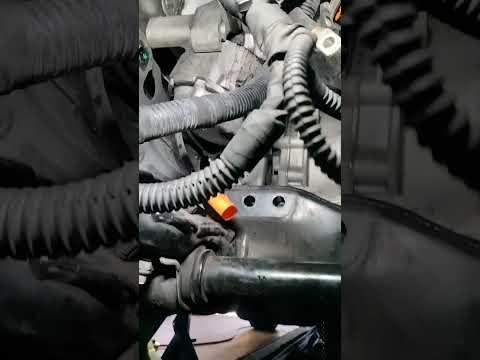
Step 4: Locate and access the right (passenger-side) engine mount
- From above, use work light to find the right mount between the engine bracket and the subframe/body mount pedestal.
- Remove any small air guides or covers blocking access using a Torx bit set (T25-T45) and metric socket set (8mm-18mm).
Step 5: Remove the right engine mount fasteners
- Use paint marker to mark the mount’s position/orientation.
- Use metric socket set (8mm-18mm), extensions (3" and 6"), and ratchet (3/8" drive) to remove the mount-to-body (lower) bolts/nuts.
- Use metric socket set (8mm-18mm) to remove the mount-to-engine-bracket (upper) bolts.
- If bolts are tight, use breaker bar (1/2" drive) carefully.
Step 6: Raise the engine slightly and remove the right mount
- Turn the engine support bar (specialty) adjuster to lift the engine just enough to create clearance (usually a few millimeters).
- Wiggle the mount out. If it won’t clear, raise the engine slightly more—do not force it past hoses/wiring.
Step 7: Install the new right engine mount and torque fasteners
- Set the new mount in place in the same orientation (use your paint marker reference).
- Hand-thread all new bolts from the engine mount bolt kit (one-time-use stretch bolts) before tightening anything.
- Tighten mount fasteners using torque wrench (10-200 Nm range) and torque angle gauge:
- Mount-to-body bolts: Torque to 60 Nm (44 ft-lbs) + 90°
- Mount-to-engine-bracket bolts: Torque to 40 Nm (30 ft-lbs) + 90°
- Tip: Tighten evenly, then do angle turns.
Step 8: Replace the left (driver-side) engine mount
- Repeat Steps 4-7 on the left side using metric socket set (8mm-18mm), extensions (3" and 6"), and torque wrench (10-200 Nm range).
- Use the engine support bar (specialty) to fine-adjust engine height as needed for clearance.
- Torque the left mount fasteners the same way:
- Mount-to-body bolts: Torque to 60 Nm (44 ft-lbs) + 90°
- Mount-to-engine-bracket bolts: Torque to 40 Nm (30 ft-lbs) + 90°
Step 9: Check the lower pendulum mount fasteners (recommended while you’re here)
- The pendulum mount (also called a “dogbone mount”) limits fore/aft drivetrain movement; it’s mounted low between the drivetrain and subframe.
- Inspect for torn rubber or leaking fluid and replace bolts if removed using the pendulum mount bolts (one-time-use).
- Use triple-square bit set (M10-M12) with breaker bar (1/2" drive) to remove/install fasteners.
- Pendulum mount main bolts: Torque to 50 Nm (37 ft-lbs) + 90°
Step 10: Lower the engine and reassemble
- Slowly release the engine support bar (specialty) until the engine sits naturally on the new mounts.
- Reinstall any covers/ducting removed using Torx bit set (T25-T45) and metric socket set (8mm-18mm).
- Reinstall the undertray using Torx bit set (T25-T45) and trim clip removal tool.
Step 11: Lower the vehicle
- Use the floor jack (rated 3-ton minimum) to lift slightly, remove jack stands (rated 3-ton minimum), then lower to the ground.
✅ After Repair
- Start the engine and let it idle; confirm vibration is reduced and the engine sits smoothly.
- With your foot on the brake, shift through P-R-N-D and listen for clunks.
- Test drive gently; re-check underneath for any loose undertray hardware.
- If you notice new vibration, re-check that all mount bolts were tightened to spec and the engine wasn’t “preloaded” while torquing.
💰 DIY vs Shop Cost
Shop Cost: $900-$1,800 (parts + labor)
DIY Cost: $250-$700 (parts only)
You Save: $650-$1,100 by doing it yourself!
Shop labor rates vary but typically run $100-$150/hour. This repair takes a shop approximately 4-6 hours.
🎯 Ready to get started?
HowToo makes it easy: same-day/2-day shipping on every part, plus all the tools and specialty tools you need! Check out the parts and tools sections below to add everything to your cart.
