









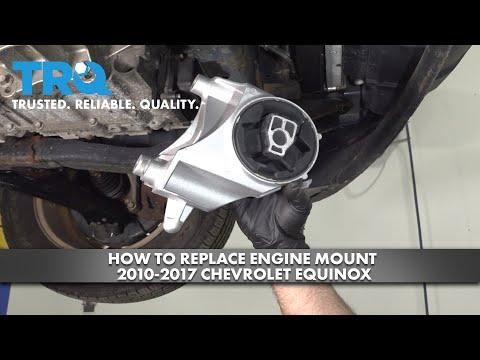







How to Replace Engine Mounts on a 2010-2017 Chevrolet Equinox 2.4L (Engine: V6 3.6L)
Step-by-step instructions with safety tips, tools, parts, and torque guidance
How to Replace Engine Mounts on a 2010-2017 Chevrolet Equinox 2.4L (Engine: V6 3.6L)
Step-by-step instructions with safety tips, tools, parts, and torque guidance for 2010, 2011, 2012, 2013, 2014, 2015, 2016, 2017


🔧 Engine Mounts - Replacement
The 2.4L Equinox uses multiple mounts to hold the engine steady and control movement. Replacing a worn mount reduces clunks, vibration, and drivetrain shake. This procedure covers the common engine-mount replacement approach: support the engine, remove the mount, and install the new one with the correct torque.
Difficulty Level: Intermediate | Estimated Time: 2-4 hours
⚠️ Safety & Precautions
- Support the engine before removing any mount. Never let the engine hang on the remaining mounts.
- Use a floor jack with a wood block under the oil pan or a proper engine support bar. Do not crush the pan.
- Keep hands clear while raising or lowering the engine slightly to align bolt holes.
- If a mount is near the starter, alternator, or wiring, disconnect the negative battery cable first.
- Work on a level surface with the parking brake set and the wheels chocked.
🔧 Required Tools
You'll need the following tools for this repair:
- Floor jack (rated 3-ton minimum)
- Jack stands (rated 3-ton minimum)
- Wheel chocks
- Metric socket set
- Metric wrench set
- Torque wrench
- Breaker bar
- Ratchet
- Extensions
- Wood block
- Safety glasses
- Mechanic gloves
- Trim clip tool
🔩 Required Parts
HowToo sells all the parts you need for this repair:
- Engine mount - Qty: 1
- Mount-to-body bolts - Qty: 1 set
- Mount-to-engine bolts - Qty: 1 set
- Replace any damaged brackets or insulators - Qty: As needed
📋 Before You Begin
- Park on level ground and set the parking brake.
- Chock the rear wheels.
- Disconnect the negative battery cable if your mount location is close to electrical components.
- Raise the front of the vehicle and support it securely on jack stands if underside access is needed.
- Tip: Take a photo before removal.
🔨 Step-by-Step Instructions
Follow these steps in order:
Step 1: Support the engine
- Place a floor jack under the oil pan with a wood block between the jack and pan.
- Raise the jack just enough to hold the engine weight. Do not lift the vehicle.
- If you have an engine support bar, use it instead for better control.
Step 2: Remove access components
- Use the appropriate metric socket and trim clip tool to remove any air box pieces, splash shields, or covers blocking the mount.
- Set all hardware aside in order.
Step 3: Remove the mount fasteners
- Use the metric socket and breaker bar to loosen the mount-to-body bolts.
- Use the metric socket to remove the mount-to-engine bolts.
- If bolts are tight, soak them with penetrating oil and wait a few minutes.
- Tip: Break bolts loose before removing them fully.
Step 4: Remove the old mount
- Lower or raise the engine slightly with the floor jack until the mount comes free.
- Lift the mount out of the bracket area by hand.
- Check for torn rubber, cracked metal, or collapsed insulators.
Step 5: Install the new mount
- Position the new mount in place by hand first.
- Start all bolts by hand before tightening them.
- Use the floor jack to move the engine slightly if needed so the holes line up.
- Tighten the mount bolts to the factory spec for your exact mount location.
Step 6: Reinstall removed parts
- Reinstall any air boxes, splash shields, brackets, or covers using the metric socket and trim clip tool.
- Make sure nothing is pinched or rubbing.
Step 7: Lower and test
- Remove the jack or engine support slowly.
- Reconnect the negative battery cable if it was disconnected.
- Start the engine and watch for excess movement or knocking.
✅ After Repair
- Check idle vibration in Park and Reverse.
- Listen for clunks during throttle tip-in and gear changes.
- Inspect the mount area again after a short test drive.
- If the engine shifts a lot, recheck fastener torque and mount placement.
💰 DIY vs Shop Cost
Shop Cost: $450-$1,000 (parts + labor)
DIY Cost: $120-$350 (parts only)
You Save: $330-$650 by doing it yourself!
Shop labor rates vary but typically run $100-$150/hour. This repair takes a shop approximately 2-4 hours.
🎯 Ready to get started?
HowToo makes it easy: same-day/2-day shipping on every part, plus all the tools and specialty tools you need! Check out the parts and tools sections below to add everything to your cart.
Guide for Engine Mount Kit replace for these Chevrolet vehicles
| Year Make Model | Sub Model | Engine | Body Style |
|---|---|---|---|
| 2017 Chevrolet Equinox | - | Inline 4 2.4L | - |
| 2016 Chevrolet Equinox | - | Inline 4 2.4L | - |
| 2015 Chevrolet Equinox | - | Inline 4 2.4L | - |
| 2014 Chevrolet Equinox | - | Inline 4 2.4L | - |
| 2013 Chevrolet Equinox | - | Inline 4 2.4L | - |
| 2012 Chevrolet Equinox | - | Inline 4 2.4L | - |
| 2011 Chevrolet Equinox | - | Inline 4 2.4L | - |
| 2010 Chevrolet Equinox | - | Inline 4 2.4L | - |