









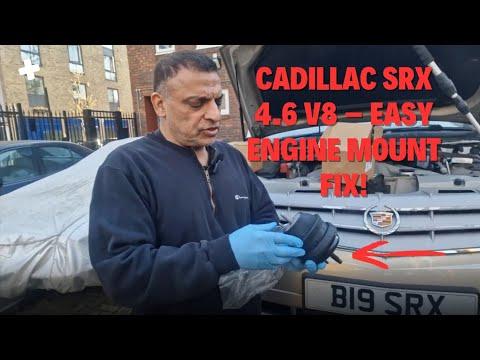





How to Replace Engine Mounts on a 2010-2016 Cadillac SRX (All Mounts) (Engine: V6 3.6L)
Step-by-step DIY instructions with tools, parts list, safety tips, and torque-spec guidance
How to Replace Engine Mounts on a 2010-2016 Cadillac SRX (All Mounts) (Engine: V6 3.6L)
Step-by-step DIY instructions with tools, parts list, safety tips, and torque-spec guidance for 2010, 2011


🔧 SRX - Engine Mount Replacement
On your SRX, the engine is held in place by several mounts (typically a right-side engine mount, a left-side transmission mount, and a lower torque mount). Replacing worn mounts reduces clunks, vibration, and excessive engine movement that can stress exhaust and driveline parts.
Difficulty Level: Advanced | Estimated Time: 3-6 hours
Assumption: Replacing all mounts (right, left, lower) one at a time.
⚠️ Safety & Precautions
- ⚠️ Support the engine before removing any mount; it can drop and cause injury or damage.
- ⚠️ Never get under the vehicle supported only by a jack; always use jack stands.
- ⚠️ Keep hands clear when raising/lowering the engine; it can shift suddenly.
- ⚠️ If you remove the battery or work near the fuse box, disconnect the negative battery cable first.
- ⚠️ Lift the engine only a little at a time; don’t crush hoses, the radiator, or A/C lines.
🔧 Required Tools
You'll need the following tools for this repair:
- Wheel chocks
- Floor jack (rated 3-ton minimum)
- Jack stands (rated 3-ton minimum)
- Jack pad or wood block (2x6 or similar)
- Metric socket set (10mm, 13mm, 15mm, 18mm, 21mm)
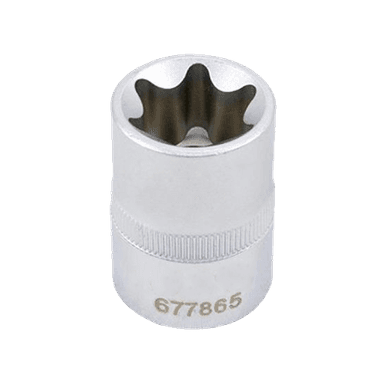
- E-Torx socket set (E12, E14)
- Ratchet
- Breaker bar (1/2-inch)
- Torque wrench (1/2-inch drive)
- Socket extensions (3-inch, 6-inch, 12-inch)
- Universal swivel socket adapter
- Pry bar
- Trim clip removal tool
- Flat-blade screwdriver
- Needle-nose pliers
- Paint marker
- Safety glasses
- Mechanic gloves
- Engine support bar (specialty)
🔩 Required Parts
HowToo sells all the parts you need for this repair:
- Right (passenger-side) engine mount - Qty: 1
- Left (driver-side) transmission mount - Qty: 1
- Lower torque mount (front/rear roll restrictor, as equipped) - Qty: 1
- Engine mount fastener kit (single-use bolts, if required) - Qty: 1
📋 Before You Begin
- Park on a level surface, set the parking brake, and place wheel chocks behind the rear tires.
- Open the hood and remove the plastic engine cover (it pulls up on most SRX covers).
- If you’ll remove the battery area for the left mount, disconnect the negative battery cable using a 10mm socket.
- Plan to replace one mount at a time so the engine stays aligned.
- An E-Torx socket is a “reverse Torx” star socket.
🔨 Step-by-Step Instructions
Follow these steps in order:
Step 1: Raise and support the SRX
- Place wheel chocks behind the rear tires.
- Lift the front using a floor jack at the proper front jack point.
- Set the vehicle down on jack stands.
- Remove the lower splash shield using a trim clip removal tool and 10mm socket (fasteners vary by shield).
Step 2: Support the engine
- Best method: Install an engine support bar (specialty) across the strut towers and lightly tension it.
- Alternate method: Put a wood block on the floor jack and gently lift under the oil pan area.
- Lift only until you see the engine weight just start to come off the mounts.
- Don’t “jack up” the car by the engine.
Step 3: Replace the right (passenger-side) engine mount
- From the top, move anything blocking access (commonly the coolant surge tank area). Remove bolts with a 10mm socket and carefully reposition without disconnecting hoses.
- Mark the mount position with a paint marker so you can reinstall aligned.
- Remove the mount-to-body fasteners using an 18mm socket (some positions may use E14 E-Torx).
- Remove the mount-to-engine bracket fasteners using an 18mm socket and extensions.
- Use the floor jack (or engine support bar) to raise/lower the engine slightly until the mount slides out.
- Install the new mount in the same orientation.
- Start all bolts by hand first, then tighten evenly.
- Torque to OEM specification (service information required for exact values) using a torque wrench.
Step 4: Replace the left (driver-side) transmission mount
- If equipped, remove the battery hold-down and battery using a 13mm socket.
- Remove the battery tray fasteners using a 10mm socket and lift the tray out.
- Keep the engine supported with the engine support bar or floor jack.
- Remove the mount fasteners using an 18mm socket and extensions.
- If the mount is “stuck,” use a pry bar gently to free it.
- Install the new mount, start bolts by hand, and tighten evenly.
- Torque to OEM specification (service information required for exact values) using a torque wrench.
- Reinstall the battery tray and battery using a 10mm socket and 13mm socket.
Step 5: Replace the lower torque mount (roll restrictor), if equipped
- From underneath, locate the lower mount connecting the powertrain to the subframe.
- Remove the mount bolts using a 15mm socket or 18mm socket (varies by mount style).
- Lower or raise the engine slightly with the floor jack to relieve tension and slide the mount out.
- Install the new mount and hand-start all bolts.
- Torque to OEM specification (service information required for exact values) using a torque wrench.
Step 6: Reassemble the underside
- Reinstall the splash shield using a 10mm socket and any clips with the trim clip removal tool.
- Lower the vehicle off the jack stands using the floor jack.
Step 7: Final tightening check
- With the SRX on the ground, re-check all accessible mount fasteners using a torque wrench.
- Remove the engine support (bar or jack) completely.
✅ After Repair
- Start the engine and let it idle; listen for clunks and watch for excessive engine movement.
- With your foot firmly on the brake, shift from Park to Reverse to Drive and back (normal light movement is OK).
- Test drive at low speed, then re-check for any loose fasteners or new noises.
- If the steering wheel vibrates more than before, a mount may be mis-seated; re-support the engine and re-align.
💰 DIY vs Shop Cost
Shop Cost: $600-$1,400 (parts + labor)
DIY Cost: $180-$600 (parts only)
You Save: $420-$800 by doing it yourself!
Shop labor rates vary but typically run $100-$150/hour. This repair takes a shop approximately 3-6 hours.
🎯 Ready to get started?
HowToo makes it easy: same-day/2-day shipping on every part, plus all the tools and specialty tools you need! Check out the parts and tools sections below to add everything to your cart.
Guide for Engine Mount Kit replace for these Cadillac vehicles
| Year Make Model | Sub Model | Engine | Body Style |
|---|---|---|---|
| 2016 Cadillac SRX | - | V6 3.6L | - |
| 2015 Cadillac SRX | - | V6 3.6L | - |
| 2014 Cadillac SRX | - | V6 3.6L | - |
| 2013 Cadillac SRX | - | V6 3.6L | - |
| 2012 Cadillac SRX | - | V6 3.6L | - |
| 2011 Cadillac SRX | - | V6 3.0L | - |
| 2010 Cadillac SRX | - | V6 3.0L | - |