
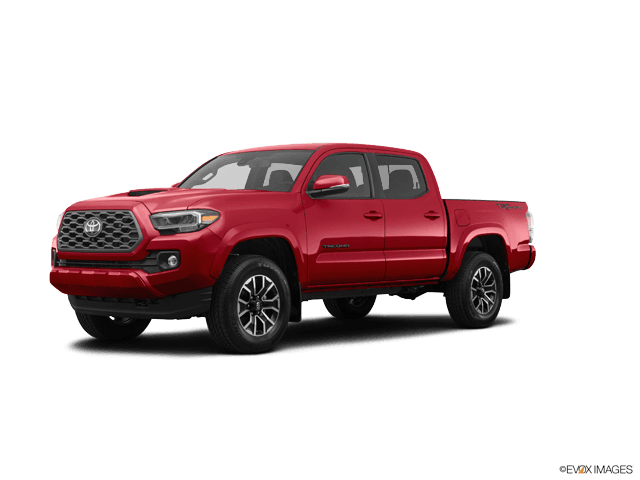


How to Replace Both Taillight Bulbs on a 2021 Toyota Tacoma
Step-by-step DIY Tacoma rear tail/brake bulb replacement with tools, parts, safety tips, and torque specs
How to Replace Both Taillight Bulbs on a 2021 Toyota Tacoma
Step-by-step DIY Tacoma rear tail/brake bulb replacement with tools, parts, safety tips, and torque specs
🔧 Tacoma - Taillight Bulb Replacement
You’ll be removing each rear lamp assembly to replace the tail/brake light bulbs on your Tacoma. The tail/brake bulb is the one that comes on with the headlights and gets brighter when you press the brake pedal.
Difficulty Level: Beginner | Estimated Time: 30-45 minutes
⚠️ Safety & Precautions
- 🔸Always switch the ignition off and remove the key before working on lights.
- 🔸Do not touch the glass part of the new bulb with bare fingers; oil can shorten bulb life.
- 🔸Work on level ground and keep the parking brake firmly set.
- 🔸If you recently drove, be careful around the exhaust area; it can be hot.
- 🔸Battery disconnect is not required for this job, as long as the lights are off.
🔧 Required Tools
You'll need the following tools for this repair:
- 🔸10mm socket
- 🔸1/4" drive ratchet
- 🔸3" socket extension
- 🔸Trim removal tool (plastic)
- 🔸Small flathead screwdriver
- 🔸Clean latex or nitrile gloves
- 🔸Safety glasses
- 🔸Shop towel or clean rag
🔩 Required Parts
HowToo sells all the parts you need for this repair:
- 🔸Tail/stop light bulb (7443 type, rear combination lamp) - Qty: 2 (replace both sides)
- 🔸Dielectric grease (for bulb contacts) - Qty: 1 small tube
- 🔸Replacement plastic push clips (rear lamp area, if any break) - Qty: 4
📋 Before You Begin
- 🔸Park your Tacoma on a flat surface, shift to neutral, and set the parking brake.
- 🔸Turn off headlights and all exterior lights; remove the key from the ignition.
- 🔸Open the tailgate fully to give better access to the lamp screws at the bed edge.
- 🔸Put on safety glasses and gloves before you start.
🔨 Step-by-Step Instructions
Follow these steps in order:
Step 1: Access the taillight screws
- 🔸Open the tailgate fully to expose the inner edge of the taillight on one side.
- 🔸Locate the two black bolts along the inner edge of the taillight (bed side).
- 🔸Use the 10mm socket with the 1/4" drive ratchet and 3" extension to remove both bolts.
- 🔸Set the bolts aside on a shop towel so they don’t roll away.
- 🔸These bolts are reinstalled later; when tightening, snug by hand only, about 5 Nm (44 in-lbs).
Step 2: Free the taillight from the body clips
- 🔸The outer side of the taillight is held by hidden metal pins that push into the body.
- 🔸Place one hand on the outer edge of the taillight and the other on the inner edge.
- 🔸Pull the taillight straight back toward you with firm, steady pressure. Do not pry outward.
- 🔸If it’s stubborn, use a trim removal tool gently at the gap on the inner edge to help start it, then pull straight back again.
- 🔸Once the pins release, support the taillight so it doesn’t hang by the wires.
Step 3: Identify the correct bulb socket
- 🔸On the back of the taillight, you’ll see several bulb sockets with wires going to them.
- 🔸The tail/brake bulb (7443) is usually the upper or middle larger socket with a dual-filament bulb.
- 🔸Look for the socket roughly aligned with where the main red lens is on the outer side.
- 🔸If unsure, you can later test by turning the lights on with a helper.
Step 4: Remove the bulb socket and old bulb
- 🔸Hold the correct bulb socket firmly.
- 🔸Turn the socket about a quarter-turn counterclockwise by hand to unlock it.
- 🔸Pull the socket straight out of the taillight housing.
- 🔸Gently pull the old bulb straight out of the socket with your gloved hand.
- 🔸If it’s stuck, wiggle slightly while pulling; do not twist the glass.
Step 5: Install the new tail/brake bulb
- 🔸Take a new 7443 tail/stop bulb and avoid touching the glass. Hold it by the base.
- 🔸If you accidentally touch the glass, wipe it with a clean shop towel.
- 🔸Apply a very small dab of dielectric grease to the metal contacts on the bulb base using your gloved finger.
- 🔸Push the new bulb straight into the socket until it’s fully seated.
- 🔸Make sure it feels snug and doesn’t wobble. Loose bulbs can flicker.
Step 6: Reinstall the socket into the taillight
- 🔸Align the tabs on the socket with the slots in the taillight housing.
- 🔸Insert the socket straight in, then turn it a quarter-turn clockwise by hand until it stops.
- 🔸Make sure the socket is fully locked; it should not spin freely.
Step 7: Test the new bulb before refitting the taillight
- 🔸Carefully let the taillight hang supported by one hand, or rest it on a towel on the bumper so there’s no strain on the wires.
- 🔸Ask a helper to turn the parking lights/headlights on.
- 🔸Confirm the new bulb lights dimly as the tail light.
- 🔸Have your helper press and hold the brake pedal.
- 🔸Confirm the same bulb lights brighter as the brake light.
- 🔸Turn the lights back off.
Step 8: Reinstall the taillight assembly
- 🔸Line up the metal guide pins on the back of the taillight with their holes in the truck body.
- 🔸Make sure the wiring is not pinched and sits inside the cavity.
- 🔸Push the taillight straight forward into place with the palm of your hand until the pins click in.
- 🔸Install the two 10mm bolts by hand first to avoid cross-threading.
- 🔸Use the 10mm socket, ratchet, and extension to tighten the bolts until snug: Torque to about 5 Nm (44 in-lbs) — just firm, not “gorilla tight.”
Step 9: Repeat for the other side
- 🔸Repeat Steps 1–8 on the opposite taillight to replace the second tail/brake bulb.
- 🔸Always replace these bulbs in pairs so brightness and color match.
✅ After Repair
- 🔸With a helper, check all rear lights: tail lights (headlights on), brake lights (pedal pressed), turn signals, and reverse lights.
- 🔸Verify both sides are equally bright and the same color.
- 🔸Close the tailgate and confirm the taillight housings sit flush with the bed and are not loose.
- 🔸If any light does not work, recheck the bulb orientation and that the socket is fully locked.
💰 DIY vs Shop Cost
Shop Cost: $80-$140 (parts + labor)
DIY Cost: $15-$35 (parts only, both bulbs + grease)
You Save: $45-$125 by doing it yourself!
Shop labor rates typically run $100-$150/hour. This repair takes a shop approximately 0.3-0.5 hours.
🎯 Ready to get started?
HowToo makes it easy: same-day/2-day shipping on every part, plus all the tools and specialty tools you need! Check out the parts and tools sections above to add everything to your cart.
