









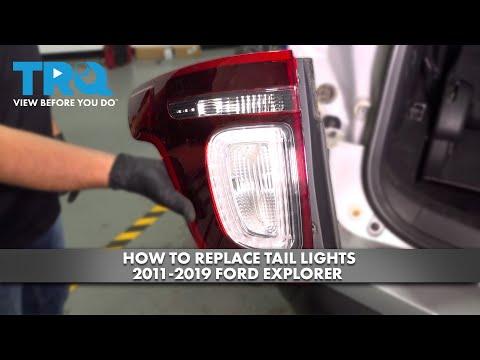







How to Replace Both Taillight Bulbs on a 2018 Ford Explorer (Step-by-Step)
Tools, bulb matching tips, taillight housing removal steps, and 22 in-lb torque spec for reassembly
How to Replace Both Taillight Bulbs on a 2018 Ford Explorer (Step-by-Step)
Tools, bulb matching tips, taillight housing removal steps, and 22 in-lb torque spec for reassembly


🔧 Explorer - Taillight Bulb Replacement
You’ll remove each outer taillight housing from the rear corners of your Explorer, twist out the bulb socket(s), and swap the bulbs. This is the cleanest way to access the bulbs without fighting tight trim panels.
Difficulty Level: Beginner | Estimated Time: 0.5-1.0 hours
⚠️ Safety & Precautions
- ⚠️ Turn the ignition OFF and remove the key before starting.
- ⚠️ Let bulbs cool first—hot bulbs can burn you.
- ⚠️ Don’t touch the glass of a new bulb with bare fingers; oils can shorten bulb life.
- ⚠️ Support the taillight assembly as you pull it out so you don’t scratch paint.
- Battery disconnect is not required for this job.
🔧 Required Tools
You'll need the following tools for this repair:
- Safety glasses
- Nitrile gloves
- 1/4" drive ratchet
- 8mm socket
- 11mm deep socket
- Plastic trim tool
- Inch-pound torque wrench (specialty)
- Clean shop towel
🔩 Required Parts
HowToo sells all the parts you need for this repair:
- Rear taillight bulb (match the number printed on the old bulb) - Qty: 2
📋 Before You Begin
- Park on level ground and set the parking brake.
- Open the liftgate for access to the rear lamp fasteners.
- Lay a clean shop towel on the bumper corner to protect paint while you work.
🔨 Step-by-Step Instructions
Follow these steps in order:
Step 1: Access the taillight fasteners (one side)
- Open the liftgate.
- At the inboard edge of the taillight (near the liftgate opening), locate the two retaining nuts/fasteners.
- Use a plastic trim tool to gently move any small trim cover out of the way if equipped. Use light pressure to avoid breaking clips.
Step 2: Remove the taillight retaining nuts
- Use an 8mm socket on a 1/4" drive ratchet to remove the retaining nuts if they are 8mm.
- If your Explorer uses larger nuts, use an 11mm deep socket on a 1/4" drive ratchet instead.
- Set the nuts aside somewhere safe.
- During reassembly, use an inch-pound torque wrench (specialty) and Torque to 22 in-lbs (2.5 Nm).
Step 3: Remove the taillight assembly
- Grip the taillight and pull it straight rearward (toward you).
- If it feels stuck, wiggle gently while pulling—there are alignment pins holding it in.
- Place the housing on the clean shop towel so the lens doesn’t get scratched.
Step 4: Remove the bulb socket(s)
- Locate the bulb socket for the function you’re replacing (tail/stop/turn, reverse, etc.).
- Twist the socket counterclockwise about a quarter-turn by hand and pull it out.
- A “socket” is the plastic holder the bulb locks into.
Step 5: Replace the bulb
- Pull the bulb straight out of the socket (some styles need a slight wiggle).
- Match the new bulb to the old bulb number printed on the base.
- Install the new bulb fully into the socket.
- Use nitrile gloves to keep skin oils off the bulb glass.
Step 6: Reinstall socket and taillight
- Insert the socket back into the taillight and twist clockwise to lock.
- Align the taillight’s guide pins with the body and press it straight in until it seats flush.
- Reinstall the retaining nuts using an 8mm socket or 11mm deep socket (whichever fit your nuts).
- Use an inch-pound torque wrench (specialty) and Torque to 22 in-lbs (2.5 Nm).
Step 7: Repeat for the other side
- Repeat Steps 1–6 on the opposite taillight.
✅ After Repair
- Turn the ignition ON and test: parking lights, brake lights, turn signals, and reverse lights (as applicable).
- Confirm both housings sit flush and don’t wobble.
- If a bulb doesn’t work, remove that socket and re-seat the bulb and socket fully.
💰 DIY vs Shop Cost
Shop Cost: $80-$180 (parts + labor)
DIY Cost: $10-$40 (parts only)
You Save: $70-$140 by doing it yourself!
Shop labor rates vary but typically run $100-$150/hour. This repair takes a shop approximately 0.5-1.0 hours.
🎯 Ready to get started?
HowToo makes it easy: same-day/2-day shipping on every part, plus all the tools and specialty tools you need! Check out the parts and tools sections below to add everything to your cart.
Guide for replace for these Ford vehicles
| Year Make Model | Sub Model | Engine | Body Style |
|---|