









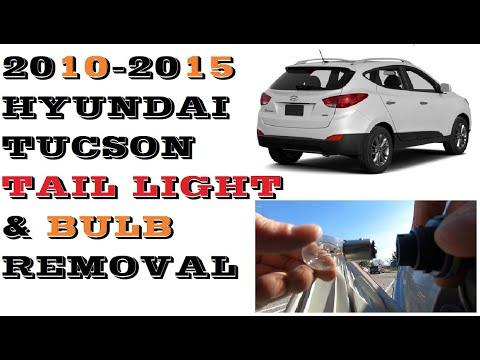







How to Replace Both Taillight Bulbs on a 2010-2021 Hyundai Tucson
Step-by-step rear bulb replacement guide with tools, parts, torque specs, and safety tips
How to Replace Both Taillight Bulbs on a 2010-2021 Hyundai Tucson
Step-by-step rear bulb replacement guide with tools, parts, torque specs, and safety tips for 2010, 2011, 2012, 2013, 2014, 2015, 2016, 2017, 2018, 2019, 2020, 2021


🔧 Tucson - Taillight Bulb Replacement
This repair replaces both rear taillight/brake light bulbs in your Tucson. The taillight bulbs sit inside the rear lamp housings, and the housings must be loosened from the liftgate opening area to access the bulb sockets.
Difficulty Level: Beginner | Estimated Time: 20-40 minutes
⚠️ Safety & Precautions
- ⚠️ Turn the ignition off and remove the key before starting.
- ⚠️ Let the bulbs cool if the lights were recently on.
- ⚠️ Wear gloves or handle new bulbs by the plastic base only; skin oil can shorten bulb life.
- ⚠️ Do not pull hard on the wiring harness; support the lamp housing with one hand.
- ⚠️ Battery disconnect is not required for this bulb replacement.
🔧 Required Tools
You'll need the following tools for this repair:
- Phillips #2 screwdriver
- 10mm socket
- 1/4-inch ratchet
- Plastic trim removal tool
- Nitrile gloves
- Safety glasses
- Clean microfiber towel
🔩 Required Parts
HowToo sells all the parts you need for this repair:
- Rear taillight/brake light bulbs - Replace in pairs - Qty: 2
- Dielectric grease packet - Qty: 1
📋 Before You Begin
- 🅿️ Park your Tucson on level ground and shift to Park.
- 🔑 Turn the ignition off and remove the key.
- 🚪 Open the rear liftgate fully.
- 💡 A bulb socket is the plastic piece that twists into the lamp housing and holds the bulb.
- 🧴 Dielectric grease is a non-conductive protective grease used lightly on bulb socket seals to help prevent moisture corrosion.
🔨 Step-by-Step Instructions
Follow these steps in order:
Step 1: Open the Liftgate and Locate the Lamp Fasteners
- Use your hands to open the rear liftgate.
- Look along the inner edge of each taillight housing, where the lamp meets the liftgate opening.
- You will see the retaining screws or bolts that hold the lamp housing to the body.
Step 2: Remove the Left Taillight Fasteners
- Use a Phillips #2 screwdriver or 10mm socket with 1/4-inch ratchet, depending on the fastener style fitted, to remove the visible lamp fasteners.
- Place the fasteners somewhere safe so they do not roll away.
- Use light pressure to avoid stripping screws.
Step 3: Release the Left Taillight Housing
- Use both hands to gently pull the taillight housing straight rearward from the vehicle.
- If it feels stuck, use a plastic trim removal tool between the lamp and body edge to gently help release the guide pins.
- Do not pry with a metal screwdriver because it can crack the lens or scratch the paint.
- Support the lamp with one hand so the wiring is not stretched.
Step 4: Remove the Old Left Taillight Bulb
- Locate the taillight/brake light socket on the back of the housing.
- Use your hand to twist the socket counterclockwise about a quarter turn, then pull it out.
- Use nitrile gloves to grip the old bulb.
- Push the bulb in slightly, turn it counterclockwise, and pull it out of the socket.
- If your replacement bulb uses a straight-pull base, pull it straight out instead of twisting.
Step 5: Install the New Left Taillight Bulb
- Use nitrile gloves and install the new bulb into the socket.
- If it is a twist-lock bulb, push it in and turn clockwise until it locks.
- If it is a wedge-style bulb, push it straight into the socket until fully seated.
- Apply a very small amount of dielectric grease to the rubber socket seal only, not to the bulb glass or metal contacts.
- Insert the socket into the lamp housing and twist clockwise until it locks.
Step 6: Reinstall the Left Taillight Housing
- Align the lamp guide pins with the body openings.
- Press the housing straight forward until it sits flush with the body.
- Use the Phillips #2 screwdriver or 10mm socket with 1/4-inch ratchet to reinstall the fasteners.
- Tighten gently: Torque to 3-5 Nm (27-44 in-lbs).
- Snug is enough for plastic lamps.
Step 7: Replace the Right Taillight Bulb
- Repeat Steps 2 through 6 on the right taillight housing.
- Use the same Phillips #2 screwdriver or 10mm socket with 1/4-inch ratchet for the fasteners.
- Use the same careful straight-rearward pull to release the housing from its guide pins.
- Install the second new bulb the same way as the first.
Step 8: Test Both Taillights
- Turn the parking lights on and confirm both rear taillights illuminate.
- Press the brake pedal and confirm both brake lights brighten.
- If working alone, use a clean microfiber towel or a safe object to reflect the lights off a wall or garage door behind your Tucson.
- If a bulb does not work, turn the lights off, remove the socket again, and make sure the bulb is fully seated.
✅ After Repair
- ✅ Confirm the taillight housings sit flush and do not wiggle.
- ✅ Check that no wiring is pinched behind either lamp housing.
- ✅ Confirm taillights, brake lights, turn signals, and reverse lights still operate normally.
- ✅ Dispose of old bulbs safely; do not leave broken glass in the cargo area.
💰 DIY vs Shop Cost
Shop Cost: $60-$130 (parts + labor)
DIY Cost: $10-$25 (parts only)
You Save: $50-$105 by doing it yourself!
Shop labor rates vary but typically run $100-$150/hour. This repair takes a shop approximately 0.3-0.6 hours.
🎯 Ready to get started?
HowToo makes it easy: same-day/2-day shipping on every part, plus all the tools and specialty tools you need! Check out the parts and tools sections below to add everything to your cart.
Guide for Tail Light Bulb replace for these Hyundai vehicles
| Year Make Model | Sub Model | Engine | Body Style |
|---|---|---|---|
| 2021 Hyundai Tucson | - | - | - |
| 2020 Hyundai Tucson | - | - | - |
| 2019 Hyundai Tucson | - | - | - |
| 2018 Hyundai Tucson | - | - | - |
| 2017 Hyundai Tucson | - | - | - |
| 2016 Hyundai Tucson | - | - | - |
| 2015 Hyundai Tucson | - | - | - |
| 2014 Hyundai Tucson | - | - | - |
| 2013 Hyundai Tucson | - | - | - |
| 2012 Hyundai Tucson | - | - | - |
| 2011 Hyundai Tucson | - | - | - |
| 2010 Hyundai Tucson | - | - | - |