















How to Replace Both Taillight Bulbs on a 2007-2013 GMC Sierra 1500 (Trim: SL)
Step-by-step instructions, tools, parts, torque specs, and safety tips
How to Replace Both Taillight Bulbs on a 2007-2013 GMC Sierra 1500 (Trim: SL)
Step-by-step instructions, tools, parts, torque specs, and safety tips for 2007, 2008, 2009, 2010, 2011, 2012, 2013


🔧 Taillight Bulb Replacement - Bulb Replacement
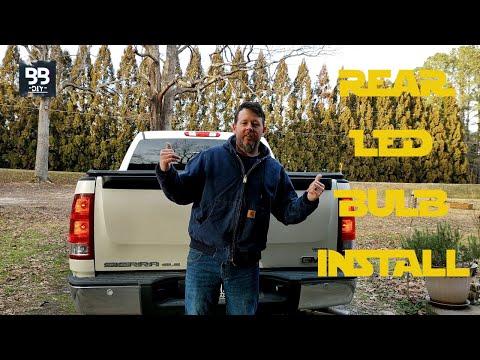
Your Sierra uses rear lamp bulbs that can be replaced from inside the bed area by removing each taillamp assembly. This is a quick repair, but take care with the plastic housing and bulb sockets so you do not crack anything or damage the contacts.
Difficulty Level: Beginner | Estimated Time: 0.5-1 hour
⚠️ Safety & Precautions
- Turn the lights off before starting.
- Let the bulbs cool if they were recently on; they can burn skin.
- Use gentle pressure on the taillamp housing. The plastic tabs can break easily.
- Keep the ignition off while handling bulb sockets.
- No battery disconnect is required for this job.
🔧 Required Tools
You'll need the following tools for this repair:
- 7mm socket
- 1/4-inch ratchet
- Short extension
- Trim panel tool
- Gloves
- Safety glasses
🔩 Required Parts
HowToo sells all the parts you need for this repair:
- Rear taillight bulb - Qty: 2
- Electrical contact cleaner - Qty: 1
📋 Before You Begin
- Park on level ground and set the parking brake.
- Put the transmission in Park.
- Open the tailgate for better access to the taillamp fasteners.
🔨 Step-by-Step Instructions
Follow these steps in order:
Step 1: Open the tailgate and locate the taillamp fasteners
- Open the tailgate.
- Look at the inner edge of each taillamp assembly in the bed opening.
- You will see the retaining screws that hold each lamp in place.
Step 2: Remove the taillamp assembly
- Use the 7mm socket, 1/4-inch ratchet, and short extension to remove the retaining screws.
- Pull the taillamp straight rearward to release it from the locator pins.
- Pull straight back, not sideways.
Step 3: Remove the bulb socket
- Twist the bulb socket counterclockwise by hand and pull it out of the housing.
- If it feels stuck, use a trim panel tool gently around the socket edge.
Step 4: Replace the bulb
- Remove the old bulb from the socket.
- Install the new bulb by pushing it in firmly until fully seated.
- Do not touch the glass with bare fingers if the bulb is halogen.
Step 5: Reinstall the socket and lamp
- Insert the socket back into the taillamp housing.
- Twist clockwise until locked.
- Set the taillamp assembly back into place on the locator pins.
- Reinstall the screws with the 7mm socket and snug them down.
- Torque to 2.5-3.5 Nm (22-31 in-lbs).
Step 6: Repeat on the other side
- Repeat the same process for the other taillamp.
✅ After Repair
- Turn on the parking lights and check both taillights.
- Press the brake pedal and confirm both brake lights work.
- Check the turn signals and reverse lights if they share the same assembly.
- If one side still does not work, inspect the socket for corrosion or melted contacts.
💰 DIY vs Shop Cost
Shop Cost: $120-$220 (parts + labor)
DIY Cost: $20-$50 (parts only)
You Save: $100-$170 by doing it yourself!
Shop labor rates vary but typically run $100-$150/hour. This repair takes a shop approximately 0.5-1 hours.
🎯 Ready to get started?
HowToo makes it easy: same-day/2-day shipping on every part, plus all the tools and specialty tools you need! Check out the parts and tools sections below to add everything to your cart.
Guide for Tail Light Bulb replace for these GMC vehicles
| Year Make Model | Sub Model | Engine | Body Style |
|---|---|---|---|
| 2013 GMC Sierra 1500 | Denali | - | - |
| 2013 GMC Sierra 1500 | SL | - | - |
| 2013 GMC Sierra 1500 | SLE | - | - |
| 2013 GMC Sierra 1500 | SLT | - | - |
| 2013 GMC Sierra 1500 | WT | - | - |
| 2012 GMC Sierra 1500 | Denali | - | - |
| 2012 GMC Sierra 1500 | SL | - | - |
| 2012 GMC Sierra 1500 | SLE | - | - |
| 2012 GMC Sierra 1500 | SLT | - | - |
| 2012 GMC Sierra 1500 | WT | - | - |
| 2011 GMC Sierra 1500 | Denali | - | - |
| 2011 GMC Sierra 1500 | SL | - | - |
| 2011 GMC Sierra 1500 | SLE | - | - |
| 2011 GMC Sierra 1500 | SLT | - | - |
| 2011 GMC Sierra 1500 | WT | - | - |
| 2010 GMC Sierra 1500 | Denali | - | - |
| 2010 GMC Sierra 1500 | SL | - | - |
| 2010 GMC Sierra 1500 | SLE | - | - |
| 2010 GMC Sierra 1500 | SLT | - | - |
| 2010 GMC Sierra 1500 | WT | - | - |
| 2009 GMC Sierra 1500 | Denali | - | - |
| 2009 GMC Sierra 1500 | SL | - | - |
| 2009 GMC Sierra 1500 | SLE | - | - |
| 2009 GMC Sierra 1500 | SLT | - | - |
| 2009 GMC Sierra 1500 | WT | - | - |
| 2008 GMC Sierra 1500 | Denali | - | - |
| 2008 GMC Sierra 1500 | SL | - | - |
| 2008 GMC Sierra 1500 | SLE | - | - |
| 2008 GMC Sierra 1500 | SLT | - | - |
| 2008 GMC Sierra 1500 | WT | - | - |
| 2007 GMC Sierra 1500 | Denali | - | - |
| 2007 GMC Sierra 1500 | SL | - | - |
| 2007 GMC Sierra 1500 | SLE | - | - |
| 2007 GMC Sierra 1500 | SLT | - | - |
| 2007 GMC Sierra 1500 | WT | - | - |