









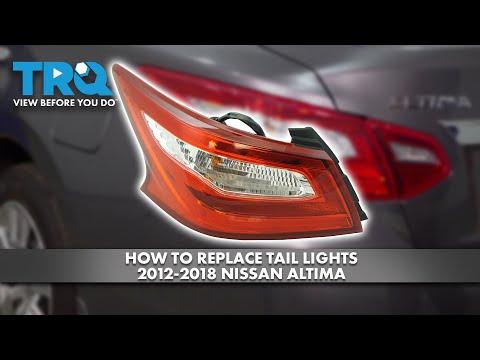







How to Replace Both Taillight Bulbs on a 1993-2013 Nissan Altima
Step-by-step rear bulb replacement guide with tools, parts, safety tips, and testing for 1993, 1994, 1995, 1996, 1997, 2002, 2003, 2004, 2005, 2006, 2007, 2008, 2009, 2010, 2011, 2012, 2013
How to Replace Both Taillight Bulbs on a 1993-2013 Nissan Altima
Step-by-step rear bulb replacement guide with tools, parts, safety tips, and testing for 1993, 1994, 1995, 1996, 1997, 2002, 2003, 2004, 2005, 2006, 2007, 2008, 2009, 2010, 2011, 2012, 2013


🔧 Altima - Taillight Bulb Replacement
Replacing both rear taillight bulbs on your Altima is a beginner-friendly job. The bulbs are accessed from inside the trunk by removing the rear trunk trim enough to reach the bulb sockets.
Difficulty Level: Beginner | Estimated Time: 20-40 minutes
⚠️ Safety & Precautions
- ⚠️ Turn the exterior lights off before removing any bulb.
- ⚠️ Let the bulbs cool for a few minutes if the lights were recently on.
- ⚠️ Do not touch the glass of new bulbs with bare fingers; skin oil can shorten bulb life.
- ⚠️ Battery disconnect is not required for this repair.
- ⚠️ Work gently around the trunk trim clips; they can crack if forced sideways.
🔧 Required Tools
You'll need the following tools for this repair:
- Trim clip removal tool
- Small flat-head screwdriver
- Nitrile gloves
- Safety glasses
- Clean microfiber cloth
- Flashlight
🔩 Required Parts
HowToo sells all the parts you need for this repair:
- Rear taillight bulbs - Replace in pairs - Qty: 2
📋 Before You Begin
- Park your Altima on level ground.
- Move the shifter to Park.
- Set the parking brake.
- Turn the ignition off.
- Turn the headlight switch fully off.
- Open the trunk and remove anything blocking the left and right rear corner trim panels.
- A trim clip removal tool is a small pry tool used to lift plastic fasteners without breaking them.
🔨 Step-by-Step Instructions
Follow these steps in order:
Step 1: Open the Trunk and Locate the Rear Trim
- Use the flashlight to look at the inside left rear corner of the trunk.
- Find the carpeted trunk side trim directly behind the taillight assembly.
- Repeat this visual check on the right rear corner.
- Take a quick photo first.
Step 2: Remove the Trunk Trim Clips
- Use the trim clip removal tool to gently lift the plastic push clips holding the carpeted trim.
- If a clip has a center pin, use the small flat-head screwdriver to lift the center pin first, then pull the whole clip out.
- Set the clips aside where they will not roll away.
- No torque spec applies because these are push-in trim clips.
Step 3: Pull the Trunk Trim Back
- Use your hands to carefully pull the carpeted trunk trim inward just enough to reach behind the taillight.
- Use the flashlight to identify the bulb sockets.
- The bulb socket is the plastic piece that twists into the back of the lamp housing and holds the bulb.
- Do not sharply fold the carpet trim.
Step 4: Remove the First Taillight Bulb Socket
- Use your gloved hand to grip the taillight bulb socket.
- Turn the socket counterclockwise about a quarter turn.
- Pull the socket straight out of the taillight housing.
- No tool is usually needed for the socket; use only hand pressure.
- Do not pull on wires.
Step 5: Remove the Old Bulb
- Use nitrile gloves and pull the old bulb straight out of the socket if it is a wedge-style bulb.
- If the bulb resists, use the clean microfiber cloth for grip and gently wiggle it while pulling straight out.
- Do not twist hard unless the replacement bulb style clearly has locking pins.
Step 6: Install the New Bulb
- Use nitrile gloves to handle the new taillight bulb.
- Push the new bulb straight into the socket until fully seated.
- Use the clean microfiber cloth to wipe the bulb if you accidentally touched the glass.
- Make sure the bulb sits straight and does not feel loose.
Step 7: Reinstall the Bulb Socket
- Use your gloved hand to insert the socket back into the taillight housing.
- Align the socket tabs with the housing slots.
- Turn the socket clockwise about a quarter turn until it locks.
- No torque spec applies; hand-tight only.
Step 8: Replace the Bulb on the Other Side
- Use the trim clip removal tool to remove the right-side trunk trim clips if needed.
- Pull the carpeted trim back by hand.
- Use your gloved hand to turn the other taillight bulb socket counterclockwise.
- Pull the socket out, remove the old bulb, install the new bulb, then lock the socket back in clockwise.
- Replace both bulbs even if only one failed, because the other is usually close behind.
Step 9: Test the Taillights Before Reinstalling Trim
- Turn the headlight switch to the parking light or headlight position.
- Walk to the rear of your Altima and confirm both taillights are on.
- If one side does not light, turn the lights off and use your gloved hand to remove and reseat that bulb.
- Turn the lights off again after testing.
Step 10: Reinstall the Trunk Trim
- Use your hands to place the carpeted trunk trim back into its original position.
- Use your fingers to push the trim clips back into their holes.
- If the clip has a center pin, push the outer clip body in first, then press the center pin flush.
- No torque spec applies to trunk trim clips.
✅ After Repair
- ✅ Check both taillights again with the trunk closed.
- ✅ Confirm the trunk trim is secure and not hanging loose.
- ✅ If a bulb still does not work, inspect the socket for corrosion or a loose connection.
- ✅ No scan tool reset or infotainment reset is required.
💰 DIY vs Shop Cost
Shop Cost: $60-$130 (parts + labor)
DIY Cost: $8-$25 (parts only)
You Save: $50-$105 by doing it yourself!
Shop labor rates vary but typically run $100-$150/hour. This repair takes a shop approximately 0.3-0.5 hours.
🎯 Ready to get started?
HowToo makes it easy: same-day/2-day shipping on every part, plus all the tools and specialty tools you need! Check out the parts and tools sections below to add everything to your cart.