










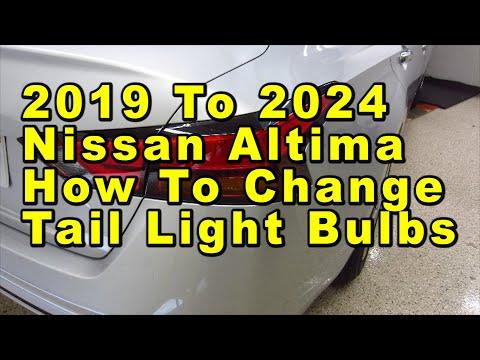






How to Replace Both Tail Light Bulbs on a 2019-2025 Nissan Altima
Step-by-step trunk access guide with tools, parts, safety tips, and bulb testing for 2019, 2020, 2021, 2023, 2024, 2025
How to Replace Both Tail Light Bulbs on a 2019-2025 Nissan Altima
Step-by-step trunk access guide with tools, parts, safety tips, and bulb testing for 2019, 2020, 2021, 2023, 2024, 2025


🔧 Altima - Tail Light Bulb Replacement
This repair replaces both rear tail light bulbs on your Altima. The bulbs are accessed from inside the trunk by pulling back the carpeted side trim and removing the bulb sockets from the rear lamp housings.
Difficulty Level: Beginner | Estimated Time: 20-40 minutes
⚠️ Safety & Precautions
- ⚠️ Turn the exterior lights OFF before removing any bulb sockets.
- ⚠️ Let the bulbs cool for a few minutes if the lights were recently on.
- ⚠️ Wear gloves when handling new bulbs; oil from your fingers can shorten bulb life.
- ⚠️ Do not pull on the wiring harness. Always pull and twist the plastic bulb socket.
- ⚠️ Battery disconnect is not required for this repair.
🔧 Required Tools
You'll need the following tools for this repair:
- Trim clip removal tool
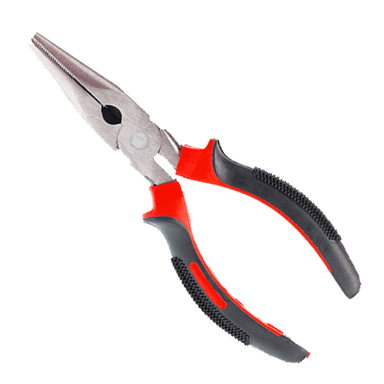
- Needle-nose pliers
- Clean nitrile gloves
- Safety glasses
- Flashlight
🔩 Required Parts
HowToo sells all the parts you need for this repair:
- Rear tail light bulbs - Qty: 2
📋 Before You Begin
- Park your Altima on level ground.
- Shift to Park and set the parking brake.
- Turn the headlight switch fully OFF.
- Open the trunk and remove any cargo blocking the left and right rear corners.
- A trim clip removal tool is a small pry tool used to remove plastic clips without damaging the trunk liner.
- Needle-nose pliers are narrow pliers used to grip small clips in tight spaces.
🔨 Step-by-Step Instructions
Follow these steps in order:
Step 1: Open the trunk and find the access area
- Use a flashlight to look at the left rear corner inside the trunk.
- You will see carpeted trunk trim behind the tail light area.
- The bulb sockets are behind this trim.
- Start on one side first.
Step 2: Remove the trunk trim clips
- Use the trim clip removal tool to gently pry out the plastic push clips from the trunk side trim.
- If a clip is stubborn, use needle-nose pliers to pull it straight out.
- Place the clips in a cup or tray so they do not get lost.
Step 3: Pull back the trunk side trim
- Use your hands with clean nitrile gloves to carefully pull the carpeted trim away from the body.
- Do not fold the trim sharply. Just move it enough to reach the back of the tail lamp.
- Use the flashlight to see the bulb sockets clearly.
Step 4: Remove the tail light bulb socket
- Use your gloved hand to grip the plastic tail light bulb socket.
- Turn the socket counterclockwise about a quarter turn.
- Pull the socket straight out of the lamp housing.
- No torque spec applies here; this socket locks by hand only.
- Twist the socket, not the wires.
Step 5: Remove the old bulb
- Use clean nitrile gloves to pull the old bulb straight out of the socket.
- If the bulb feels stuck, gently wiggle it while pulling straight outward.
- Check the socket for corrosion, melted plastic, or loose metal contacts.
Step 6: Install the new bulb
- Use clean nitrile gloves to handle the new rear tail light bulb.
- Push the new bulb straight into the socket until fully seated.
- Make sure it feels snug and does not wobble.
Step 7: Reinstall the bulb socket
- Use your gloved hand to insert the socket into the tail lamp housing.
- Turn the socket clockwise until it locks in place.
- No torque spec applies; hand-tighten only until it stops.
Step 8: Test the first side
- Turn the parking lights ON using the headlight switch.
- Check that the new tail light bulb turns on.
- Press the brake pedal, or have a helper press it, if the bulb also serves as a brake light.
- Turn the lights OFF before working on the other side.
Step 9: Replace the bulb on the other side
- Use the trim clip removal tool to remove the trunk trim clips on the opposite side.
- Use your hands with clean nitrile gloves to pull the carpeted trim back.
- Use the flashlight to locate the tail light bulb socket.
- Turn the socket counterclockwise by hand and pull it out.
- Pull the old bulb straight out by hand.
- Push the new bulb straight in by hand.
- Reinstall the socket by turning it clockwise until locked.
Step 10: Reinstall the trunk trim
- Use your hands to move the carpeted trim back into its original position.
- Use your thumb or the trim clip removal tool to press the plastic clips back into place.
- Make sure the trim sits flat and does not pinch any wiring.
✅ After Repair
- ✅ Turn the parking lights ON and verify both rear tail lights work.
- ✅ Press the brake pedal and verify both brake lights work if the replaced bulbs are dual-function bulbs.
- ✅ Turn on the hazard lights to confirm nearby rear lamp functions were not disturbed.
- ✅ Check that all trunk trim clips are fully seated.
- ✅ No scan tool, coding, or infotainment reset is required.
💰 DIY vs Shop Cost
Shop Cost: $80-$160 (parts + labor)
DIY Cost: $10-$30 (parts only)
You Save: $70-$130 by doing it yourself!
Shop labor rates vary but typically run $100-$150/hour. This repair takes a shop approximately 0.3-0.6 hours.
🎯 Ready to get started?
HowToo makes it easy: same-day/2-day shipping on every part, plus all the tools and specialty tools you need! Check out the parts and tools sections below to add everything to your cart.
