
















How to Replace Both Low-Beam Headlight Bulbs on a 2016 Buick Envision (HID/Halogen)
Step-by-step DIY instructions with tools, parts list, safety tips, and key torque specs for both sides
How to Replace Both Low-Beam Headlight Bulbs on a 2016 Buick Envision (HID/Halogen)
Step-by-step DIY instructions with tools, parts list, safety tips, and key torque specs for both sides


🔧 Envision - Headlight Bulb Replacement (Both Sides)
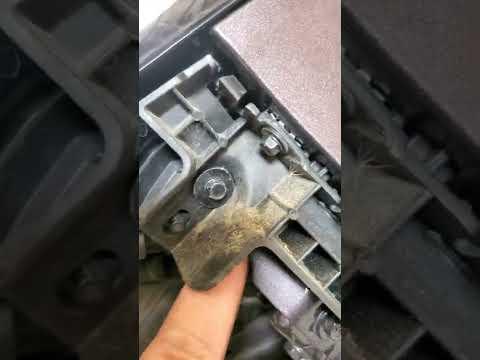
You’ll be replacing the left and right headlight (low-beam) bulbs from behind the headlamp housings in the engine bay. Access is tight on the Envision, so you may need to move the air intake parts on one side to reach the bulb covers.
Difficulty Level: Intermediate | Estimated Time: 1.0-2.0 hours
Assumption: Your Envision may use either HID or halogen low-beams; steps include both paths.
⚠️ Safety & Precautions
- ⚠️ If equipped with HID bulbs: they use high voltage; disconnect the battery and wait 5 minutes before unplugging the bulb/igniter.
- ⚠️ Turn the headlight switch OFF and remove the key/fob from the vehicle.
- ⚠️ Let the headlamp housings cool; bulbs and surrounding parts can be hot.
- ⚠️ Do not touch the glass of halogen/HID bulbs with bare fingers (skin oil shortens bulb life).
- ⚠️ Support any moved hoses/wiring; do not pull on connectors by the wires.
🔧 Required Tools
You'll need the following tools for this repair:
- 10mm socket
- 1/4" drive ratchet
- 6" extension for 1/4" ratchet
- Trim clip removal tool
- Flathead screwdriver
- Torque wrench (5–25 Nm range)
- Flashlight
- Nitrile gloves
- Safety glasses
🔩 Required Parts
HowToo sells all the parts you need for this repair:
- Low-beam headlight bulbs (HID type, if equipped) - Qty: 2
- Low-beam headlight bulbs (halogen type, if equipped) - Qty: 2
- Dielectric grease (small packet) - Qty: 1
📋 Before You Begin
- Park on level ground, shift to Park, and set the parking brake.
- Open the hood and use a flashlight to locate the rear dust covers on both headlamp housings.
- Disconnect the negative battery cable: use a 10mm socket to loosen the clamp and remove it from the negative terminal. Torque to 17 Nm (13 ft-lbs) when reinstalling.
- Tip: Place the cable aside so it can’t spring back.
🔨 Step-by-Step Instructions
Follow these steps in order:
Step 1: Create working room (as needed)
- On the tighter side (commonly the passenger side), remove the air intake duct/clips to improve access.
- Use a trim clip removal tool or flathead screwdriver to release any plastic push-clips.
- If the air duct has small bolts, remove them with a 10mm socket and 1/4" ratchet. Torque to 10 Nm (89 in-lbs) during reassembly.
- Tip: Set clips/bolts in a cup so they don’t vanish.
Step 2: Remove the rear dust cover from the headlamp
- From behind the headlamp, locate the round/oval dust cover.
- Use your hand (or a nitrile glove for grip) and twist the cover counterclockwise to remove it.
- Set the cover aside where it will stay clean (dust inside the housing is bad for the reflector/lens).
Step 3: Identify your bulb type (HID vs halogen)
- HID setup: You’ll typically see a larger base with an “igniter”/module attached. The connector area looks bulkier.
- Halogen setup: Smaller bulb base, usually a simple twist-lock connector.
- Tip: Compare to your new bulb before removal.
Step 4A: Remove the old bulb (Halogen path)
- Unplug the electrical connector by pressing the lock tab and pulling straight back (do not yank wires).
- Rotate the bulb counterclockwise (usually about 1/8–1/4 turn) and pull it straight out.
- Keep the bulb pointed outward so dirt can’t fall into the housing.
Step 4B: Remove the old bulb (HID path)
- Make sure the negative battery cable is still disconnected and you waited 5 minutes.
- Unplug the HID connector/igniter: press the lock tab and pull straight back.
- If there is a retaining ring, rotate it counterclockwise by hand to release the bulb.
- Carefully pull the HID bulb straight out without twisting the glass.
Step 5: Install the new bulb (either type)
- Put on nitrile gloves and handle the new bulb by the base only.
- Align the bulb tabs with the headlamp housing slots, then insert fully.
- Halogen: Rotate clockwise to lock.
- HID: Reinstall the retaining ring (if equipped) and rotate clockwise until seated.
- Apply a tiny amount of dielectric grease to the connector seal area (not on the bulb glass), then reconnect the electrical connector until it clicks.
Step 6: Reinstall the dust cover and any removed intake parts
- Reinstall the rear dust cover and twist clockwise until fully seated.
- Reinstall the air duct/fasteners you removed using a 10mm socket and 1/4" ratchet. Torque to 10 Nm (89 in-lbs).
- Make sure no hoses or wiring are pinched before tightening.
Step 7: Reconnect the battery
- Reconnect the negative battery terminal using a 10mm socket.
- Torque to 17 Nm (13 ft-lbs).
Step 8: Repeat on the other headlight
- Do the same process on the opposite side.
- Tip: Replace bulbs in pairs for even brightness/color.
✅ After Repair
- Turn the headlights ON and verify both low-beams work.
- Check high-beams and turn signals to ensure no connector was disturbed.
- Look through the lens for condensation over the next day; if you see fogging, re-check that the dust cover is fully sealed.
- If the beam pattern looks off after bulb replacement, have the headlamp aim checked/adjusted.
💰 DIY vs Shop Cost
Shop Cost: $150-$400 (parts + labor, varies a lot for HID)
DIY Cost: $40-$250 (parts only, depends on bulb type)
You Save: $110-$150+ by doing it yourself!
Shop labor rates vary but typically run $100-$150/hour. This repair takes a shop approximately 1.0-1.5 hours.
🎯 Ready to get started?
HowToo makes it easy: same-day/2-day shipping on every part, plus all the tools and specialty tools you need! Check out the parts and tools sections below to add everything to your cart.