









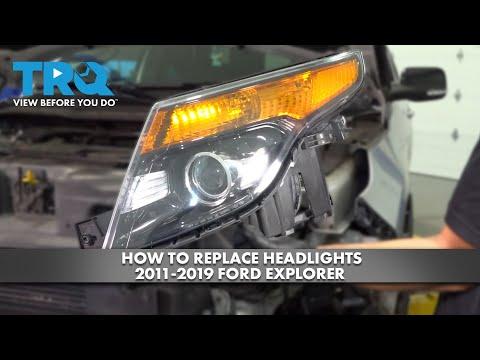







How to Replace Both Low-Beam Headlight Bulbs on a 2013-2019 Ford Explorer
Step-by-step instructions with tools, parts, safety tips, and after-repair checks
How to Replace Both Low-Beam Headlight Bulbs on a 2013-2019 Ford Explorer
Step-by-step instructions with tools, parts, safety tips, and after-repair checks for 2013, 2014, 2015, 2016, 2017, 2018, 2019


🔧 Headlight Bulb Replacement - Low Beam Bulbs
Assumption: This guide covers both low-beam headlight bulbs on your Explorer. If you meant the high beams, the bulb type and access are different.
The low-beam bulbs are replaced from the back of the headlamp housing. You’ll work in a tight space, but the job is straightforward if you move carefully and avoid touching the glass on the new bulbs.
Difficulty Level: Beginner | Estimated Time: 0.5-1 hour
⚠️ Safety & Precautions
- Turn the lights off and remove the key before starting.
- Let the bulbs cool completely. Halogen bulbs get very hot.
- Do not touch the glass on new halogen bulbs. Oil from your fingers can shorten bulb life.
- Work carefully around the battery and wiring behind the headlamp.
- No battery disconnect is required for this repair.
🔧 Required Tools
You'll need the following tools for this repair:
- Gloves
- Safety glasses
- Trim panel tool (specialty)
- Flat-blade screwdriver
- 10mm socket
- Ratchet
- Extension bar
🔩 Required Parts
HowToo sells all the parts you need for this repair:
- Low-beam headlight bulbs - Qty: 2
📋 Before You Begin
- Park on level ground and set the parking brake.
- Turn the headlight switch fully off.
- Open the hood and secure it fully.
- Have both new bulbs ready before you start.
🔨 Step-by-Step Instructions
Follow these steps in order:
Step 1: Open the hood and make room
- Open the hood and locate the back side of each headlamp assembly.
- Use a 10mm socket and ratchet to remove any air inlet duct or cover that blocks access, if equipped.
- Set removed clips aside safely.
Step 2: Reach the bulb socket
- Reach behind the headlamp housing and find the low-beam bulb connector.
- Press the connector lock tab and pull the electrical connector straight off by hand.
- If space is tight, use a trim panel tool to help release small retainers without breaking them.
Step 3: Remove the old bulb
- Twist the bulb counterclockwise using your hand or a flat-blade screwdriver if needed for light leverage.
- Pull the bulb straight out of the headlamp housing.
- Inspect the seal area for dirt or moisture.
Step 4: Install the new bulb
- Put on gloves before handling the new bulb.
- Insert the new bulb into the housing in the same position as the old one.
- Twist clockwise until it locks in place.
- Reconnect the electrical connector until it clicks.
- Do not force the bulb.
Step 5: Reassemble and repeat on the other side
- Reinstall any covers, ducts, or retainers using the 10mm socket and ratchet.
- Repeat the same process on the other headlight bulb.
✅ After Repair
- Turn the headlights on and verify both low beams work.
- Check that each bulb is seated evenly in the housing.
- Look for flickering or warning messages.
- Park facing a wall and confirm both beams are aimed at the same height.
💰 DIY vs Shop Cost
Shop Cost: $120-$240 (parts + labor)
DIY Cost: $30-$80 (parts only)
You Save: $90-$160 by doing it yourself!
Shop labor rates vary but typically run $100-$150/hour. This repair takes a shop approximately 0.5-1 hour.
🎯 Ready to get started?
HowToo makes it easy: same-day/2-day shipping on every part, plus all the tools and specialty tools you need! Check out the parts and tools sections below to add everything to your cart.
Guide for Headlight Bulb replace for these Ford vehicles
| Year Make Model | Sub Model | Engine | Body Style |
|---|---|---|---|
| 2019 Ford Explorer | - | - | - |
| 2018 Ford Explorer | - | - | - |
| 2017 Ford Explorer | - | - | - |
| 2016 Ford Explorer | - | - | - |
| 2015 Ford Explorer | - | - | - |
| 2014 Ford Explorer | - | - | - |
| 2013 Ford Explorer | - | - | - |