














How to Replace Both Low-Beam Headlight Bulbs on a 1996-2023 Chevrolet Express 3500
Step-by-step DIY guide with required 9006 bulbs, tools list, safety tips, and install walkthrough
How to Replace Both Low-Beam Headlight Bulbs on a 1996-2023 Chevrolet Express 3500
Step-by-step DIY guide with required 9006 bulbs, tools list, safety tips, and install walkthrough for 1996, 1997, 1998, 1999, 2000, 2001, 2002, 2003, 2004, 2005, 2006, 2007, 2008, 2009, 2010, 2011, 2012, 2013, 2014, 2015, 2016, 2017, 2018, 2019, 2020, 2021, 2022, 2023


🔧 Express - Headlight Bulb Replacement
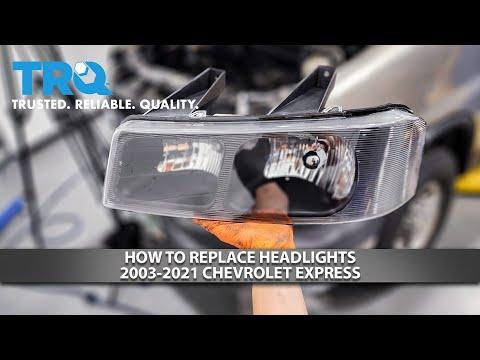
You’ll remove each headlamp assembly, swap the bulb(s), and reinstall everything. On your Express, the headlamp is held in by two vertical retaining pins from the top, so this is a pretty DIY-friendly job.
Difficulty Level: Beginner | Estimated Time: 0.5-1.0 hours
Assumption: “both” = left + right low-beam bulbs (most common).
⚠️ Safety & Precautions
- ⚠️ Turn the headlight switch OFF and let bulbs cool; they get very hot.
- ⚠️ Do not touch the new bulb’s glass with bare fingers; skin oil can shorten bulb life.
- ⚠️ If you choose to disconnect the battery, disconnect the negative terminal only.
- ⚠️ Support the headlamp assembly so it doesn’t scratch the paint or strain wiring.
🔧 Required Tools
You'll need the following tools for this repair:
- Nitrile gloves
- Safety glasses
- Small flathead screwdriver
- Trim clip/panel removal tool
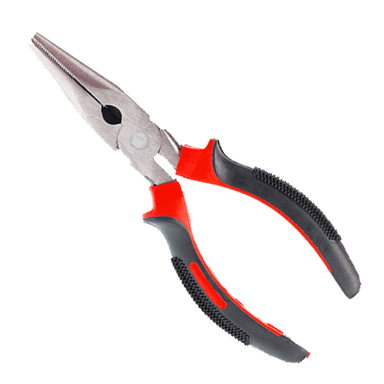
- Needle-nose pliers
- 10mm socket
- 3/8" ratchet
- 3" extension
- Clean paper towels
🔩 Required Parts
HowToo sells all the parts you need for this repair:
- Low-beam headlight bulb (9006) - Qty: 2
- Dielectric grease - Qty: 1
📋 Before You Begin
- Park on level ground, shift to Park, and set the parking brake.
- Open the hood and make sure the headlights are switched OFF.
- Optional: Use 10mm socket and 3/8" ratchet to disconnect the negative battery cable (helps prevent accidental shorting).
🔨 Step-by-Step Instructions
Follow these steps in order:
Step 1: Remove the headlamp retaining pins
- Locate the two vertical retaining pins at the top of the headlamp assembly (one toward the grille side, one toward the fender side).
- Use needle-nose pliers to pull each pin straight up and out.
- If a pin is stuck, gently pry up while pulling using a small flathead screwdriver. Don’t bend the pins.
Step 2: Pull the headlamp assembly forward
- Grip the headlamp housing and pull it straight forward.
- If it feels tight, wiggle gently while pulling—don’t yank.
- Rest the housing carefully so it doesn’t scratch paint or strain wiring.
Step 3: Remove the low-beam bulb
- On the back of the headlamp housing, find the low-beam bulb socket (usually the larger rear access location).
- Twist the bulb/socket counterclockwise about 1/4 turn by hand and pull it out.
- Press the electrical connector tab and unplug the bulb (use trim clip/panel removal tool to help press the tab if needed).
- Put on nitrile gloves before handling the new bulb.
Step 4: Install the new low-beam bulb
- Plug the connector into the new 9006 bulb until it clicks.
- Apply a tiny dab of dielectric grease inside the connector seal area (not on the bulb glass).
- Insert the bulb into the housing, align the tabs, then twist clockwise to lock.
- If you accidentally touch the glass, wipe it with a clean paper towel before installing.
Step 5: Reinstall the headlamp assembly
- Slide the headlamp assembly back into position, keeping it straight so the locating tabs line up.
- Reinstall both retaining pins by pushing them straight down until fully seated.
Step 6: Repeat on the other side
- Repeat Steps 1–5 for the other headlamp assembly so you replace both bulbs as a matched pair.
Step 7: Reconnect battery (if disconnected) and test
- If you disconnected the battery, reconnect the negative cable using a 10mm socket, 3/8" ratchet, and 3" extension.
- Turn on low beams and verify both sides work.
✅ After Repair
- Turn on low beams, then high beams, and verify both sides illuminate evenly.
- Check that each headlamp assembly is fully seated and both retaining pins are fully down.
- If the beam looks “off,” re-seat the housing—misalignment usually means it isn’t fully clipped in.
💰 DIY vs Shop Cost
Shop Cost: $120-$250 (parts + labor)
DIY Cost: $25-$80 (parts only)
You Save: $95-$170 by doing it yourself!
Shop labor rates vary but typically run $100-$150/hour. This repair takes a shop approximately 0.5-1.0 hours.
🎯 Ready to get started?
HowToo makes it easy: same-day/2-day shipping on every part, plus all the tools and specialty tools you need! Check out the parts and tools sections below to add everything to your cart.
Guide for Headlight Bulb replace for these Chevrolet vehicles
| Year Make Model | Sub Model | Engine | Body Style |
|---|---|---|---|
| 2023 Chevrolet Express 3500 | - | - | - |
| 2022 Chevrolet Express 3500 | - | - | - |
| 2021 Chevrolet Express 3500 | - | - | - |
| 2020 Chevrolet Express 3500 | - | - | - |
| 2019 Chevrolet Express 3500 | - | - | - |
| 2018 Chevrolet Express 3500 | - | - | - |
| 2017 Chevrolet Express 3500 | - | - | - |
| 2016 Chevrolet Express 3500 | - | - | - |
| 2015 Chevrolet Express 3500 | - | - | - |
| 2014 Chevrolet Express 3500 | - | - | - |
| 2013 Chevrolet Express 3500 | - | - | - |
| 2012 Chevrolet Express 3500 | - | - | - |
| 2011 Chevrolet Express 3500 | - | - | - |
| 2010 Chevrolet Express 3500 | - | - | - |
| 2009 Chevrolet Express 3500 | - | - | - |
| 2008 Chevrolet Express 3500 | - | - | - |
| 2007 Chevrolet Express 3500 | - | - | - |
| 2006 Chevrolet Express 3500 | - | - | - |
| 2005 Chevrolet Express 3500 | - | - | - |
| 2004 Chevrolet Express 3500 | - | - | - |
| 2003 Chevrolet Express 3500 | - | - | - |
| 2002 Chevrolet Express 3500 | - | - | - |
| 2001 Chevrolet Express 3500 | - | - | - |
| 2000 Chevrolet Express 3500 | - | - | - |
| 1999 Chevrolet Express 3500 | - | - | - |
| 1998 Chevrolet Express 3500 | - | - | - |
| 1997 Chevrolet Express 3500 | - | - | - |
| 1996 Chevrolet Express 3500 | - | - | - |