














How to Replace Both Headlight Bulbs on a 2015-2021 Ford Expedition (Low/High Beam)
Step-by-step bulb replacement with required tools, parts list, safety tips, and key torque specs
How to Replace Both Headlight Bulbs on a 2015-2021 Ford Expedition (Low/High Beam)
Step-by-step bulb replacement with required tools, parts list, safety tips, and key torque specs for 2015, 2016, 2017, 2018, 2019, 2020, 2021


🔧 Expedition - Headlight Bulb Replacement (Both Sides)
You’ll remove the headlamp assembly enough to access the bulb sockets, then swap the bulbs without touching the glass. Replacing both sides at the same time helps keep light color and brightness even.
Assumption: This covers the common halogen headlamp setup (most Expedition trims). If your Expedition has factory HID/LED headlamps, the bulb/module and access steps differ.
Difficulty Level: Beginner | Estimated Time: 0.5-1.0 hours
⚠️ Safety & Precautions
- ⚠️ Turn headlights OFF and let bulbs cool 10+ minutes (they get very hot).
- ⚠️ Do not touch the new bulb glass with bare fingers (oil shortens bulb life).
- ⚠️ Support the headlamp so it doesn’t scratch paint or strain wiring.
- ⚠️ If your Expedition has HID (high-voltage) lighting, do not open ballasts; disconnect the battery and follow OEM procedures.
- ⚠️ Battery disconnect is optional for halogen, but recommended if you’re worried about shorting a connector.
🔧 Required Tools
You'll need the following tools for this repair:
- Nitrile gloves
- Safety glasses
- Trim clip removal tool (specialty)
- Flat trim pry tool
- 7mm socket
- 8mm socket
- 10mm socket
- 1/4" drive ratchet
- 6" extension for 1/4" drive ratchet
- Torque wrench (in-lb)
- Flashlight
- Clean microfiber towel
🔩 Required Parts
HowToo sells all the parts you need for this repair:
- Low beam headlight bulb (commonly H11) - Replace in pairs - Qty: 2
- High beam headlight bulb (commonly 9005) - Optional if you meant high beams - Replace in pairs - Qty: 2
- Dielectric grease - Optional - Qty: 1
- Rubbing alcohol wipes - Optional - Qty: 1
📋 Before You Begin
- Park on level ground, shift to Park, and set the parking brake.
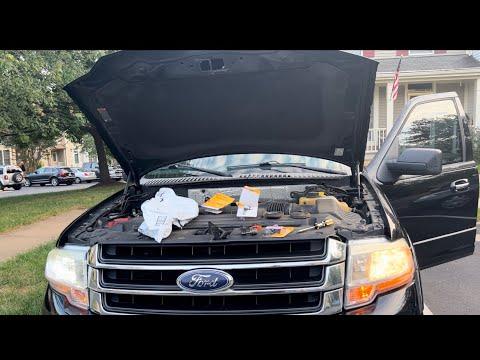
- Open the hood and place a clean microfiber towel over the bumper corner near the headlamp to prevent scratches.
- If disconnecting the battery: use a 10mm socket to loosen the negative terminal and move it aside, then Torque to 6 Nm (53 in-lbs) on reassembly.
🔨 Step-by-Step Instructions
Follow these steps in order:
Step 1: Remove the upper radiator cover (if it blocks headlamp access)
- Use a trim clip removal tool (specialty) (a forked pry tool for plastic pins) and/or a flat trim pry tool to pop up the plastic retainers.
- Lift the cover off and set it aside.
Step 2: Release the headlamp assembly retainers
- Look at the top/back of the headlamp for the retainers.
- If equipped with locking pins: pull the pins straight up using your hands; if tight, gently pry with a flat trim pry tool.
- If equipped with bolts instead of pins: remove them using a 7mm socket or 8mm socket with a 1/4" drive ratchet and 6" extension, then on install Torque to 5 Nm (44 in-lbs).
Step 3: Pull the headlamp forward
- Use both hands to pull the headlamp assembly straight forward.
- Set it on the towel or hold it in place so the wiring isn’t stretched.
- Wiggle gently; don’t force it.
Step 4: Remove the low beam bulb (driver side, then passenger side)
- Find the low beam bulb socket on the back of the headlamp (usually the larger main bulb).
- Twist the bulb/socket counterclockwise by hand to unlock it, then pull it straight out.
- Press the connector tab and unplug the bulb (use a flashlight to see the tab clearly).
Step 5: Install the new low beam bulb
- Put on nitrile gloves before handling the new bulb.
- Plug the connector into the new bulb until it clicks; add a thin smear of dielectric grease (silicone grease that helps keep moisture out) if you have it.
- Insert the bulb into the housing, align the tabs, then twist clockwise until it locks fully.
- If you accidentally touch the glass, clean it with rubbing alcohol wipes and let it dry.
Step 6: Repeat for the other side
- Repeat Steps 2-5 on the opposite headlamp.
- Replace bulbs in pairs for the most even light output.
Step 7: Reinstall the headlamp assemblies
- Slide each headlamp straight back into its locating pins.
- Reinstall the locking pins by pushing them fully down by hand, or reinstall bolts with a 7mm socket/8mm socket and Torque to 5 Nm (44 in-lbs) if equipped.
Step 8: Reinstall the upper radiator cover (if removed)
- Set the cover back in place.
- Press the retainers back in by hand; if they’re two-piece, push the body in first, then press the center pin down.
✅ After Repair
- Start the Expedition and switch on low beams to confirm both sides work.
- Check high beams and turn signals to ensure no connector was bumped loose.
- At night, verify the beams look even and not wildly mis-aimed (a loose headlamp can shift aim).
💰 DIY vs Shop Cost
Shop Cost: $120-$250 (parts + labor)
DIY Cost: $30-$80 (parts only)
You Save: $90-$170 by doing it yourself!
Shop labor rates vary but typically run $100-$150/hour. This repair takes a shop approximately 0.5-1.0 hours.
🎯 Ready to get started?
HowToo makes it easy: same-day/2-day shipping on every part, plus all the tools and specialty tools you need! Check out the parts and tools sections below to add everything to your cart.
Guide for Headlight Bulb replace for these Ford vehicles
| Year Make Model | Sub Model | Engine | Body Style |
|---|---|---|---|
| 2021 Ford Expedition | - | - | - |
| 2020 Ford Expedition | - | - | - |
| 2019 Ford Expedition | - | - | - |
| 2018 Ford Expedition | - | - | - |
| 2017 Ford Expedition | - | - | - |
| 2016 Ford Expedition | - | - | - |
| 2015 Ford Expedition | - | - | - |