








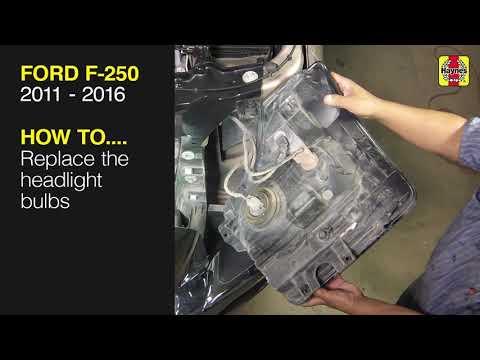







How to Replace Both Headlight Bulbs on a 2005-2023 Ford F-250 Super Duty
Step-by-step DIY guide with halogen vs HID steps, required tools/parts, and safety tips
How to Replace Both Headlight Bulbs on a 2005-2023 Ford F-250 Super Duty
Step-by-step DIY guide with halogen vs HID steps, required tools/parts, and safety tips for 2005, 2006, 2007, 2008, 2009, 2010, 2011, 2012, 2013, 2014, 2015, 2016, 2017, 2018, 2019, 2020, 2021, 2022, 2023


🔧 F-250 Super Duty - Headlight Bulb Replacement
Replacing both headlight bulbs restores safe nighttime visibility and keeps your lights the same color and brightness side-to-side. You’ll access the bulbs from behind each headlight assembly in the engine bay and swap them one at a time.
Difficulty Level: Beginner | Estimated Time: 0.5-1.0 hours
Assumption: Your F-250 has standard halogen bulbs; HID steps are also included below.
⚠️ Safety & Precautions
- ⚠️ Turn the headlight switch OFF and remove the key before starting.
- ⚠️ Let the bulbs cool for 10+ minutes; hot bulbs can burn you.
- ⚠️ Do not touch the glass of a new bulb with bare fingers; skin oils shorten bulb life. Use clean gloves.
- ⚠️ If equipped with HID bulbs, the system uses high voltage; disconnect the negative battery cable before touching the bulb/igniter.
🔧 Required Tools
You'll need the following tools for this repair:
- Nitrile gloves
- Safety glasses
- Flashlight
- 8mm socket
- 1/4" drive ratchet
- 6" extension for 1/4" ratchet
- Trim clip remover (specialty)
🔩 Required Parts
HowToo sells all the parts you need for this repair:
- Headlight bulb (halogen) - Qty: 2
- OR Headlight bulb (HID) - Qty: 2
- Dielectric grease - Qty: 1
📋 Before You Begin
- Park on level ground and set the parking brake.
- Open the hood and use a flashlight so you can see the bulb lock tabs clearly.
- If your F-250 has HID headlights, disconnect the battery: use an 8mm socket, 1/4" drive ratchet, and 6" extension to remove the negative terminal and move it aside.
🔨 Step-by-Step Instructions
Follow these steps in order:
Step 1: Identify which bulb type you have (Halogen vs HID)
- Use a flashlight to look behind the headlight.
- Halogen usually has a simple plastic electrical connector on the bulb.
- HID usually has a larger igniter/base and may be labeled “D3S/D4S” style. If you see a warning label, treat as HID.
Step 2: Remove the rear dust cover (if equipped)
- Use your gloved hand (nitrile gloves) to twist the round dust cap counterclockwise and pull it off.
- Set it somewhere clean so dirt doesn’t get inside.
Step 3 (Halogen): Unplug the bulb connector
- Use nitrile gloves and press the connector lock tab, then pull the connector straight off the bulb.
- If it’s stubborn, gently wiggle while pulling—don’t yank the wires.
Step 4 (Halogen): Remove the old bulb
- Use nitrile gloves to rotate the bulb base counterclockwise about 1/4 turn, then pull the bulb straight out.
- Keep note of the bulb’s “ears/tabs” position so the new one goes in the same way.
Step 5 (Halogen): Install the new bulb
- Put on clean nitrile gloves and insert the new bulb without touching the glass.
- Line up the tabs, push the bulb fully in, then rotate clockwise until it locks.
- Add a tiny dab of dielectric grease to the connector seal (not the bulb glass), then reconnect the plug until it clicks.
Step 6 (HID): Disconnect power and remove the HID igniter/connector
- Confirm the negative battery cable is disconnected using an 8mm socket, 1/4" drive ratchet, and 6" extension.
- Use nitrile gloves and rotate/remove the igniter/connector from the back of the HID bulb (it typically twists off).
- HID parts can be tight—go slow and steady.
Step 7 (HID): Remove and replace the HID bulb
- Use nitrile gloves to rotate the bulb counterclockwise and pull it out.
- Insert the new HID bulb in the same orientation, then rotate clockwise to lock.
- Reinstall the igniter/connector by hand until fully seated and locked.
Step 8: Reinstall the dust cover
- Use your gloved hand (nitrile gloves) to reinstall the dust cap and twist clockwise until snug.
- Make sure it’s sealed to keep moisture out of the headlight.
Step 9: Repeat on the other side
- Use the same steps for the second headlight so both bulbs match in brightness and color.
Step 10: Reconnect the battery (HID only)
- Use an 8mm socket, 1/4" drive ratchet, and 6" extension to reinstall the negative battery terminal clamp.
- Make it snug and secure (no wiggling by hand).
✅ After Repair
- Turn the headlights ON and confirm both low beams and high beams work as expected.
- Check that the dust caps are fully seated (prevents fogging/condensation).
- At night, verify the beams look even on a wall; if one looks “off,” the bulb may not be fully locked in.
💰 DIY vs Shop Cost
Shop Cost: $120-$280 (parts + labor)
DIY Cost: $30-$220 (parts only)
You Save: $90-$60 by doing it yourself!
Shop labor rates vary but typically run $100-$150/hour. This repair takes a shop approximately 0.5-1.0 hours.
🎯 Ready to get started?
HowToo makes it easy: same-day/2-day shipping on every part, plus all the tools and specialty tools you need! Check out the parts and tools sections below to add everything to your cart.
Guide for Headlight Bulb replace for these Ford vehicles
| Year Make Model | Sub Model | Engine | Body Style |
|---|---|---|---|
| 2023 Ford F-250 Super Duty | - | - | - |
| 2022 Ford F-250 Super Duty | - | - | - |
| 2021 Ford F-250 Super Duty | - | - | - |
| 2020 Ford F-250 Super Duty | - | - | - |
| 2019 Ford F-250 Super Duty | - | - | - |
| 2018 Ford F-250 Super Duty | - | - | - |
| 2017 Ford F-250 Super Duty | - | - | - |
| 2016 Ford F-250 Super Duty | - | - | - |
| 2015 Ford F-250 Super Duty | - | - | - |
| 2014 Ford F-250 Super Duty | - | - | - |
| 2013 Ford F-250 Super Duty | - | - | - |
| 2012 Ford F-250 Super Duty | - | - | - |
| 2011 Ford F-250 Super Duty | - | - | - |
| 2010 Ford F-250 Super Duty | - | - | - |
| 2009 Ford F-250 Super Duty | - | - | - |
| 2008 Ford F-250 Super Duty | - | - | - |
| 2007 Ford F-250 Super Duty | - | - | - |
| 2006 Ford F-250 Super Duty | - | - | - |
| 2005 Ford F-250 Super Duty | - | - | - |