










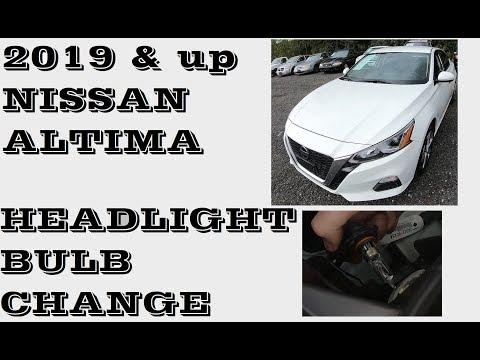







How to Replace Both Headlight Bulbs on a 2005-2022 Nissan Altima (Trim: S)
Step-by-step low beam bulb replacement with tools, parts, safety tips, and access instructions for 2005, 2006, 2007, 2008, 2009, 2010, 2011, 2012, 2013, 2014, 2015, 2016, 2017, 2018, 2019, 2020, 2021, 2022
How to Replace Both Headlight Bulbs on a 2005-2022 Nissan Altima (Trim: S)
Step-by-step low beam bulb replacement with tools, parts, safety tips, and access instructions for 2005, 2006, 2007, 2008, 2009, 2010, 2011, 2012, 2013, 2014, 2015, 2016, 2017, 2018, 2019, 2020, 2021, 2022


🔧 Altima - Low Beam Headlight Bulb Replacement
Replacing both low beam headlight bulbs on your Altima is a beginner-friendly job, but access is tight behind the headlamp housings. You’ll remove the front wheel-well liners enough to reach the bulb covers, then swap the bulbs without touching the glass.
Difficulty Level: Beginner | Estimated Time: 45-90 minutes
⚠️ Safety & Precautions
- ⚠️ Turn the headlights and ignition OFF before starting.
- ⚠️ Let the bulbs cool if the lights were recently on.
- ⚠️ Do not touch the glass part of the new bulb; skin oil can shorten bulb life.
- ⚠️ If using a floor jack, support your Altima with jack stands before putting hands in the wheel-well area.
- ⚠️ Battery disconnect is not normally required for this bulb replacement, but keep the headlight switch OFF.
🔧 Required Tools
You'll need the following tools for this repair:
- Flat-blade trim clip remover
- Small flat-head screwdriver
- Phillips #2 screwdriver
- 10mm socket
- 1/4-inch ratchet
- Floor jack (rated 2-ton minimum)
- Jack stands (rated 2-ton minimum)
- Wheel chocks
- Nitrile gloves
- Safety glasses
🔩 Required Parts
HowToo sells all the parts you need for this repair:
- Low beam headlight bulbs - Replace in pairs - Qty: 2
- Fender liner push clips - Qty: 4-8
📋 Before You Begin
- Park your Altima on level ground and set the parking brake.
- Turn the headlight switch OFF and remove the key/fob from the vehicle area.
- Place wheel chocks behind the rear wheels.
- A trim clip remover is a small fork-shaped tool used to lift plastic push clips without breaking them.
- Wear nitrile gloves before handling the new bulbs.
- Assumption: this procedure is for the standard replaceable low beam bulbs used on the Altima S, not a full LED headlamp assembly conversion.
🔨 Step-by-Step Instructions
Follow these steps in order:
Step 1: Turn the Front Wheels for Access
- Start with the driver side.
- Turn the steering wheel fully to the right to open up space in the driver-side wheel well.
- Use wheel chocks to keep your Altima from rolling.
- More space makes this much easier.
Step 2: Raise the Front Corner if Needed
- If your hands do not fit comfortably, use a floor jack rated 2-ton minimum at the front side jacking point.
- Place a jack stand rated 2-ton minimum under the proper support point before working.
- Keep the floor jack lightly touching as a backup, but never rely on the jack alone.
Step 3: Loosen the Fender Liner
- Put on safety glasses.
- Use a flat-blade trim clip remover to lift the plastic push clips from the front section of the wheel-well liner.
- Use a small flat-head screwdriver to raise the center pin of stubborn clips, then remove the clip with the trim clip remover.
- Use a Phillips #2 screwdriver for any Phillips screws in the liner area.
- Use a 10mm socket and 1/4-inch ratchet for any 10mm liner fasteners present.
- Pull the liner back gently just enough to reach the rear of the headlamp housing.
Step 4: Remove the Headlight Bulb Cover
- Reach behind the headlamp housing through the wheel-well opening.
- Use your gloved hand to rotate the round rear bulb access cover counterclockwise.
- Pull the cover straight rearward and set it somewhere clean.
- Take a quick photo before unplugging.
Step 5: Disconnect the Bulb Connector
- Use your gloved fingers to press the connector release tab.
- Pull the electrical connector straight off the bulb.
- If it is stuck, use a small flat-head screwdriver gently at the connector tab only.
- Do not pull on the wires.
Step 6: Remove the Old Bulb
- Use your gloved hand to rotate the bulb counterclockwise until it unlocks.
- Pull the bulb straight out of the housing.
- Note the position of the locking tabs so the new bulb goes in the same way.
Step 7: Install the New Bulb
- Open the new low beam bulb package carefully.
- Hold the bulb by the plastic base only while wearing nitrile gloves.
- Insert the bulb straight into the headlamp housing.
- Rotate the bulb clockwise until it locks firmly.
- Reconnect the electrical connector until it clicks.
- No torque spec is used here; the bulb locks by hand only.
Step 8: Reinstall the Bulb Cover
- Use your gloved hand to place the round rear access cover back onto the housing.
- Rotate it clockwise until it is fully seated.
- Make sure the cover sits flat to keep moisture out of the headlight.
Step 9: Refasten the Fender Liner
- Push the wheel-well liner back into position by hand.
- Use the flat-blade trim clip remover only if needed to align clip holes.
- Install the plastic push clips by hand, then press the centers flush.
- Use the Phillips #2 screwdriver to reinstall any Phillips screws.
- Use the 10mm socket and 1/4-inch ratchet to reinstall any 10mm fasteners snugly.
- For small liner bolts, tighten gently: Torque to 5 Nm (44 in-lbs) if torqueing is possible.
Step 10: Repeat on the Passenger Side
- Turn the steering wheel fully to the left for passenger-side access.
- Repeat Steps 2 through 9 on the passenger side.
- Use the same tools: flat-blade trim clip remover, small flat-head screwdriver, Phillips #2 screwdriver, 10mm socket, and 1/4-inch ratchet.
Step 11: Test the Headlights
- Remove all tools from the engine bay and wheel-well areas.
- Turn the ignition ON without starting the engine if desired.
- Switch the low beams ON and confirm both new bulbs light up.
- Check that both beam patterns look even on a wall or garage door.
✅ After Repair
- ✅ Confirm both low beams work before driving at night.
- ✅ Check the fender liners for loose clips or rubbing near the tires.
- ✅ If one light does not work, turn the lights OFF and recheck the connector seating.
- ✅ If the beam aim looks badly off, have the headlight aim checked with proper aiming equipment.
- ✅ No scan tool, battery registration, or infotainment reset is required for this repair.
💰 DIY vs Shop Cost
Shop Cost: $160-$320 (parts + labor)
DIY Cost: $35-$120 (parts only)
You Save: $125-$200 by doing it yourself!
Shop labor rates vary but typically run $100-$150/hour. This repair takes a shop approximately 0.6-1.2 hours.
🎯 Ready to get started?
HowToo makes it easy: same-day/2-day shipping on every part, plus all the tools and specialty tools you need! Check out the parts and tools sections below to add everything to your cart.
