









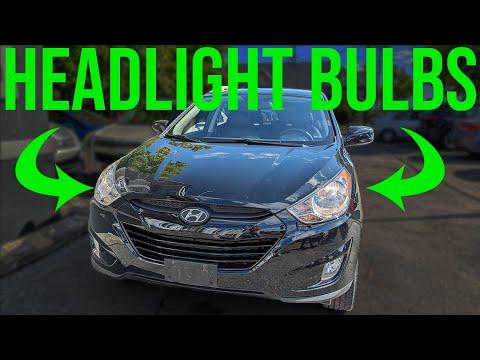







How to Replace Both Headlight Bulbs on a 2005-2013 Hyundai Tucson
Step-by-step low beam bulb replacement guide with tools, parts, and safety tips
How to Replace Both Headlight Bulbs on a 2005-2013 Hyundai Tucson
Step-by-step low beam bulb replacement guide with tools, parts, and safety tips for 2005, 2006, 2007, 2008, 2009, 2010, 2011, 2012, 2013


🔧 Tucson - Headlight Bulb Replacement
Replacing both low-beam headlight bulbs on your Tucson is a beginner-friendly job that can usually be done from inside the engine bay. The goal is to remove the old bulbs without damaging the headlamp housings, then install new bulbs without touching the glass.
Difficulty Level: Beginner | Estimated Time: 20-40 minutes
⚠️ Safety & Precautions
- ⚠️ Turn the headlights and ignition OFF before starting.
- ⚠️ Let the headlight bulbs cool for at least 10 minutes if they were recently on.
- ⚠️ Do not touch the glass part of a halogen bulb with bare fingers. Skin oil can shorten bulb life.
- ⚠️ Disconnecting the battery is not normally required for this bulb-only repair, but keep metal tools away from battery terminals.
- ⚠️ Replace both bulbs as a pair so the brightness and color match.
🔧 Required Tools
You'll need the following tools for this repair:
- Nitrile gloves
- Safety glasses
- Clean microfiber towel
- Flashlight
- Small flathead screwdriver
🔩 Required Parts
HowToo sells all the parts you need for this repair:
- Low beam headlight bulbs - Replace in pairs - Qty: 2
📋 Before You Begin
- Park your Tucson on level ground and set the parking brake.
- Turn the headlight switch OFF and remove the key from the ignition.
- Open the hood and support it securely.
- Put on nitrile gloves and safety glasses.
- A halogen bulb is a glass bulb filled with gas that gets very hot during use, so handle it only by the plastic base.
🔨 Step-by-Step Instructions
Follow these steps in order:
Step 1: Locate the Back of the Headlight
- Use a flashlight to look behind the driver-side headlight housing.
- Find the round rear cover for the low-beam bulb area.
- The driver-side bulb area is usually tighter because of nearby engine-bay components.
- Take a phone photo first.
Step 2: Remove the Rear Headlight Cover
- Use your gloved hand to turn the round rear cover counterclockwise.
- Pull the cover straight off and set it on a clean microfiber towel.
- If the cover is stuck, use a small flathead screwdriver gently at the edge to help loosen it. Do not pry hard against the plastic housing.
Step 3: Disconnect the Bulb Connector
- Use your gloved hand to grasp the electrical connector at the back of the bulb.
- Pull the connector straight back from the bulb.
- If it is tight, gently wiggle it while pulling. Do not pull on the wires.
- A connector is the plastic plug that supplies power to the bulb.
Step 4: Release and Remove the Old Bulb
- Use your gloved hand to rotate the bulb base counterclockwise until it unlocks.
- Pull the bulb straight out of the headlight housing.
- Keep the old bulb away from the headlight opening so dirt does not fall inside.
- No torque spec applies; this bulb locks by hand pressure only.
Step 5: Install the New Driver-Side Bulb
- Use nitrile gloves to hold the new bulb by the plastic base only.
- Insert the bulb into the housing, matching the tabs on the bulb base to the slots in the headlight.
- Turn the bulb clockwise until it locks in place.
- No torque spec applies; hand-tighten only until seated.
- Never touch the bulb glass.
Step 6: Reconnect the Electrical Connector
- Use your gloved hand to push the connector straight onto the new bulb.
- Make sure it clicks or seats firmly.
- Use a flashlight to confirm the connector is fully attached and not crooked.
Step 7: Reinstall the Rear Headlight Cover
- Use your gloved hand to place the round rear cover back onto the headlight housing.
- Turn the cover clockwise until it is fully seated.
- This cover helps keep moisture and dust out of the headlight.
- No torque spec applies; hand-tighten only.
Step 8: Replace the Passenger-Side Bulb
- Use the same process on the passenger-side headlight.
- Use a flashlight to locate the rear cover.
- Use your gloved hand to remove the cover, unplug the connector, rotate the old bulb counterclockwise, and remove it.
- Install the new bulb by the plastic base, rotate it clockwise to lock, reconnect the connector, and reinstall the cover.
- No torque spec applies; all bulb and cover locking is by hand only.
Step 9: Test the Headlights
- Turn the ignition to ON or start your Tucson.
- Switch the headlights ON.
- Stand in front of the vehicle and confirm both low beams work.
- Use the headlight switch to test high beams if you also replaced those bulbs.
✅ After Repair
- ✅ Check that both headlights are equally bright and aimed normally.
- ✅ Look inside the engine bay and confirm both rear headlight covers are fully installed.
- ✅ If one bulb does not work, turn the lights OFF and recheck the connector on that side.
- ✅ If a new bulb was accidentally touched, wipe the glass gently with a clean microfiber towel before use.
💰 DIY vs Shop Cost
Shop Cost: $80-$180 USD equivalent (parts + labor)
DIY Cost: $25-$70 USD equivalent (parts only)
You Save: $55-$110 by doing it yourself!
Shop labor rates vary by location. This repair takes a shop approximately 0.3-0.6 hours.
🎯 Ready to get started?
HowToo makes it easy: same-day/2-day shipping on every part, plus all the tools and specialty tools you need! Check out the parts and tools sections below to add everything to your cart.
Guide for Headlight Bulb replace for these Hyundai vehicles
| Year Make Model | Sub Model | Engine | Body Style |
|---|---|---|---|
| 2013 Hyundai Tucson | - | - | - |
| 2012 Hyundai Tucson | - | - | - |
| 2011 Hyundai Tucson | - | - | - |
| 2010 Hyundai Tucson | - | - | - |
| 2009 Hyundai Tucson | - | - | - |
| 2008 Hyundai Tucson | - | - | - |
| 2007 Hyundai Tucson | - | - | - |
| 2006 Hyundai Tucson | - | - | - |
| 2005 Hyundai Tucson | - | - | - |