









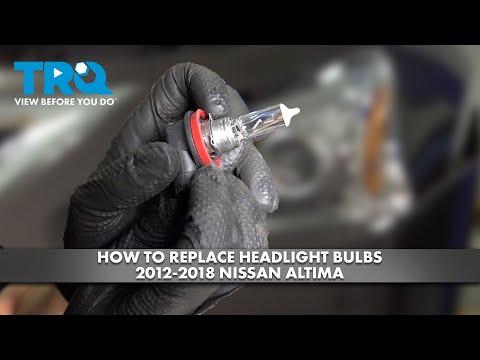







How to Replace Both Headlight Bulbs on a 2002-2015 Nissan Altima
Step-by-step low-beam bulb replacement with tools, parts, safety tips, and wheel-well access for 2002, 2003, 2004, 2005, 2006, 2007, 2008, 2009, 2012, 2013, 2014, 2015
How to Replace Both Headlight Bulbs on a 2002-2015 Nissan Altima
Step-by-step low-beam bulb replacement with tools, parts, safety tips, and wheel-well access for 2002, 2003, 2004, 2005, 2006, 2007, 2008, 2009, 2012, 2013, 2014, 2015


🔧 Altima - Headlight Bulb Replacement
Replacing both low-beam headlight bulbs on your Altima restores safe nighttime visibility and helps both sides match in brightness. On this model, access is tight, so the easiest beginner-friendly method is through the front wheel-well liners.
Difficulty Level: Beginner | Estimated Time: 45-90 minutes
⚠️ Safety & Precautions
- ⚠️ Turn the headlights and ignition off before starting.
- ⚠️ Let the bulbs cool for at least 10 minutes if the lights were recently on.
- ⚠️ Do not touch the glass part of a halogen bulb with bare fingers. Skin oil can shorten bulb life.
- ⚠️ Support the vehicle with jack stands if you raise it. Never rely on a jack alone.
- ⚠️ Battery disconnect is not normally required for this bulb replacement, but keep the light switch off.
🔧 Required Tools
You'll need the following tools for this repair:
- Flat-blade screwdriver
- Plastic trim clip removal tool
- Phillips #2 screwdriver
- 10mm socket
- 3/8-inch ratchet
- Floor jack (rated 2-ton minimum)
- Jack stands (rated 2-ton minimum)
- Wheel chocks
- Nitrile gloves
- Safety glasses
- Clean microfiber cloth
🔩 Required Parts
HowToo sells all the parts you need for this repair:
- Low-beam headlight bulbs - Qty: 2
- Wheel-well liner push clips - Qty: 4-8
📋 Before You Begin
- Park your Altima on level ground and set the parking brake.
- Turn the steering wheel fully to the side opposite the bulb you are replacing to create more room.
- If you need more space, raise the front corner with a floor jack and place a jack stand under the proper front support point.
- A push clip is a plastic fastener that holds the liner in place. It has a center pin that pops up before the clip comes out.
- Replace both bulbs as a pair so the light color and brightness match.
🔨 Step-by-Step Instructions
Follow these steps in order:
Step 1: Prepare the First Side
- Use wheel chocks behind the rear tires to keep the car from moving.
- Use safety glasses and nitrile gloves before working near the wheel well.
- Turn the steering wheel fully away from the side you are working on.
- If more clearance is needed, use a floor jack to raise that front corner, then place a jack stand securely under the vehicle.
Step 2: Open the Wheel-Well Liner
- Use a flat-blade screwdriver to gently lift the center pins of the plastic push clips along the front inner fender liner.
- Use a plastic trim clip removal tool to remove the clips without cracking them.
- Use a Phillips #2 screwdriver or 10mm socket if your liner has screws or small bolts at the lower edge.
- Pull the front part of the liner rearward just enough to reach the back of the headlight housing.
- Work slowly; old clips break easily.
Step 3: Locate the Low-Beam Bulb
- Reach behind the headlight housing through the opened wheel-well area.
- Find the round low-beam bulb socket at the rear of the headlamp assembly.
- Use a clean microfiber cloth if the area is dusty before opening the bulb area.
Step 4: Remove the Old Bulb
- Use your hand to rotate the bulb socket counterclockwise until it unlocks.
- Pull the bulb and socket straight rearward from the headlight housing.
- Press the electrical connector release tab by hand and unplug the old bulb.
- Do not pull on the wires. Hold the connector body only.
Step 5: Install the New Bulb
- Put on clean nitrile gloves before handling the new bulb.
- Plug the electrical connector into the new low-beam headlight bulb until it clicks.
- Insert the bulb straight into the headlight housing, matching the tabs to the slots.
- Use your hand to rotate the bulb clockwise until it locks firmly in place.
- If you accidentally touch the glass, clean it with a clean microfiber cloth before installing.
Step 6: Test the First Bulb
- Turn the headlight switch on briefly and confirm the new bulb lights up.
- Turn the headlight switch off again before closing the liner.
- If the bulb does not light, use your hand to unplug and reconnect the electrical connector until it fully clicks.
Step 7: Reinstall the Wheel-Well Liner
- Push the wheel-well liner back into its original position by hand.
- Use the plastic trim clip removal tool or your fingers to reinstall the push clips.
- Press the center pin of each clip flush after the clip body is seated.
- Use a Phillips #2 screwdriver or 10mm socket to reinstall any screws or small bolts removed earlier.
- Tighten liner screws snug only. No published torque is typically required for these plastic liner fasteners.
Step 8: Replace the Opposite Side Bulb
- Turn the steering wheel fully the opposite direction.
- Repeat Steps 2 through 7 using the flat-blade screwdriver, plastic trim clip removal tool, Phillips #2 screwdriver, and 10mm socket as needed.
- Make sure both bulb sockets are locked fully clockwise into the headlight housings.
Step 9: Lower the Vehicle if Raised
- Use the floor jack to slightly lift the vehicle off the jack stand.
- Remove the jack stand carefully.
- Lower the vehicle slowly with the floor jack.
✅ After Repair
- ✅ Turn on the low beams and confirm both headlights work.
- ✅ Check high beams, parking lights, and turn signals to make sure nothing was disturbed.
- ✅ Park about 25 feet from a wall on level ground and confirm both beams are aimed evenly.
- ✅ If one beam looks very high, low, or crooked, the bulb may not be seated correctly. Recheck the bulb tabs and locking position.
- ✅ Keep the old working bulb as an emergency spare if one was still functional.
💰 DIY vs Shop Cost
Shop Cost: $120-$240 (parts + labor)
DIY Cost: $25-$80 (parts only)
You Save: $95-$160 by doing it yourself!
Shop labor rates vary but typically run $100-$150/hour. This repair takes a shop approximately 0.5-1.0 hours.
🎯 Ready to get started?
HowToo makes it easy: same-day/2-day shipping on every part, plus all the tools and specialty tools you need! Check out the parts and tools sections below to add everything to your cart.