









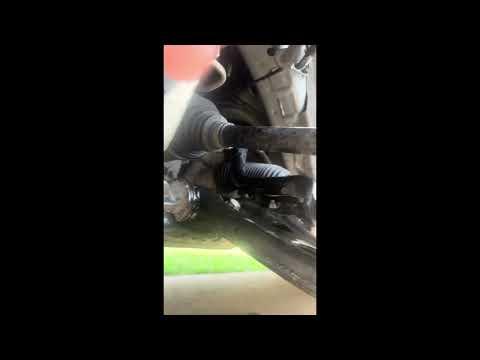







How to Replace Both Front Lower Control Arms on a 2018-2019 Chevrolet Equinox
Step-by-step instructions with tools, parts, torque specs, safety tips, and wheel alignment info
How to Replace Both Front Lower Control Arms on a 2018-2019 Chevrolet Equinox
Step-by-step instructions with tools, parts, torque specs, safety tips, and wheel alignment info for 2018, 2019


🔧 Control Arms - Front Lower Control Arm Replacement
This guide covers replacing both front lower control arms on your Equinox. Because the front suspension will be disturbed, a wheel alignment is required after the repair to keep the steering straight and prevent tire wear.
Difficulty Level: Advanced | Estimated Time: 3-5 hours
⚠️ Safety & Precautions
- Support the vehicle with jack stands before removing any suspension parts.
- Do not work under a vehicle supported only by a floor jack.
- The steering knuckle can shift suddenly when the control arm is removed.
- Use caution around the brake hose and ABS wire so they are not stretched or damaged.
- If the suspension is loaded, some bolts may be hard to remove; never force the knuckle into a twisted position.
- No battery disconnect is required for this repair.
🔧 Required Tools
You'll need the following tools for this repair:
- Floor jack (rated 3-ton minimum)
- Jack stands (rated 3-ton minimum)
- Wheel chocks
- Breaker bar
- Metric socket set
- Metric wrench set
- Torque wrench
- Ball joint separator (specialty)
- Pry bar
- Rubber mallet
- Penetrating oil
- Safety glasses
- Mechanic gloves
🔩 Required Parts
HowToo sells all the parts you need for this repair:
- Front lower control arm, left - Qty: 1
- Front lower control arm, right - Qty: 1
- Front lower control arm hardware kit - Qty: 2
- Wheel alignment - Qty: 1
📋 Before You Begin
- Park on level ground and set the parking brake.
- Loosen the front lug nuts slightly before lifting the vehicle.
- Raise the front end and support it securely on jack stands.
- Remove both front wheels.
- Spray penetrating oil on the control arm bolts and ball joint area if rust is present.
🔨 Step-by-Step Instructions
Follow these steps in order:
Step 1: Remove the front wheels
- Use a lug wrench or the correct metric socket to loosen and remove the front wheel nuts.
- Set the wheels aside flat so they do not roll away.
Step 2: Disconnect the lower control arm from the steering knuckle
- Use the correct metric socket and metric wrench to remove the lower ball joint fastener at the knuckle.
- Use a ball joint separator (specialty) if the taper is stuck.
- Support the knuckle so it does not pull on the brake hose or ABS wire.
- Torque to factory specification during reassembly.
Step 3: Remove the control arm rear and front mounting bolts
- Use the correct metric socket and breaker bar to remove the control arm mounting bolts.
- If the arm is tight in the subframe, use a pry bar carefully to shift it free.
- Remove the control arm from the vehicle.
- Torque to factory specification on installation.
Step 4: Install the new control arm
- Position the new control arm in the subframe by hand.
- Start all bolts by hand first using the correct metric socket and metric wrench.
- Do not fully tighten the mounting bolts yet if the suspension is hanging.
- Make sure the ball joint stud seats correctly in the knuckle.
Step 5: Reconnect the ball joint to the knuckle
- Use the correct metric socket and metric wrench to install the ball joint fastener.
- Use a torque wrench to tighten it to factory specification.
- Keep the knuckle centered.
Step 6: Tighten the control arm bolts at ride height
- Raise the lower suspension with a floor jack under the knuckle or lower arm until the vehicle sits at normal ride height.
- Use a torque wrench to tighten the control arm mounting bolts to factory specification.
- This prevents the rubber bushings from being preloaded and failing early.
Step 7: Reinstall the wheels and lower the vehicle
- Reinstall both front wheels and hand-tighten the lug nuts.
- Lower the vehicle to the ground.
- Use a torque wrench to tighten the lug nuts to factory specification in a star pattern.
✅ After Repair
- Start the vehicle and turn the steering wheel lock-to-lock to check for binding or noise.
- Inspect both sides for loose hardware, torn boots, or interference.
- Schedule a front wheel alignment right away.
- Test drive slowly at first and listen for clunks or pulling.
💰 DIY vs Shop Cost
Shop Cost: $800-$1,400 (parts + labor)
DIY Cost: $220-$520 (parts only)
You Save: $580-$880 by doing it yourself!
Shop labor rates vary but typically run $100-$150/hour. This repair takes a shop approximately 3-5 hours.
🎯 Ready to get started?
HowToo makes it easy: same-day/2-day shipping on every part, plus all the tools and specialty tools you need! Check out the parts and tools sections below to add everything to your cart.
Guide for Suspension Control Arm and Ball Joint Assembly replace for these Chevrolet vehicles
| Year Make Model | Sub Model | Engine | Body Style |
|---|---|---|---|
| 2019 Chevrolet Equinox | - | - | - |
| 2018 Chevrolet Equinox | - | - | - |