















How to Replace Both Front Ball Joints on a 2019 GMC Sierra 1500
Step-by-step instructions with tools, parts, safety tips, and alignment guidance
How to Replace Both Front Ball Joints on a 2019 GMC Sierra 1500
Step-by-step instructions with tools, parts, safety tips, and alignment guidance for 2019


🔧 Headlight Bulb Replacement - Low Beam
This procedure replaces both low-beam headlight bulbs on your Sierra. These bulbs are serviceable from the engine bay, so you do not need to remove the front bumper.
Difficulty Level: Beginner | Estimated Time: 0.5-1 hour
⚠️ Safety & Precautions
- Turn the headlights off and let the bulbs cool fully before touching them.
- Do not touch the glass part of a halogen bulb with bare fingers. Skin oil can shorten bulb life.
- If your Sierra has LED headlamps instead of halogen bulbs, this repair does not apply.
- Disconnecting the battery is not required for this repair.
🔧 Required Tools
You'll need the following tools for this repair:
- Flat-blade trim tool
- Needle-nose pliers
- Gloves
- Safety glasses
🔩 Required Parts
HowToo sells all the parts you need for this repair:
- Low-beam headlight bulbs (H11) - Qty: 2
- Headlight bulb dust covers - Qty: 2, if damaged
📋 Before You Begin
- Park on level ground and set the parking brake.
- Turn the ignition off and remove the key fob from the vehicle.
- Open the hood and make sure both headlamp housings are cool.
🔨 Step-by-Step Instructions
Follow these steps in order:
Step 1: Access the back of the headlamp housing
- Open the hood.
- Reach behind the headlamp assembly for the bulb you want to replace.
- If needed, move the washer reservoir neck or nearby air duct out of the way by hand.
Step 2: Remove the dust cover
- Use a flat-blade trim tool to gently pry off the rear dust cover, if equipped.
- Set the cover aside in a clean place.
Step 3: Disconnect the bulb connector
- Press the locking tab on the bulb connector and pull it straight off.
- If the connector is tight, use needle-nose pliers very gently on the connector body, not the wires.
Step 4: Remove the old bulb
- Twist the bulb counterclockwise with your hand and pull it out of the housing.
- Do not force it.
Step 5: Install the new bulb
- Put on gloves and hold the new H11 bulb by the base only.
- Insert the bulb into the opening and twist it clockwise until it locks.
- Reconnect the electrical plug until it clicks.
Step 6: Reinstall the cover and repeat on the other side
- Reinstall the dust cover by pressing it fully into place.
- Repeat Steps 2 through 5 for the other headlight bulb.
✅ After Repair
- Turn the headlights on and confirm both low beams work.
- Check that both bulbs sit fully seated in the housing.
- If one side does not light, recheck the connector and bulb orientation.
- Make sure the beam pattern looks normal against a wall at night.
💰 DIY vs Shop Cost
Shop Cost: $120-$260 (parts + labor)
DIY Cost: $20-$80 (parts only)
You Save: $100-$180 by doing it yourself!
Shop labor rates vary but typically run $100-$150/hour. This repair takes a shop approximately 0.5-1 hour.
🎯 Ready to get started?
HowToo makes it easy: same-day/2-day shipping on every part, plus all the tools and specialty tools you need! Check out the parts and tools sections below to add everything to your cart.
🔧 Ball Joint Replacement - Front Suspension
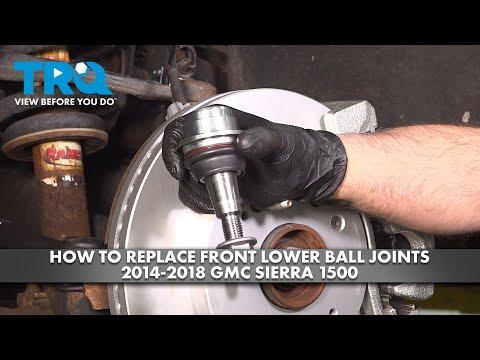
Replacing both front ball joints on your Sierra means removing the steering knuckle, pressing or separating the worn joints, and installing new ones with the correct torque. This is a safety-critical repair because the ball joints hold the wheel assembly to the suspension.
Difficulty Level: Advanced | Estimated Time: 4-6 hours
⚠️ Safety & Precautions
- Support the vehicle securely with jack stands before removing any suspension parts.
- Do not work under the truck with only a floor jack supporting it.
- The steering knuckle is heavy; keep one hand on it when removing the last fastener.
- Use a ball joint separator carefully to avoid damaging the steering knuckle or control arm.
- An alignment is required after this repair.
- If your Sierra has corrosion around the suspension bolts, expect extra effort and penetrating oil may be needed.
🔧 Required Tools
You'll need the following tools for this repair:
- Floor jack (rated 3-ton minimum)
- Jack stands
- Wheel chocks
- Breaker bar
- Torque wrench
- Socket set
- Wrench set
- 21mm socket
- 22mm socket
- 24mm socket
- Ratchet
- Ball joint separator (specialty)
- Ball joint press kit (specialty)
- Hammer
- Penetrating oil
- Wire brush
- Safety glasses
- Gloves
🔩 Required Parts
HowToo sells all the parts you need for this repair:
- Front upper ball joints - Qty: 2
- Front lower ball joints - Qty: 2
- New cotter pins - Qty: 2
- Front end alignment - Qty: 1
- Replacement grease fittings - Qty: 2, if equipped
📋 Before You Begin
- Park on level ground and set the parking brake.
- Chock the rear wheels.
- Loosen the front lug nuts before lifting the truck.
- Raise the front of the truck and support it with jack stands under the frame.
- Remove both front wheels.
- Spray all fasteners early.
🔨 Step-by-Step Instructions
Follow these steps in order:
Step 1: Remove the front wheel and brake components
- Use a 21mm socket to remove the wheel nuts if not already removed.
- If the brake caliper or rotor blocks access, remove the caliper with the correct socket and hang it with wire; do not let it hang by the hose.
- Remove the rotor if needed for clearance.
Step 2: Separate the steering tie rod from the knuckle
- Use a 21mm socket or the correct wrench to remove the tie rod end nut.
- Use a ball joint separator (specialty) to pop the tie rod end loose from the knuckle.
- Do not hammer on the threads.
Step 3: Disconnect the upper ball joint
- Use a 18mm socket or the correct size for the upper ball joint nut and remove the nut.
- Use a ball joint separator (specialty) to separate the upper ball joint stud from the steering knuckle.
- Support the knuckle so the CV axle and brake hose are not stretched.
Step 4: Disconnect the lower ball joint
- Use the correct socket and wrench to remove the lower ball joint nut.
- Use the ball joint separator (specialty) to release the lower stud from the knuckle.
- Carefully lower or reposition the knuckle as needed.
Step 5: Remove the old ball joints
- If the ball joints are bolted to the control arm, use a socket set and ratchet to remove the fasteners.
- If the joints are pressed in, use a ball joint press kit (specialty) to press them out of the control arm.
- Clean the mounting area with a wire brush.
Step 6: Install the new lower ball joints
- Use the ball joint press kit (specialty) to press the new lower joints into place, if press-fit.
- Install any retaining hardware by hand first.
- Tighten the fasteners with a torque wrench to the OEM specification for your exact joint style.
Step 7: Install the new upper ball joints
- Install the new upper ball joints into the control arm or knuckle, depending on the part design.
- Use the correct socket set and torque wrench to tighten the mounting fasteners to OEM specification.
- Insert the ball joint stud into the knuckle and install the new nut.
Step 8: Reassemble the steering knuckle
- Reattach the lower and upper ball joint studs into the knuckle.
- Use the correct socket and torque wrench to tighten the nuts to OEM specification.
- Install new cotter pins if the nuts are castellated.
- Reinstall the tie rod end and torque the nut to OEM specification.
Step 9: Reinstall the brake parts and wheel
- Reinstall the rotor and caliper using the correct socket set.
- Torque the caliper fasteners to OEM specification.
- Reinstall the wheel and snug the lug nuts by hand.
Step 10: Lower the truck and final-torque everything
- Lower the truck so the suspension is at normal ride height.
- Use a torque wrench to tighten the wheel nuts in a star pattern to the factory spec.
- Repeat the full process on the other side.
✅ After Repair
- Turn the steering wheel lock-to-lock and listen for any binding or clicking.
- Check that all cotter pins are installed correctly.
- Test drive slowly and confirm the front end tracks straight.
- Get a professional wheel alignment immediately after the repair.
💰 DIY vs Shop Cost
Shop Cost: $700-$1,400 (parts + labor)
DIY Cost: $180-$450 (parts only)
You Save: $500-$950 by doing it yourself!
Shop labor rates vary but typically run $100-$150/hour. This repair takes a shop approximately 4-6 hours.
🎯 Ready to get started?
HowToo makes it easy: same-day/2-day shipping on every part, plus all the tools and specialty tools you need! Check out the parts and tools sections below to add everything to your cart.
Guide for Suspension Ball Joint replace for these GMC vehicles
| Year Make Model | Sub Model | Engine | Body Style |
|---|---|---|---|
| 2019 GMC Sierra 1500 | - | - | - |