


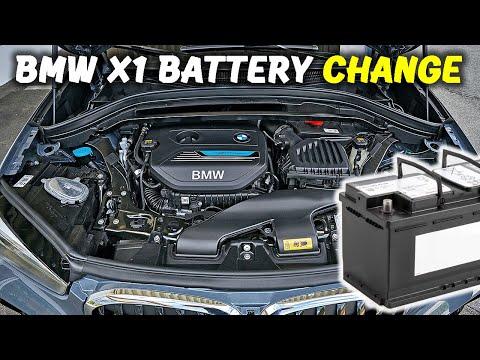


How to Replace and Register the Battery on a 2016 BMW X1 (AGM)
Step-by-step DIY guide with tools, parts, safety tips, torque specs, and BMW battery registration/coding steps
How to Replace and Register the Battery on a 2016 BMW X1 (AGM)
Step-by-step DIY guide with tools, parts, safety tips, torque specs, and BMW battery registration/coding steps


🔧 X1 - Battery Replacement
The battery on your X1 sits in the right-rear cargo area under the floor. Replacing it is mostly basic hand tools, but BMW requires battery registration (telling the car a new battery is installed) so the charging system works correctly and the new battery lasts.
Difficulty Level: Intermediate | Estimated Time: 0.8-1.5 hours
⚠️ Safety & Precautions
- ⚠️ Turn ignition OFF, remove key/fob from the vehicle, and keep it at least 15 ft away.
- ⚠️ Always disconnect the negative battery terminal first, and reconnect it last.
- ⚠️ Do not short the positive terminal to body metal; it can arc violently.
- ⚠️ Your X1 uses an IBS (Intelligent Battery Sensor) on the negative terminal; don’t pry or twist on the sensor.
- ⚠️ Battery is heavy; lift with legs, not your back.
- 🔋 Battery disconnect is required for this repair.
🔧 Required Tools
You'll need the following tools for this repair:
- 10mm socket
- 13mm socket
- Ratchet (3/8")
- 6" extension (3/8")
- Torque wrench (3/8", 5-60 Nm range)
- Trim panel tool set
- Flat blade screwdriver (medium)
- OBD2 Bluetooth adapter
- BMW-capable battery registration scan tool or app (specialty)
- Work gloves
- Safety glasses
🔩 Required Parts
HowToo sells all the parts you need for this repair:
- 12V AGM battery (correct size/capacity for X1) - Qty: 1
- Battery terminal anti-corrosion protectant - Qty: 1
📋 Before You Begin
- Park on level ground, shift to Park, and apply the parking brake.
- Open the tailgate and keep it open while you work.
- Know this term: battery registration means using a scan tool/app to tell the car a new battery is installed so charging strategy resets.
- Assumption: your X1 has the battery in the right-rear cargo compartment (common layout).
🔨 Step-by-Step Instructions
Follow these steps in order:
Step 1: Access the battery compartment
- Open the rear cargo area and lift the cargo floor using your hands.
- Use a trim panel tool set to pop up any plastic retainers holding the right-side access cover.
- Remove the right-side battery access panel (some versions use quarter-turn clips you can turn with a flat blade screwdriver (medium)).
Step 2: Disconnect the negative (IBS) terminal first
- Locate the negative terminal (usually black) and the IBS (a small sensor module on the negative cable).
- Use a 10mm socket and ratchet (3/8") to loosen the negative terminal clamp nut.
- Lift the negative clamp off the battery post and tuck it aside so it cannot spring back.
- Tip: Wrap the clamp in a glove.
Step 3: Disconnect the positive terminal
- Open the red plastic cover over the positive terminal.
- Use a 10mm socket to loosen the positive terminal clamp nut.
- Lift the positive clamp straight up and move it aside, avoiding metal contact.
Step 4: Remove the vent tube (if equipped)
- Many BMW batteries have a small vent tube (a hose that routes battery gases outside).
- Gently pull the vent tube straight out of the battery using your fingers or a trim panel tool set.
Step 5: Remove the battery hold-down
- Find the hold-down bracket at the base of the battery.
- Use a 13mm socket, ratchet (3/8"), and 6" extension (3/8") to remove the hold-down bolt.
- Remove the bracket and set it aside.
Step 6: Lift out the old battery
- Use your hands to lift the battery straight up and out.
- Set it on the ground upright (don’t tip it).
Step 7: Install the new battery
- Set the new AGM battery into the tray in the same orientation as the old one.
- Reconnect the vent tube to the new battery (if used).
- Reinstall the hold-down bracket and bolt using a 13mm socket.
- Torque to 24 Nm (18 ft-lbs) using a torque wrench (3/8", 5-60 Nm range).
Step 8: Reconnect terminals (positive first, negative last)
- Install the positive terminal clamp first and snug it using a 10mm socket.
- Torque to 5 Nm (44 in-lbs) using a torque wrench (3/8", 5-60 Nm range).
- Install the negative (IBS) terminal clamp last and snug it using a 10mm socket.
- Torque to 5 Nm (44 in-lbs) using a torque wrench (3/8", 5-60 Nm range).
- Apply a light coat of battery terminal anti-corrosion protectant to the terminals.
Step 9: Reinstall cargo trim
- Reinstall the battery access panel by hand.
- Press all clips back in using your hands (use the trim panel tool set only if needed to align clips).
- Reinstall the cargo floor panel.
Step 10: Register the new battery (required)
- Plug your OBD2 Bluetooth adapter into the OBD port (driver footwell area).
- Use a BMW-capable battery registration scan tool or app (specialty) to run Battery Registration.
- If the new battery is a different type (AGM vs non-AGM) or a different Ah rating, the car may need battery coding (programming the new specs), not just registration.
- Definition: battery coding updates the battery type/capacity so charging is correct.
✅ After Repair
- Start the engine and confirm there are no warning lights related to charging.
- Check that the clock, radio presets, and power windows operate normally.
- Verify the tailgate opens/closes normally.
- Scan for codes after registration and clear any low-voltage history codes if present.
💰 DIY vs Shop Cost
Shop Cost: $450-$850 (parts + labor + registration/coding)
DIY Cost: $180-$350 (parts only, if you already have a registration tool/app)
You Save: $270-$500 by doing it yourself!
Shop labor rates vary but typically run $100-$150/hour. This repair takes a shop approximately 0.8-1.5 hours.
🎯 Ready to get started?
HowToo makes it easy: same-day/2-day shipping on every part, plus all the tools and specialty tools you need! Check out the parts and tools sections below to add everything to your cart.
