









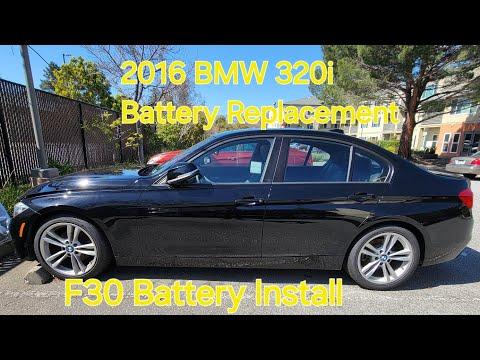






How to Replace and Register the 12V Battery on a 2016 BMW 340i (Trunk-Mounted)
Step-by-step battery swap with required tools/parts, torque specs, safety tips, and OBD-II battery registration/coding for 2016, 2017, 2018
How to Replace and Register the 12V Battery on a 2016 BMW 340i (Trunk-Mounted)
Step-by-step battery swap with required tools/parts, torque specs, safety tips, and OBD-II battery registration/coding for 2016, 2017, 2018


🔧 340i - 12V Battery Replacement
Your 340i’s 12V battery sits in the trunk and powers starting, computers, locks, and all accessories. Replacing it is straightforward, but BMW requires battery registration afterward so the charging system knows a new battery is installed.
Difficulty Level: Intermediate | Estimated Time: 0.8-1.5 hours
⚠️ Safety & Precautions
- ⚠️ Battery acid and hydrogen gas can be dangerous—work in a ventilated area and keep sparks/flames away.
- ⚠️ Always disconnect the negative (-) cable first and reconnect it last to prevent short circuits.
- ⚠️ The battery is heavy—lift with your legs, not your back.
- ⚠️ After replacement, register the battery or the new battery may be over/under-charged and fail early.
🔧 Required Tools
You'll need the following tools for this repair:
- 10mm socket
- 13mm socket
- 3/8" drive ratchet
- 3" extension for ratchet
- Trim removal tool (plastic) (specialty)
- Torque wrench (5-60 Nm range)
- OBD-II BMW battery registration scan tool or app adapter (specialty)
- Nitrile gloves
- Safety glasses
🔩 Required Parts
HowToo sells all the parts you need for this repair:
- 12V trunk-mounted battery (AGM type if equipped) - Qty: 1
- Battery terminal anti-corrosion protectant - Qty: 1
📋 Before You Begin
- Park on level ground, shift to Park, and remove the key/fob from the car (keep it 10+ feet away).
- Open the trunk and leave it open (so you don’t get locked out with power disconnected).
- Plan your battery registration method ahead of time: connect your OBD-II adapter (a plug-in tool that connects your phone/scanner to the car) and ensure the app/scanner is ready.
🔨 Step-by-Step Instructions
Follow these steps in order:
Step 1: Access the battery in the trunk
- Open the trunk and lift the right-side trunk floor/side access cover to reach the battery.
- Use a trim removal tool (plastic) (specialty) to pop any plastic clips (a trim tool is a plastic pry tool that helps you remove panels without breaking them).
Step 2: Disconnect the negative (-) cable first
- Locate the negative (-) terminal (usually black, connected to the car body and the battery sensor area).
- Use a 10mm socket and ratchet to loosen the negative terminal clamp nut.
- Lift the clamp straight up and off the battery post, then tuck it aside so it cannot spring back to the post.
- When reinstalling later: Torque to 6 Nm (4 ft-lbs).
Step 3: Disconnect the positive (+) cable
- Locate the positive (+) terminal (usually red with a protective cover).
- Flip open the red cover, then use a 10mm socket and ratchet to loosen the clamp nut.
- Remove the clamp from the post and position it safely away from the battery.
- When reinstalling later: Torque to 6 Nm (4 ft-lbs).
Step 4: Remove the battery hold-down bracket
- At the base of the battery, find the hold-down bracket/strap that keeps the battery from moving.
- Use a 13mm socket, ratchet, and extension to remove the hold-down bolt(s).
- Set the bracket and hardware aside.
- On reassembly: Torque to 24 Nm (18 ft-lbs).
Step 5: Disconnect the battery vent tube
- On the side of the battery you’ll see a small vent tube (this routes battery gases out of the trunk).
- Pull the vent tube gently straight out by hand.
- Don’t skip this—venting is important.
Step 6: Remove the old battery
- Carefully lift the battery up and out of the trunk well.
- Use gloves and keep the battery upright to avoid any leakage.
Step 7: Install the new battery
- Set the new battery into the tray in the same orientation as the old one.
- Reconnect the vent tube firmly to the vent port on the battery.
- Reinstall the hold-down bracket using the 13mm socket and ratchet, then Torque to 24 Nm (18 ft-lbs).
Step 8: Reconnect cables (positive first, negative last)
- Install the positive (+) clamp first and tighten with a 10mm socket to Torque to 6 Nm (4 ft-lbs).
- Close the red protective cover.
- Install the negative (-) clamp last and tighten with a 10mm socket to Torque to 6 Nm (4 ft-lbs).
- Apply a light coat of battery terminal anti-corrosion protectant to reduce future corrosion.
Step 9: Register the new battery (required)
- Plug in your OBD-II BMW battery registration scan tool or app adapter (specialty) to the OBD port under the dash.
- Use your tool/app’s service function for Battery Registration (often listed under Service/Body/Power Management).
- If you changed battery type (AGM vs non-AGM) or capacity (Ah rating), use a tool that supports battery coding as well (registration alone is not enough when specs change).
✅ After Repair
- Start the engine and confirm normal cranking and no warning messages.
- Check that trunk lights, windows, and locks work normally.
- Verify your clock/date and radio presets; set them if needed.
- Scan for faults with your scan tool and clear any low-voltage history codes after registration.
💰 DIY vs Shop Cost
Shop Cost: $450-$900 (parts + labor + registration/coding)
DIY Cost: $220-$450 (parts only, depending on AGM and capacity)
You Save: $230-$450 by doing it yourself!
Shop labor rates vary but typically run $100-$150/hour. This repair takes a shop approximately 0.8-1.5 hours.
🎯 Ready to get started?
HowToo makes it easy: same-day/2-day shipping on every part, plus all the tools and specialty tools you need! Check out the parts and tools sections below to add everything to your cart.