
















How to Replace All Oxygen Sensors on a 2020-2024 Hyundai Palisade (Upstream & Downstream) (Engine: V6 3.8L)
Step-by-step O2 sensor replacement with tools list, parts, safety tips, torque specs, and code clearing
How to Replace All Oxygen Sensors on a 2020-2024 Hyundai Palisade (Upstream & Downstream) (Engine: V6 3.8L)
Step-by-step O2 sensor replacement with tools list, parts, safety tips, torque specs, and code clearing for 2020, 2021, 2022, 2023, 2024


🔧 Palisade - Oxygen Sensor Replacement (All Sensors)
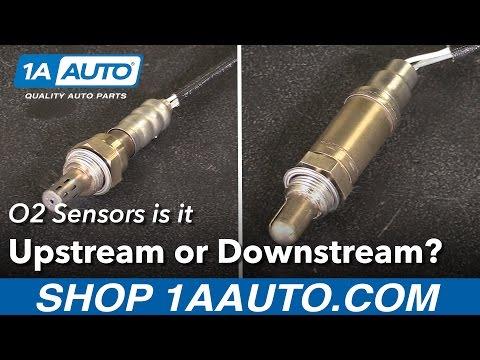
On your Palisade, there are multiple oxygen sensors (upstream and downstream) that help the engine computer control fuel mixture and monitor catalytic converter performance. Replacing them all means working around hot exhaust parts and tight spaces, then tightening the new sensors correctly and reconnecting the wiring.
Difficulty Level: Intermediate | Estimated Time: 2.0-4.0 hours
⚠️ Safety & Precautions
- ⚠️ Let the exhaust cool fully before starting; sensors thread into hot exhaust.
- ⚠️ Support your Palisade with jack stands; never rely only on a jack.
- ⚠️ Keep wiring away from the exhaust; melted wiring can cause misfires and shorts.
- ⚠️ If you unplug sensors with the key on, you may set extra codes.
- ⚠️ Battery disconnect is recommended to prevent accidental shorts.
🔧 Required Tools
You'll need the following tools for this repair:
- Safety glasses
- Nitrile gloves
- Wheel chocks
- Floor jack (rated 3-ton minimum)
- Jack stands (rated 3-ton minimum)
- 3/8" drive ratchet
- 3/8" drive torque wrench (10-80 ft-lbs range)
- 7/8" (22mm) oxygen sensor socket (specialty)
- 3/8" drive extension set (3", 6", 12")
- Breaker bar (3/8" or 1/2" drive)
- Trim clip removal tool
- Flathead screwdriver
- 10mm socket
- 12mm socket
- Penetrating oil
- OBD2 scan tool
🔩 Required Parts
HowToo sells all the parts you need for this repair:
- Upstream oxygen sensor (Sensor 1), Bank 1 - Qty: 1
- Upstream oxygen sensor (Sensor 1), Bank 2 - Qty: 1
- Downstream oxygen sensor (Sensor 2), Bank 1 - Qty: 1
- Downstream oxygen sensor (Sensor 2), Bank 2 - Qty: 1
- Anti-seize compound (oxygen-sensor safe) - Qty: 1
📋 Before You Begin
- Park on level ground, shift to Park, and apply the parking brake.
- Chock the rear wheels with wheel chocks.
- Open the hood and disconnect the negative battery cable using a 10mm socket.
- Raise the front of your Palisade with a floor jack and support it securely with jack stands.
- Take a quick photo of each connector first.
🔨 Step-by-Step Instructions
Follow these steps in order:
Step 1: Remove the lower engine cover (if equipped)
- Use a trim clip removal tool and flathead screwdriver to remove plastic clips.
- Use a 10mm socket to remove any small bolts holding the cover.
- Set the cover and clips aside so you don’t lose them.
Step 2: Locate all four oxygen sensors
- Find the upstream sensors (Sensor 1): these are on the exhaust before the catalytic converters (closer to the engine).
- Find the downstream sensors (Sensor 2): these are after the catalytic converters (further downstream).
- Trace each sensor’s wire to its connector so you unplug the correct one.
Step 3: Unplug the first oxygen sensor connector
- Release the locking tab on the connector by hand or with a flathead screwdriver.
- Separate the connector and move the harness away from the exhaust.
- Never pull on the wires—pull on the connector body.
Step 4: Loosen and remove the oxygen sensor
- Spray the sensor threads area with penetrating oil and wait 5-10 minutes.
- Install the 7/8" (22mm) oxygen sensor socket (specialty) over the sensor, and use a 3/8" drive ratchet with a 3/8" drive extension as needed.
- If it’s very tight, use a breaker bar for extra leverage.
- Once loose, spin the sensor out by hand and remove it.
Step 5: Install the new oxygen sensor
- Compare the old and new sensor (connector shape and wire length should match).
- If the new sensor threads are not pre-coated, apply a very light amount of anti-seize compound (oxygen-sensor safe) to the threads only.
- Thread the new sensor in by hand first to avoid cross-threading (damaging the threads).
- Tighten using the 7/8" (22mm) oxygen sensor socket (specialty) and a torque wrench: Torque to 44 Nm (32 ft-lbs).
Step 6: Reconnect the sensor wiring
- Plug the connector back in until it clicks.
- Make sure the harness is clipped back into its holders so it can’t touch the exhaust.
Step 7: Repeat for the remaining three sensors
- Repeat Steps 3 through 6 for the other upstream and downstream sensors.
- Use the 3/8" drive extension set to reach tight sensors.
- Do one sensor at a time to avoid mix-ups.
Step 8: Reinstall the lower engine cover
- Position the cover and reinstall clips using the trim clip removal tool.
- Reinstall bolts with a 10mm socket.
Step 9: Reconnect the battery
- Reconnect the negative battery cable using a 10mm socket.
✅ After Repair
- Start the engine and listen for exhaust leaks (ticking sounds) near the sensor areas.
- Use an OBD2 scan tool to clear stored codes and verify no codes return.
- Take a short test drive (10-15 minutes) and recheck for a check-engine light.
- Recheck that no wiring is touching the exhaust after the drive.
💰 DIY vs Shop Cost
Shop Cost: $600-$1,400 (parts + labor)
DIY Cost: $250-$900 (parts only)
You Save: $350-$500 by doing it yourself!
Shop labor rates vary but typically run $100-$150/hour. This repair takes a shop approximately 2-4 hours.
🎯 Ready to get started?
HowToo makes it easy: same-day/2-day shipping on every part, plus all the tools and specialty tools you need! Check out the parts and tools sections below to add everything to your cart.
Guide for Oxygen Sensor replace for these Hyundai vehicles
| Year Make Model | Sub Model | Engine | Body Style |
|---|---|---|---|
| 2024 Hyundai Palisade | - | V6 3.8L | - |
| 2023 Hyundai Palisade | - | V6 3.8L | - |
| 2022 Hyundai Palisade | - | V6 3.8L | - |
| 2021 Hyundai Palisade | - | V6 3.8L | - |
| 2020 Hyundai Palisade | - | V6 3.8L | - |