









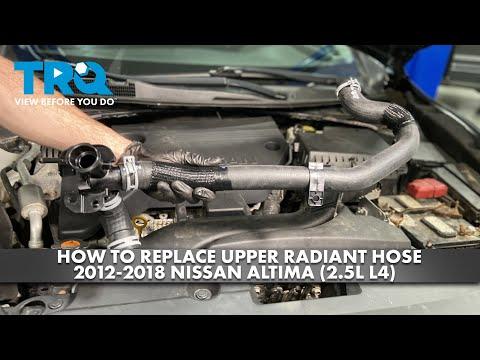






How to Replace a Radiator Hose on a 2017 Nissan Altima
Step-by-step coolant hose repair guide with tools, parts, safety tips, and bleeding instructions for 2002, 2003, 2004, 2005, 2006, 2007, 2008, 2009, 2010, 2011, 2012, 2013, 2014, 2015, 2016, 2017, 2018, 2019
How to Replace a Radiator Hose on a 2017 Nissan Altima
Step-by-step coolant hose repair guide with tools, parts, safety tips, and bleeding instructions for 2002, 2003, 2004, 2005, 2006, 2007, 2008, 2009, 2010, 2011, 2012, 2013, 2014, 2015, 2016, 2017, 2018, 2019


🔧 Altima - Radiator Hose Replacement
This repair replaces a leaking, swollen, cracked, or soft radiator hose on your Altima. The radiator hoses carry hot coolant between the engine and radiator, so replacing a bad hose helps prevent overheating and engine damage.
Assumption: This guide covers the upper or lower radiator hose replacement; steps call out the differences where needed.
Difficulty Level: Beginner | Estimated Time: 1-2 hours
⚠️ Safety & Precautions
- ⚠️ Work only when the engine is completely cold. Hot coolant can cause serious burns.
- ⚠️ Do not open the radiator cap while the engine is hot or warm.
- ⚠️ Coolant is poisonous to people and pets. Catch all coolant in a drain pan and wipe spills right away.
- ⚠️ Keep coolant away from painted surfaces and rinse spills with water.
- ⚠️ Disconnecting the battery is not normally required for this repair.
- ⚠️ If raising the front of the vehicle, support it with jack stands. Never rely on a floor jack alone.
🔧 Required Tools
You'll need the following tools for this repair:
- Safety glasses
- Nitrile gloves
- Drain pan 2-gallon minimum
- Flat-blade screwdriver
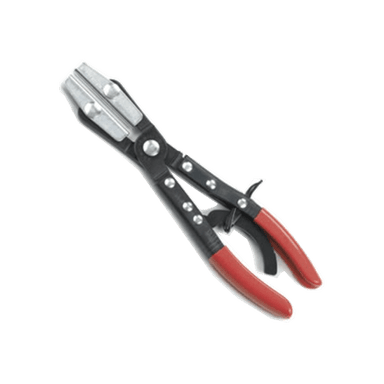
- Hose clamp pliers
- Slip-joint pliers
- Pick tool set
- 10mm socket
- Ratchet 3/8-inch drive
- Torque wrench 3/8-inch drive
- Funnel spill-free coolant fill kit (specialty)
- Floor jack rated 2-ton minimum
- Jack stands rated 2-ton minimum
- Wheel chocks
- Shop towels
🔩 Required Parts
HowToo sells all the parts you need for this repair:
- Radiator hose - Qty: 1
- Radiator hose clamps - Qty: 2
- Nissan-compatible blue long-life coolant premix 50/50 - Qty: 1 gallon
- Plastic splash shield clips - Qty: As needed
📋 Before You Begin
- 🅿️ Park your Altima on level ground and set the parking brake.
- 🧊 Let the engine sit until completely cold, preferably several hours.
- 🪵 Place wheel chocks behind the rear wheels.
- 🛞 If replacing the lower radiator hose, raise the front with a floor jack and support it with jack stands.
- 🧰 A spill-free coolant fill kit is a funnel system that helps remove air pockets while refilling the cooling system.
- ♻️ Have a sealed container ready for used coolant. Do not pour coolant onto the ground or into drains.
🔨 Step-by-Step Instructions
Follow these steps in order:
Step 1: Let the Cooling System Cool
- Put on safety glasses and nitrile gloves.
- Touch the upper radiator hose carefully with your hand. It must feel fully cool before continuing.
- Slowly loosen the radiator cap or coolant reservoir cap with a shop towel over it to release any leftover pressure.
- Cold engine only.
Step 2: Raise the Front If Needed
- If replacing the upper radiator hose, you usually do not need to raise the vehicle.
- If replacing the lower radiator hose, use a floor jack rated 2-ton minimum at the front center jacking point.
- Place jack stands rated 2-ton minimum under the front support points and gently lower the vehicle onto them.
- Keep wheel chocks behind the rear wheels.
Step 3: Remove the Lower Splash Shield If Needed
- For lower hose access, use a 10mm socket and ratchet 3/8-inch drive to remove the splash shield bolts.
- Use a flat-blade screwdriver or pick tool set to release plastic clips carefully.
- Set the shield and hardware aside in order.
- When reinstalling splash shield bolts later, tighten snugly by hand tool only. Typical small splash shield fasteners are Torque to 5-7 Nm (44-62 in-lbs).
Step 4: Drain Some Coolant
- Place a drain pan 2-gallon minimum under the radiator drain area or below the hose you are replacing.
- If using the radiator drain plug, open it carefully by hand or with a flat-blade screwdriver only if needed.
- Drain enough coolant so the level drops below the hose connection.
- If the drain plug is hard to access, leave it alone and expect coolant to spill when the hose is removed.
- Close the radiator drain plug snugly by hand. Do not overtighten plastic drain plugs.
Step 5: Release the Hose Clamps
- Use hose clamp pliers to squeeze the spring clamp tabs together.
- Slide the clamp several inches back onto the hose.
- If screw-style clamps are installed, use a flat-blade screwdriver to loosen them.
- Repeat this on both ends of the radiator hose.
- A spring clamp is the factory-style clamp that pinches tight using spring pressure.
Step 6: Remove the Old Radiator Hose
- Twist the hose by hand to break it loose from the fitting.
- If it is stuck, use a pick tool set carefully between the hose and metal/plastic fitting to loosen the seal.
- Do not gouge or pry hard on plastic radiator necks. They can crack.
- Pull the hose off and aim the open end into the drain pan 2-gallon minimum.
- Twist first, then pull.
Step 7: Inspect the Hose Connections
- Use shop towels to clean the radiator neck and engine-side hose fitting.
- Check for cracks, heavy corrosion, or broken plastic edges.
- Use a pick tool set gently to remove stuck rubber pieces if needed.
- If a plastic radiator neck is cracked, the radiator must be replaced before installing the hose.
Step 8: Install the New Radiator Hose
- Compare the new radiator hose to the old one for length, bends, and end size.
- Slide the new radiator hose clamps onto the hose before installing it.
- Push the hose fully onto both fittings until it seats past the raised bead on each fitting.
- Use hose clamp pliers to move spring clamps into their original positions behind the raised bead.
- If using screw-style clamps, tighten with a flat-blade screwdriver until secure, but do not crush the hose or plastic radiator neck.
Step 9: Reinstall the Splash Shield
- If removed, position the splash shield by hand.
- Install clips by hand and press them fully seated.
- Use a 10mm socket, ratchet 3/8-inch drive, and torque wrench 3/8-inch drive to tighten bolts.
- Tighten small splash shield bolts to Torque to 5-7 Nm (44-62 in-lbs).
Step 10: Refill the Cooling System
- Install the funnel spill-free coolant fill kit on the radiator fill neck or reservoir fill point, depending on access.
- Pour in Nissan-compatible blue long-life coolant premix 50/50 slowly.
- Squeeze the upper radiator hose by hand several times to help push air out.
- Fill until the coolant level stabilizes at the proper level.
- Install the cap by hand once the system is filled and air bubbles slow down.
Step 11: Bleed Air from the Cooling System
- Start the engine and let it idle with the heater set to full hot and fan on low.
- Watch the temperature gauge. It should rise normally and stay near the middle.
- Use the funnel spill-free coolant fill kit to keep coolant available as air bubbles come out.
- When the radiator fans cycle on and warm air blows from the vents, most air is out.
- Shut the engine off and let it cool fully before checking the level again.
Step 12: Final Coolant Level Check
- After the engine is fully cold, remove the cap carefully with a shop towel.
- Add Nissan-compatible blue long-life coolant premix 50/50 if the level is low.
- Fill the reservoir to the cold mark.
- Use shop towels to dry all hose connections so leaks are easy to spot.
✅ After Repair
- ✅ Let the engine idle and inspect both hose ends for leaks.
- ✅ Take a short 5-10 minute drive while watching the temperature gauge.
- ✅ Park, let the engine cool completely, then recheck coolant level.
- ✅ Reinspect the hose clamps after the first full heat cycle.
- ✅ Properly recycle used coolant at an approved fluid recycling location.
- ✅ If the temperature gauge rises above normal, stop driving and shut the engine off immediately.
💰 DIY vs Shop Cost
Shop Cost: $180-$350 (parts + labor)
DIY Cost: $35-$95 (parts only)
You Save: $145-$255 by doing it yourself!
Shop labor rates vary but typically run $100-$150/hour. This repair takes a shop approximately 0.8-1.5 hours.
🎯 Ready to get started?
HowToo makes it easy: same-day/2-day shipping on every part, plus all the tools and specialty tools you need! Check out the parts and tools sections below to add everything to your cart.