













How to Replace a Radiator Hose on a 2016 Ford F-150
Step-by-step instructions with tools, parts, safety tips, and cooling system refill guidance
How to Replace a Radiator Hose on a 2016 Ford F-150
Step-by-step instructions with tools, parts, safety tips, and cooling system refill guidance


🔧 Radiator Hose - Replacement
Replacing a radiator hose on your F-150 means draining some coolant, removing the old hose and clamps, then installing the new hose and refilling the cooling system. On the 3.5L EcoBoost, the hoses run tight around the front of the engine, so work slowly and keep an eye on nearby hot and sharp parts.
Difficulty Level: Intermediate | Estimated Time: 1.5-2.5 hours
⚠️ Safety & Precautions
- Let the engine cool completely before opening the cooling system. Hot coolant can cause severe burns.
- Do not remove the radiator cap or reservoir cap when the engine is hot.
- Use jack stands if you raise the truck. Never work under a truck supported only by a jack.
- Keep coolant away from pets and children. Used coolant is toxic.
- If the hose is near the fan shroud or accessory drive, keep hands clear of moving parts.
🔧 Required Tools
You'll need the following tools for this repair:
- Drain pan
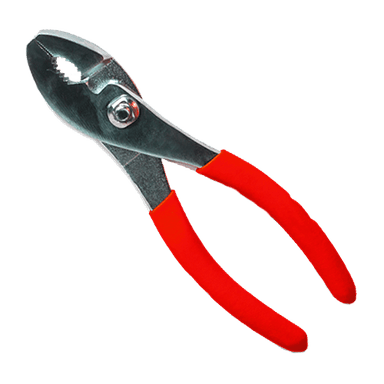
- Pliers
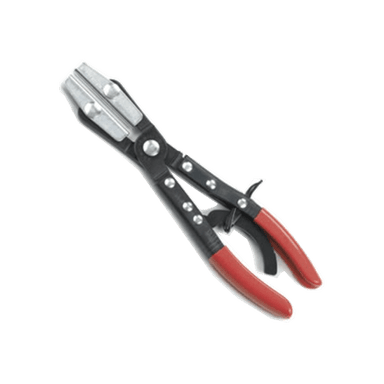
- Hose clamp pliers (specialty)
- Flat-blade screwdriver
- 10mm socket
- Ratchet
- Extensions
- Funnel
- Safety glasses
- Nitrile gloves
- Jack and jack stands
- Shop towels
🔩 Required Parts
HowToo sells all the parts you need for this repair:
- Radiator hose - Qty: 1
- Spring hose clamps - Qty: 2
- Ford-approved coolant - Qty: 1-2 gallons
- Distilled water - Qty: 1-2 gallons
📋 Before You Begin
- Park on level ground and let the engine cool fully.
- Set the parking brake.
- If the hose is on the lower radiator side, raise the front of the truck and support it with jack stands.
- Have a drain pan ready before opening the cooling system.
🔨 Step-by-Step Instructions
Follow these steps in order:
Step 1: Drain coolant to below the hose level
- Place the drain pan under the radiator.
- Open the radiator drain valve or remove the lower hose carefully if needed.
- Drain enough coolant so the hose you are replacing is below the coolant level.
- Work with a cold engine only.
Step 2: Remove access components if needed
- If the hose is hard to reach, remove the intake tube or nearby covers using a 10mm socket and ratchet.
- Set fasteners aside in order so they go back in the same place.
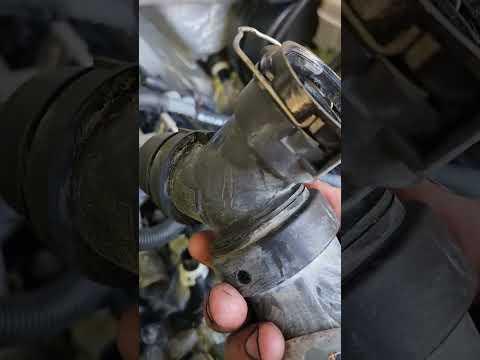
Step 3: Remove the old hose
- Use hose clamp pliers or pliers to compress the spring clamps.
- Slide the clamps back on the hose.
- Twist the hose gently to break it loose, then pull it off the fittings.
- If it is stuck, use a flat-blade screwdriver carefully to lift the hose edge.
- Do not pry on plastic necks.
Step 4: Inspect the fittings
- Check both hose ends for cracks, rust, or residue.
- Clean the fittings with a shop towel.
- Make sure the old hose did not leave rubber stuck to the pipe.
Step 5: Install the new hose
- Slide the clamps onto the new hose before installing it.
- Push the hose fully onto both fittings until it seats against the stop.
- Position the clamps in the same spot as the originals using hose clamp pliers or pliers.
- Make sure the hose is not twisted or rubbing on anything.
Step 6: Reassemble removed parts
- Reinstall any intake tube or covers using the 10mm socket and ratchet.
- Make sure all clips and fasteners are fully seated.
Step 7: Refill the cooling system
- Close the drain valve if it was opened.
- Use a funnel to refill with Ford-approved coolant mixed with distilled water if required by the coolant type.
- Fill the degas bottle to the proper mark.
- Fill slowly to reduce trapped air.
Step 8: Bleed air from the system
- Start the engine with the cap on and let it idle.
- Watch the coolant level and add more as it drops.
- Turn the heater to full hot and the blower on low.
- Let the engine reach operating temperature and check for bubbles.
- Install the cap securely once the level stabilizes.
Step 9: Check for leaks
- Inspect both hose ends, clamp areas, and the radiator for leaks.
- Shut the engine off and recheck the coolant level after it cools.
✅ After Repair
- Drive the truck short distance and watch the temperature gauge.
- Recheck coolant level the next day when the engine is cold.
- Look for dried coolant residue around the hose ends after a few heat cycles.
💰 DIY vs Shop Cost
Shop Cost: $180-$420 (parts + labor)
DIY Cost: $45-$140 (parts only)
You Save: $135-$280 by doing it yourself!
Shop labor rates vary but typically run $100-$150/hour. This repair takes a shop approximately 1.5-2.5 hours.
🎯 Ready to get started?
HowToo makes it easy: same-day/2-day shipping on every part, plus all the tools and specialty tools you need! Check out the parts and tools sections below to add everything to your cart.
Guide for Engine Coolant / Antifreeze replace for these Ford vehicles
| Year Make Model | Sub Model | Engine | Body Style |
|---|