














How to Replace a Radiator Hose on a 2013 Nissan Altima
Step-by-step coolant hose repair guide with tools, parts, safety tips, and leak checks for 2011, 2012, 2013, 2014, 2015, 2016, 2017, 2018
How to Replace a Radiator Hose on a 2013 Nissan Altima
Step-by-step coolant hose repair guide with tools, parts, safety tips, and leak checks for 2011, 2012, 2013, 2014, 2015, 2016, 2017, 2018


🔧 Altima - Radiator Hose Replacement
This repair replaces a cracked, leaking, swollen, or soft radiator hose on your Altima. The upper hose is usually easier to reach from above; the lower hose may require removing the lower splash shield and working from underneath.
Difficulty Level: Beginner to Intermediate | Estimated Time: 1-2 hours
⚠️ Safety & Precautions
- ⚠️ Work only when the engine is completely cold. Hot coolant can cause serious burns.
- ⚠️ Do not open the radiator cap or coolant reservoir cap when the engine is hot.
- ⚠️ Coolant is poisonous. Keep it away from children, pets, and the ground.
- ⚠️ If you lift your Altima, support it with jack stands. Never work under a vehicle held only by a jack.
- ⚠️ Battery disconnect is not required for this repair.
🔧 Required Tools
You'll need the following tools for this repair:
- 10mm socket
- Ratchet wrench 3/8-inch drive
- Flat-blade screwdriver 1/4-inch tip
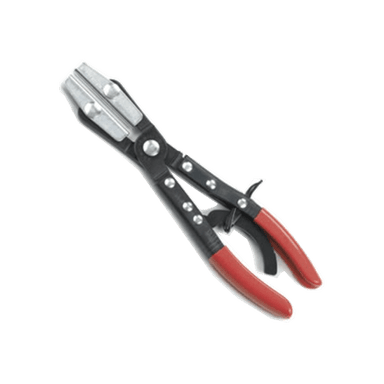
- Hose clamp pliers (specialty)
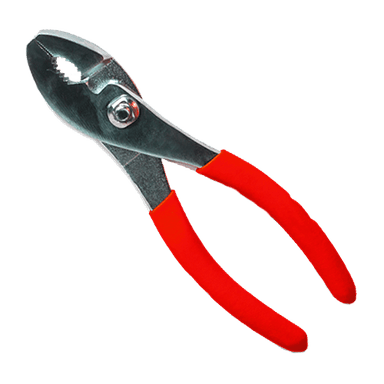
- Slip-joint pliers 8-inch
- Drain pan 2-gallon minimum
- Long-neck funnel
- Plastic trim clip remover
- Floor jack 2-ton minimum
- Jack stands 2-ton minimum
- Wheel chocks
- Shop towels
- Nitrile gloves
- Safety glasses
🔩 Required Parts
HowToo sells all the parts you need for this repair:
- Upper radiator hose - Qty: 1, if replacing upper hose
- Lower radiator hose - Qty: 1, if replacing lower hose
- Radiator hose clamps - Qty: 2 per hose
- Nissan-compatible blue long-life coolant 50/50 premix - Qty: 1-2 gallons
- Lower splash shield clips - Qty: As needed
📋 Before You Begin
- Park your Altima on level ground.
- Set the parking brake and place wheel chocks behind the rear wheels.
- Let the engine cool fully before touching any cooling system parts.
- If replacing the lower radiator hose, raise the front using a floor jack 2-ton minimum and support it with jack stands 2-ton minimum.
- A hose clamp is the metal band that squeezes the hose tight so coolant cannot leak.
🔨 Step-by-Step Instructions
Follow these steps in order:
Step 1: Confirm the Engine Is Cold
- Put on safety glasses and nitrile gloves.
- Touch the upper radiator hose by hand. It should feel cool and soft, not hot or pressurized.
- Slowly loosen the coolant reservoir cap by hand only after the engine is cold.
- Cold engine only.
Step 2: Access the Hose
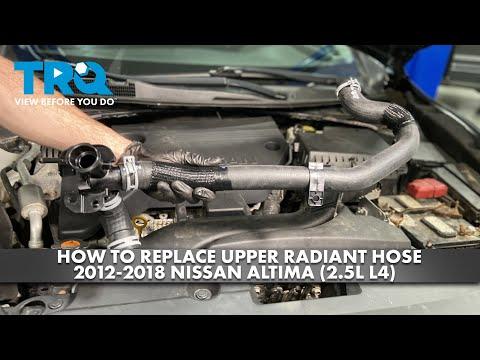
- For the upper hose, open the hood and locate the hose running from the radiator to the engine.
- Use a 10mm socket and ratchet wrench 3/8-inch drive to remove any small brackets or intake duct fasteners blocking access.
- For the lower hose, use a plastic trim clip remover to remove the lower splash shield clips.
- Use a 10mm socket and ratchet wrench 3/8-inch drive to remove any lower shield bolts.
Step 3: Drain Some Coolant
- Place a drain pan 2-gallon minimum under the radiator area.
- Use a flat-blade screwdriver 1/4-inch tip to carefully open the radiator drain plug if it is accessible.
- Drain enough coolant so the level drops below the hose you are replacing.
- If the drain plug is hard to reach, keep the drain pan 2-gallon minimum under the hose and expect coolant to spill when the hose comes off.
Step 4: Move the Hose Clamps Back
- Use hose clamp pliers (specialty) to squeeze the tabs on the factory spring clamp.
- A spring clamp is a factory clamp that opens when you squeeze its two metal ears together.
- Slide the clamp back onto the hose, away from the radiator or engine fitting.
- If worm-drive clamps are installed, loosen them with a flat-blade screwdriver 1/4-inch tip.
Step 5: Loosen the Old Hose
- Twist the hose by hand to break it loose from the fitting.
- If it is stuck, use slip-joint pliers 8-inch to gently twist the hose end.
- Do not pry hard against the radiator neck because it can crack.
- Twist first, pull second.
Step 6: Remove the Old Hose
- Pull the hose straight off by hand once it loosens.
- Keep the drain pan 2-gallon minimum under the hose to catch coolant.
- Use shop towels to clean spilled coolant from nearby parts.
Step 7: Clean the Hose Fittings
- Use shop towels to wipe the radiator and engine hose fittings clean.
- Check that no old rubber pieces are stuck to the fittings.
- Do not scrape plastic radiator fittings with sharp metal tools.
Step 8: Install the New Hose
- Compare the new hose with the old hose by hand before installing it.
- Slide the new clamps onto the hose before pushing the hose onto the fittings.
- Push the hose fully onto each fitting by hand until it passes the raised bead.
- The raised bead is the small lip on the fitting that helps keep the hose from sliding off.
Step 9: Position the Clamps
- Use hose clamp pliers (specialty) to move factory spring clamps into position.
- Place each clamp just behind the raised bead on the fitting.
- If using worm-drive clamps, tighten them with a flat-blade screwdriver 1/4-inch tip until snug.
- Torque to snug only; no OEM torque spec is used for spring clamps.
- Do not overtighten clamps on plastic radiator fittings.
Step 10: Refill the Cooling System
- Use a flat-blade screwdriver 1/4-inch tip to close the radiator drain plug if you opened it.
- Place a long-neck funnel into the coolant reservoir opening.
- Add Nissan-compatible blue long-life coolant 50/50 premix until the reservoir reaches the MAX line.
- Do not mix coolant types unless the coolant label specifically says it is compatible with Nissan blue coolant.
Step 11: Bleed Air from the Cooling System
- Start the engine and let it idle with the coolant reservoir cap off.
- Set the cabin heat to full hot and blower speed low.
- Watch the coolant level and add coolant through the long-neck funnel if the level drops.
- Wait until the upper radiator hose gets warm and the heater blows warm air.
- Install the coolant reservoir cap by hand.
Step 12: Reinstall the Splash Shield
- If removed, reinstall the lower splash shield using the plastic trim clip remover and your hands.
- Use a 10mm socket and ratchet wrench 3/8-inch drive to reinstall lower shield bolts.
- Torque small splash shield bolts to 5-7 Nm (44-62 in-lbs).
- Use the floor jack 2-ton minimum to lift slightly, remove the jack stands 2-ton minimum, and lower your Altima slowly.
✅ After Repair
- Let the engine reach normal operating temperature while watching the temperature gauge.
- Check both hose ends for leaks.
- Turn the engine off and let it cool completely.
- Recheck the coolant reservoir level and top off to the MAX line if needed.
- Take a short test drive, then inspect again for leaks or coolant smell.
- Dispose of used coolant at an approved recycling or service facility.
💰 DIY vs Shop Cost
Shop Cost: $180-$350 (parts + labor)
DIY Cost: $35-$120 (parts only)
You Save: $145-$230 by doing it yourself!
Shop labor rates vary but typically run $100-$150/hour. This repair takes a shop approximately 0.8-1.5 hours.
🎯 Ready to get started?
HowToo makes it easy: same-day/2-day shipping on every part, plus all the tools and specialty tools you need! Check out the parts and tools sections below to add everything to your cart.