















How to Replace a Radiator Hose on a 2013-2016 Ford Escape (Engine: Inline 4 2.0L)
Step-by-step cooling system guide with tools, coolant tips, bleeding, and leak checks
How to Replace a Radiator Hose on a 2013-2016 Ford Escape (Engine: Inline 4 2.0L)
Step-by-step cooling system guide with tools, coolant tips, bleeding, and leak checks for 2013, 2014, 2015, 2016


🔧 Escape - Radiator Hose Replacement
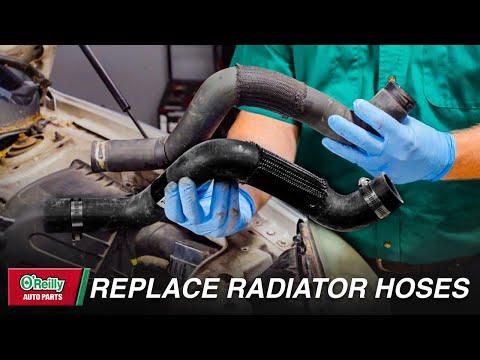
Replacing a radiator hose on your Escape means draining some coolant, removing the old hose, installing the new hose, and refilling/bleeding the cooling system. Radiator hoses carry hot coolant between the engine and radiator, so a cracked, swollen, leaking, or soft hose should be replaced before it causes overheating.
Difficulty Level: Beginner | Estimated Time: 1-2 hours
⚠️ Safety & Precautions
- ⚠️ Never open the coolant reservoir cap when the engine is hot. Hot coolant can spray out and cause burns.
- 🧤 Wear safety glasses and gloves. Coolant is slippery, toxic, and harmful to pets and children.
- 🌡️ Let the engine cool completely before starting. A safe wait is at least 2-3 hours after driving.
- 🔋 Battery disconnect is not required for this repair.
- 🧴 Use the correct Ford-approved coolant type. Mixing incompatible coolant can cause cooling system problems.
🔧 Required Tools
You'll need the following tools for this repair:
- Safety glasses
- Nitrile gloves
- Drain pan 2-gallon minimum
- Flat-blade screwdriver 1/4-inch
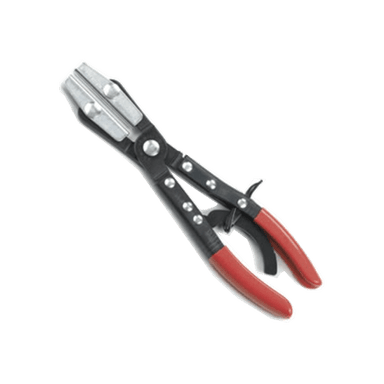
- Hose clamp pliers (specialty)
- Slip-joint pliers 10-inch
- Pick tool 90-degree
- Utility knife
- Funnel long-neck
- Clean shop towels
- Coolant tester (specialty)
- Torque wrench inch-pound 1/4-inch drive
- 8mm socket
- 1/4-inch drive ratchet
🔩 Required Parts
HowToo sells all the parts you need for this repair:
- Upper radiator hose - Qty: 1
- Lower radiator hose - Qty: 1, if replacing the lower hose
- Radiator hose clamps - Qty: 2 per hose, replace if weak, rusty, or damaged
- Ford-approved engine coolant concentrate or premix - Qty: 1-2 gallons
- Distilled water - Qty: 1 gallon, only if using coolant concentrate
📋 Before You Begin
- 🚗 Park your Escape on level ground and set the parking brake.
- ❄️ Make sure the engine is completely cold before opening the cooling system.
- 🧭 Identify the hose you are replacing. The upper radiator hose runs near the top of the radiator; the lower radiator hose runs near the bottom.
- 🪣 Place a drain pan under the radiator hose connection area before loosening any hose.
- 📌 A hose clamp plier is a tool that squeezes spring clamps evenly so you can slide them off the hose without fighting them.
- 📌 A pick tool is a small hooked tool used to gently break the stuck hose seal without damaging the metal or plastic fitting.
🔨 Step-by-Step Instructions
Follow these steps in order:
Step 1: Let the Engine Cool
- Use your hand carefully near the coolant reservoir area to confirm there is no heat coming from the engine bay.
- Do not remove the coolant reservoir cap until the system is cold.
- Cold engine only.
Step 2: Remove the Coolant Reservoir Cap
- Use a clean shop towel over the coolant reservoir cap.
- Turn the cap slowly by hand to release any leftover pressure.
- Remove the cap fully once you are sure there is no pressure release.
Step 3: Position the Drain Pan
- Use a 2-gallon drain pan and place it under the hose you are replacing.
- If replacing the upper radiator hose, place the pan below the upper hose connection at the radiator side.
- If replacing the lower radiator hose, place the pan below the lower radiator hose connection because more coolant will drain out.
Step 4: Loosen the Hose Clamps
- If your Escape has spring-style clamps, use hose clamp pliers to squeeze the clamp tabs together.
- Slide the clamp several inches back onto the hose with the hose clamp pliers.
- If worm-drive clamps are installed, use a 1/4-inch flat-blade screwdriver or 8mm socket with 1/4-inch ratchet to loosen the clamp screw.
- Do this at both ends of the hose.
Step 5: Break the Hose Free
- Use slip-joint pliers to gently twist the hose at the end connection.
- If the hose is stuck, use a 90-degree pick tool to carefully lift the hose edge and break the seal.
- Do not gouge or scratch the radiator neck or engine fitting.
- If the old hose will not come off, use a utility knife to carefully slice the hose lengthwise, then peel it off by hand.
- Protect plastic fittings.
Step 6: Remove the Old Hose
- Pull the old hose off both fittings by hand.
- Keep the drain pan in place because coolant may continue to drain.
- Use clean shop towels to wipe spilled coolant from nearby parts.
Step 7: Inspect the Hose Fittings
- Use a clean shop towel to wipe the radiator and engine hose fittings.
- Look for cracks, corrosion, broken plastic, or leftover hose material.
- Use the 90-degree pick tool only to remove stuck rubber pieces, not to scrape deeply.
Step 8: Compare the New Hose
- Place the new radiator hose next to the old hose by hand.
- Check that the bends, length, and end sizes match.
- Install the clamps onto the new hose before putting the hose on the vehicle.
Step 9: Install the New Hose
- Push the new hose fully onto the radiator fitting by hand until it seats past the raised bead on the fitting.
- Push the other end fully onto the engine-side fitting by hand.
- The raised bead is the small lip on the fitting that helps keep the hose from sliding off.
- Do not use grease or oil on the hose ends.
Step 10: Position and Tighten the Clamps
- Use hose clamp pliers to move spring clamps into their original clamp marks on the hose.
- Make sure each clamp sits behind the raised bead on the fitting.
- If using worm-drive clamps, use an 8mm socket with 1/4-inch ratchet to snug them evenly.
- If clamp torque is specified by the clamp manufacturer, use a 1/4-inch inch-pound torque wrench and 8mm socket. Typical worm-drive clamp torque is Torque to 30-40 in-lbs.
- Do not overtighten clamps on plastic radiator fittings.
Step 11: Refill the Cooling System
- Use a long-neck funnel in the coolant reservoir.
- Add Ford-approved premixed coolant until the level reaches the cold fill mark on the reservoir.
- If using concentrate, mix it with distilled water before filling, unless the bottle instructions say otherwise.
- Do not use tap water.
Step 12: Bleed Air from the Cooling System
- Leave the coolant reservoir cap off.
- Start the engine and let it idle.
- Set the cabin heater to full hot and the fan to low using the dashboard climate controls.
- Watch the coolant level in the reservoir and add coolant as the level drops.
- Let the engine warm up until the upper radiator hose gets warm and the cabin heater blows warm air.
- Install the coolant reservoir cap by hand once the level stabilizes near the cold fill range.
Step 13: Check for Leaks
- Use a flashlight and clean shop towels to inspect both hose ends.
- Look for dripping, wetness, or coolant smell around the clamps.
- If a worm-drive clamp seeps, use the 8mm socket and inch-pound torque wrench to tighten slightly, staying within Torque to 30-40 in-lbs.
Step 14: Final Coolant Level Check
- Shut the engine off and let it cool completely.
- Use safety glasses and gloves, then check the coolant reservoir level.
- Add coolant to the cold fill mark if needed using the long-neck funnel.
- Use a coolant tester to verify freeze protection after the system is fully mixed.
✅ After Repair
- ✅ Take a short 10-15 minute test drive while watching the temperature gauge.
- 🌡️ Stop driving immediately if the temperature gauge rises above normal or a coolant warning appears.
- 🔍 After the test drive, let the engine cool and inspect both hose ends again for leaks.
- 🧴 Recheck coolant level the next morning when the engine is cold.
- ♻️ Dispose of old coolant properly. Do not pour coolant onto the ground or into drains.
💰 DIY vs Shop Cost
Shop Cost: $180-$350 per hose replacement, parts + labor
DIY Cost: $35-$120, parts only depending on hose and coolant needed
You Save: $145-$230 by doing it yourself!
Shop labor rates vary but typically run $100-$150/hour. This repair takes a shop approximately 0.7-1.3 hours.
🎯 Ready to get started?
HowToo makes it easy: same-day/2-day shipping on every part, plus all the tools and specialty tools you need! Check out the parts and tools sections below to add everything to your cart.
Guide for Radiator Coolant Hose replace for these Ford vehicles
| Year Make Model | Sub Model | Engine | Body Style |
|---|---|---|---|
| 2016 Ford Escape | - | Inline 4 2.0L | - |
| 2015 Ford Escape | - | Inline 4 2.0L | - |
| 2014 Ford Escape | - | Inline 4 2.0L | - |
| 2013 Ford Escape | - | Inline 4 2.0L | - |