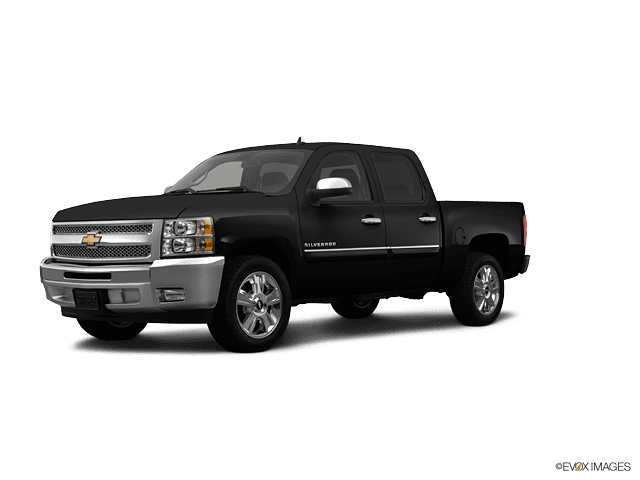


How to Install or Replace the Cabin Air Filter on a 2007-2013 Chevy Silverado 1500 (Engine: V8 6.0L)
Step-by-step Silverado 1500 retrofit and filter change guide with tools, parts, costs, and safety tips
How to Install or Replace the Cabin Air Filter on a 2007-2013 Chevy Silverado 1500 (Engine: V8 6.0L)
Step-by-step Silverado 1500 retrofit and filter change guide with tools, parts, costs, and safety tips for 2007, 2008, 2009, 2010, 2011, 2012, 2013
🔧 Silverado 1500 - Cabin Air Filter Check / Retrofit
Your Silverado 1500 from this generation did not come with a cabin air filter from the factory. Many owners add an aftermarket “retrofit” filter behind the glove box to clean the air coming through the vents.
Below I’ll show you how to confirm if you already have an added filter, and how to install a retrofit kit if you want one.
Difficulty Level: Beginner | Estimated Time: 0.5–1 hour
⚠️ Safety & Precautions
- 🛑 Work with the engine off, key out of the ignition, and the parking brake set.
- 🧤 Avoid turning the blower fan on while the glove box is removed to keep debris from blowing in your face.
- 👓 Wear safety glasses when cutting or snapping plastic behind the glove box so chips don’t get in your eyes.
- 🔋 Battery disconnect is not required for this job.
🔧 Required Tools
You'll need the following tools for this repair:
- 🧰 Phillips #2 screwdriver
- 🧰 Flathead screwdriver (small)
- 🧰 Trim removal tool (plastic)
- 🧰 Utility knife or hobby knife
- 🧰 Needle-nose pliers
- 🧰 Work light or flashlight
- 🧰 Mechanic gloves
- 🧰 Safety glasses
🔩 Required Parts
HowToo sells all the parts you need for this repair:
- 🔩 Cabin air filter retrofit kit for Silverado 1500 - Qty: 1
- 🔩 Cabin air filter element (if not included in kit) - Qty: 1
- 🔩 HVAC filter access door (if not included in kit) - Qty: 1
- 🔩 Small self-tapping screws - Qty: 2–4 (only if required by kit)
📋 Before You Begin
- Park on level ground, set the parking brake, and switch the ignition off.
- Move the front passenger seat all the way back to give yourself more space.
- Clear out the glove box (manual, papers, and anything loose).
- Have your work light ready; the area behind the glove box is dark.
🔨 Step-by-Step Instructions
Follow these steps in order:
Step 1: Open and lower the glove box
- Open the glove box door fully by hand.
- Use the Phillips #2 screwdriver to remove any visible screws along the top or sides of the glove box door if present (some trims just pop out without screws).
- On the right side of the glove box, gently unhook the small damper arm using the flathead screwdriver (small). This arm slows the glove box when it opens.
- Squeeze the sides of the glove box inward by hand so the plastic stops clear the dash opening, then let the glove box swing down toward the floor.
- Support the glove box so it doesn’t drop suddenly.
Step 2: Identify the HVAC housing and check for a filter door
- Use the work light or flashlight to look behind the lowered glove box.
- You will see a large black plastic box; this is the HVAC housing (the box that holds the heater core and A/C evaporator).
- Look on the front face of this box, roughly centered, for a small rectangular access door (about the size of a large phone).
- If you see a door with clips or a cover already installed, your truck has been retrofitted. Continue to Step 3A.
- If the surface is solid plastic with a raised rectangular outline and no opening, you do not have a filter door. Continue to Step 3B for retrofit cutting.
Step 3A: If a cabin filter door is already present (simple filter change)
- Use the flathead screwdriver (small) to gently pry the clips on the access door.
- Remove the door by hand and set it aside.
- Grip the old filter’s edge and slide it straight out. Use the needle-nose pliers if it’s stuck.
- Note the airflow arrow on the old filter; it should point downward (toward the floor) in most kits.
- Insert the new filter with the airflow arrow pointed in the same direction as the old one.
- Reinstall the access door by snapping it back into place by hand.
- Skip to Step 6 to reinstall the glove box.
Step 3B: Mark the opening for a retrofit kit
- Take the filter door or template from your cabin air filter retrofit kit.
- Hold the template against the flat area on the HVAC housing where the raised rectangular outline is molded.
- Use the utility knife or hobby knife to lightly trace the rectangle’s outline so you can see your cut line.
- Do not cut deeply on the first pass.
Step 4: Cut the opening in the HVAC housing
- Using the utility knife or hobby knife, carefully cut along the marked rectangle.
- Make several shallow passes instead of one deep cut to stay in control.
- Once the plastic is mostly cut through, wiggle the cut-out piece and break it free by hand or with needle-nose pliers.
- Remove any loose plastic shavings by hand or with a clean cloth.
- Keep debris out of the opening as much as possible.
Step 5: Install the filter and access door (retrofit)
- Slide the new cabin filter into the opening by hand, making sure the airflow arrow points downward (toward the floor) unless your kit says otherwise.
- Position the new plastic access door from the kit over the opening.
- If the door is a snap-in type, press it into place by hand until it clicks.
- If the kit uses screws, use the Phillips #2 screwdriver and the included small self-tapping screws to fasten the door. Do not overtighten; just snug.
Step 6: Reinstall the glove box
- Lift the glove box back up toward its normal position by hand.
- Squeeze the sides slightly so the stops go back inside the dash opening.
- Reconnect the small damper arm on the right side using your fingers or the needle-nose pliers if needed.
- If you removed screws, reinstall them with the Phillips #2 screwdriver until snug (no torque spec; just firm hand-tight).
- Open and close the glove box to make sure it moves smoothly.
✅ After Repair
- Turn the ignition to ON (engine can stay off) and run the blower fan at different speeds to ensure there are no unusual noises.
- Switch between vent modes (face, floor, defrost) and check for good airflow.
- If airflow feels very weak compared to before, make sure the filter is fully seated and not doubled over.
- Plan to replace the cabin filter about once a year in dusty areas like yours, or sooner if you notice odors or reduced airflow.
💰 DIY vs Shop Cost
Shop Cost: $80–$150 (parts + labor, including retrofit cutting if they do it)
DIY Cost: $20–$50 (retrofit kit and filter)
You Save: $60–$100 by doing it yourself!
Shop labor rates vary but typically run $100–$150/hour. This repair takes a shop approximately 0.5–1 hour.
🎯 Ready to get started?
HowToo makes it easy: same-day/2-day shipping on every part, plus all the tools and specialty tools you need! Check out the parts and tools sections above to add everything to your cart.
Guide for Cabin Air Filter replace for these Chevrolet vehicles
| Year Make Model | Sub Model | Engine | Body Style |
|---|---|---|---|
| 2013 Chevrolet Silverado 1500 | - | V8 4.8L | - |
| 2013 Chevrolet Silverado 1500 | - | V8 5.3L | - |
| 2013 Chevrolet Silverado 1500 | - | V8 6.0L | - |
| 2013 Chevrolet Silverado 1500 | - | V6 4.3L | - |
| 2013 Chevrolet Silverado 1500 | - | V8 6.2L | - |
| 2012 Chevrolet Silverado 1500 | - | V8 4.8L | - |
| 2012 Chevrolet Silverado 1500 | - | V8 5.3L | - |
| 2012 Chevrolet Silverado 1500 | - | V8 6.0L | - |
| 2012 Chevrolet Silverado 1500 | - | V6 4.3L | - |
| 2012 Chevrolet Silverado 1500 | - | V8 6.2L | - |
| 2011 Chevrolet Silverado 1500 | - | V8 4.8L | - |
| 2011 Chevrolet Silverado 1500 | - | V8 5.3L | - |
| 2011 Chevrolet Silverado 1500 | - | V8 6.0L | - |
| 2011 Chevrolet Silverado 1500 | - | V6 4.3L | - |
| 2011 Chevrolet Silverado 1500 | - | V8 6.2L | - |
| 2010 Chevrolet Silverado 1500 | - | V8 4.8L | - |
| 2010 Chevrolet Silverado 1500 | - | V8 5.3L | - |
| 2010 Chevrolet Silverado 1500 | - | V8 6.0L | - |
| 2010 Chevrolet Silverado 1500 | - | V6 4.3L | - |
| 2010 Chevrolet Silverado 1500 | - | V8 6.2L | - |
| 2009 Chevrolet Silverado 1500 | - | V8 4.8L | - |
| 2009 Chevrolet Silverado 1500 | - | V8 5.3L | - |
| 2009 Chevrolet Silverado 1500 | - | V8 6.0L | - |
| 2009 Chevrolet Silverado 1500 | - | V6 4.3L | - |
| 2009 Chevrolet Silverado 1500 | - | V8 6.2L | - |
| 2008 Chevrolet Silverado 1500 | - | V8 4.8L | - |
| 2008 Chevrolet Silverado 1500 | - | V8 5.3L | - |
| 2008 Chevrolet Silverado 1500 | - | V8 6.0L | - |
| 2008 Chevrolet Silverado 1500 | - | V6 4.3L | - |
| 2007 Chevrolet Silverado 1500 | - | V8 4.8L | - |
| 2007 Chevrolet Silverado 1500 | - | V8 5.3L | - |
| 2007 Chevrolet Silverado 1500 | - | V8 6.0L | - |
| 2007 Chevrolet Silverado 1500 | - | V6 4.3L | - |