









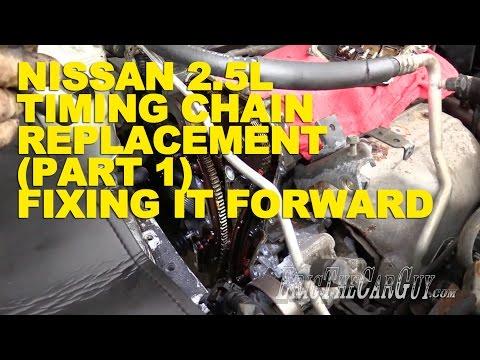



How to Diagnose Timing Belt vs Timing Chain on a 2017 Nissan Altima
Step-by-step guide to confirm no timing belt, inspect the drive belt, and service the timing chain for 2007, 2008, 2009, 2010, 2015, 2016, 2017
How to Diagnose Timing Belt vs Timing Chain on a 2017 Nissan Altima
Step-by-step guide to confirm no timing belt, inspect the drive belt, and service the timing chain for 2007, 2008, 2009, 2010, 2015, 2016, 2017


🔧 Altima - Timing Drive Inspection
Your Altima’s 2.5L engine does not use a timing belt. It uses a timing chain, which is inside the engine and is designed to last much longer than a belt.
There is no normal timing belt replacement service for your Altima. If you are hearing chain rattle, have cam/crank correlation codes, or the engine is out of time, this becomes an advanced timing chain repair.
Difficulty Level: Advanced | Estimated Time: 8-12 hours
⚠️ Safety & Precautions
- ⚠️ Do not attempt to “replace the timing belt” on your Altima because there is no timing belt fitted.
- ⚠️ Timing chain service requires removing engine covers, the crankshaft pulley, front timing cover, and setting exact camshaft/crankshaft timing.
- ⚠️ Incorrect timing can cause poor running, no-start, or severe engine damage.
- ⚠️ Disconnect the negative battery cable before any timing cover or starter-area work.
- ⚠️ Support the engine properly before removing any engine mount components.
🔧 Required Tools
You'll need the following tools for this repair:
- 10mm socket
- 12mm socket
- 14mm socket
- 19mm socket
- 27mm socket
- 3/8-inch ratchet
- 1/2-inch breaker bar
- Torque wrench 10-150 ft-lbs
- Crankshaft pulley holding tool (specialty)
- Harmonic balancer puller (specialty)
- Engine support bar (specialty)
- Plastic trim clip remover
- Flat-blade screwdriver
- Gasket scraper plastic
- Drain pan 2-gallon
- Floor jack rated 2-ton minimum
- Jack stands rated 2-ton minimum
- Wheel chocks
- Safety glasses
- Nitrile gloves
🔩 Required Parts
HowToo sells all the parts you need for this repair:
- No timing belt required - Qty: 0
- Timing chain kit - Qty: 1
- Front timing cover sealant - Qty: 1
- Crankshaft front oil seal - Qty: 1
- Engine oil - Qty: 5 quarts
- Oil filter - Qty: 1
- Coolant - Qty: As needed
📋 Before You Begin
- Park your Altima on level ground and set the parking brake.
- Let the engine cool completely before working near the timing cover or cooling system.
- Disconnect the negative battery cable using a 10mm socket.
- A timing chain is a metal chain inside the engine that keeps the crankshaft and camshafts synchronized.
- A harmonic balancer is the crankshaft pulley on the front of the engine; it must be removed for timing cover access.
- This is not a beginner-friendly repair. If your goal is routine maintenance, you do not need to replace a timing belt on this engine.
🔨 Step-by-Step Instructions
Follow these steps in order:
Step 1: Confirm There Is No Timing Belt
- Open the hood and look at the passenger side of the engine.
- Your Altima’s 2.5L engine uses an internal timing chain, not an external rubber timing belt.
- No timing belt cover or belt replacement interval applies to this engine.
- Stop here for routine belt maintenance.
Step 2: Inspect the Accessory Drive Belt Instead
- Use a flashlight if available and inspect the visible rubber belt on the front/passenger side of the engine.
- This visible belt is the accessory drive belt, sometimes called the serpentine belt.
- Look for cracks, missing ribs, glazing, fraying, or squealing noise.
- If this is the belt you meant, it can be replaced separately without opening the engine.
Step 3: Only Continue If Diagnosing Timing Chain Failure
- Timing chain replacement should only be done for confirmed symptoms such as chain rattle, timing-related trouble codes, oil-pressure-related guide damage, or verified timing misalignment.
- Use a scan tool before disassembly if the check engine light is on.
- Common timing-related codes may include camshaft/crankshaft correlation faults.
Step 4: Prepare for Timing Chain Service
- Use a 10mm socket to disconnect the negative battery cable.
- Use wheel chocks behind the rear wheels.
- Use a floor jack rated 2-ton minimum to lift the front of the vehicle.
- Place the vehicle securely on jack stands rated 2-ton minimum.
- Wear safety glasses and nitrile gloves.
Step 5: Remove Upper Engine Covers and Access Panels
- Use a 10mm socket to remove the plastic engine cover fasteners if equipped.
- Use a plastic trim clip remover to remove splash shield clips under the front of the vehicle.
- Use a 10mm socket to remove lower splash shield bolts.
Step 6: Drain Fluids as Needed
- Place a drain pan 2-gallon under the engine.
- Drain engine oil before timing cover removal.
- Drain coolant if any coolant passages or hoses must be opened during access.
Step 7: Support the Engine
- Install an engine support bar across the upper body structure.
- An engine support bar holds the engine from above when an engine mount is removed.
- Do not rely on a floor jack alone to hold the engine during mount removal.
Step 8: Remove the Crankshaft Pulley
- Use a crankshaft pulley holding tool to keep the pulley from turning.
- Use a 27mm socket with a 1/2-inch breaker bar to loosen the crankshaft pulley bolt.
- Use a harmonic balancer puller to remove the pulley if it does not slide off by hand.
- Do not pry against the timing cover sealing surface.
Step 9: Remove the Front Timing Cover
- Use 10mm socket, 12mm socket, and 14mm socket as needed to remove front cover bolts.
- Keep bolts organized by length and location.
- Use a plastic gasket scraper to separate old sealant after the cover is removed.
- Do not gouge the aluminum sealing surfaces.
Step 10: Set Engine to Top Dead Center
- Use a 27mm socket on the crankshaft bolt location to rotate the engine by hand.
- Top Dead Center means piston number 1 is at the top of its compression stroke.
- Align the crankshaft and camshaft timing marks exactly before removing the chain.
- If marks do not line up, stop and verify timing before disassembly.
Step 11: Replace the Timing Chain Components
- Use the correct sockets to remove the timing chain tensioner, guides, and chain.
- The tensioner is the spring/oil-pressure-loaded part that keeps the chain tight.
- Install the new chain, guides, and tensioner from the timing chain kit.
- Make sure all colored chain links align with the camshaft and crankshaft timing marks.
- Use a torque wrench 10-150 ft-lbs for all fasteners according to the included service specifications.
Step 12: Recheck Timing Before Closing the Engine
- Use a 27mm socket to rotate the crankshaft two full turns by hand.
- Stop immediately if you feel hard resistance.
- Recheck that the camshaft and crankshaft timing marks return to the correct positions.
- Hand-rotate first, never use the starter.
Step 13: Reseal and Reinstall the Timing Cover
- Use a plastic gasket scraper to clean all old sealant from the engine and cover.
- Apply front timing cover sealant in the correct bead pattern.
- Install a new crankshaft front oil seal.
- Use a torque wrench 10-150 ft-lbs to tighten cover bolts in sequence.
Step 14: Reinstall Removed Components
- Use the same sockets used during removal to reinstall mounts, pulley, covers, and splash shields.
- Use a torque wrench 10-150 ft-lbs on engine mount and crankshaft pulley fasteners.
- Do not start the engine until oil and coolant have been refilled.
Step 15: Refill Fluids and Reconnect Battery
- Install the new oil filter by hand until the gasket contacts, then tighten per filter instructions.
- Refill engine oil with the correct amount.
- Refill coolant if drained.
- Use a 10mm socket to reconnect the negative battery cable.
✅ After Repair
- Start the engine and listen for abnormal rattling, knocking, or scraping.
- Check for oil leaks around the front timing cover and crankshaft seal.
- Check coolant level after the engine reaches operating temperature and cools back down.
- Clear any stored trouble codes with a scan tool if timing-related repairs were performed.
- If the engine runs rough or sets timing codes, shut it off and recheck mechanical timing.
💰 DIY vs Shop Cost
Shop Cost: $1,200-$2,200 USD equivalent (parts + labor)
DIY Cost: $250-$650 USD equivalent (parts only)
You Save: $950-$1,550 USD equivalent by doing it yourself!
Shop labor rates vary but typically run $100-$150/hour. This repair takes a shop approximately 8-12 hours.
🎯 Ready to get started?
HowToo makes it easy: same-day/2-day shipping on every part, plus all the tools and specialty tools you need! Check out the parts and tools sections below to add everything to your cart.