


How to Change Transmission Fluid on a 2019 Ford Escape (Step-by-Step DIY)
Complete DIY drain-and-fill guide with tools, parts list, torque specs, safety tips, and fluid level procedure
How to Change Transmission Fluid on a 2019 Ford Escape (Step-by-Step DIY)
Complete DIY drain-and-fill guide with tools, parts list, torque specs, safety tips, and fluid level procedure
🔧 Escape - Transmission Fluid Drain & Fill
You’ll be doing a drain-and-fill service on the automatic transmission. This refreshes a portion of the old fluid and helps protect the transmission from wear and overheating.
Difficulty Level: Intermediate | Estimated Time: 2–3 hours
⚠️ Safety & Precautions
- ⚠️ Work only on a completely level, solid surface so fluid level is accurate and the vehicle is stable.
- ⚠️ Always support the front of your Escape with jack stands; never rely only on a floor jack.
- ⚠️ Transmission fluid can be very hot; let the vehicle cool until fluid is warm, not scalding.
- ⚠️ Keep the engine off whenever you are under the vehicle.
- ⚠️ Use only MERCON ULV automatic transmission fluid; other fluids can damage the transmission.
- ⚠️ Avoid getting dirt into the fill opening; contamination can cause shifting problems.
- ⚠️ Battery disconnect is not required for this job.
🔧 Required Tools
You'll need the following tools for this repair:
- 🛠️ Floor jack (rated 3-ton minimum)
- 🛠️ Jack stands (rated 3-ton minimum) - Qty: 2–4
- 🛠️ Wheel chocks
- 🛠️ Metric socket set (8mm–19mm)
- 🛠️ 3/8" drive ratchet
- 🛠️ 3/8" drive torque wrench (5–80 ft-lbs range)
- 🛠️ Torx T30 bit
- 🛠️ Torx T40 bit
- 🛠️ Hex bit set (5mm–10mm)
- 🛠️ Long-nose funnel with hose (for transmission filling)
- 🛠️ Fluid transfer pump (hand or drill type)
- 🛠️ Large drain pan (at least 10-quart capacity)
- 🛠️ Shop rags or paper towels
- 🛠️ Safety glasses
- 🛠️ Nitrile gloves
- 🛠️ OBD-II scan tool with live data (specialty)
- 🛠️ Infrared thermometer (specialty)
- 🛠️ Flat-blade screwdriver (medium)
- 🛠️ Plastic trim tool set
🔩 Required Parts
HowToo sells all the parts you need for this repair:
- 🧩 MERCON ULV automatic transmission fluid - Qty: 5–6 quarts (drain & fill)
- 🧩 Transmission pan drain plug gasket or sealing washer - Qty: 1
- 🧩 Transmission level plug sealing washer - Qty: 1
- 🧩 Brake cleaner spray - Qty: 1
- 🧩 Absorbent floor pads or cardboard - Qty: as needed
📋 Before You Begin
- Park your Escape on a flat, level surface. Set the parking brake and chock the rear wheels.
- Drive the vehicle for 10–15 minutes to warm the transmission, then let it sit 15–20 minutes so the fluid is warm, not burning hot.
- Make sure you have an OBD-II scan tool that can read transmission fluid temperature. This is needed to set the correct fluid level.
- Gather all tools and parts before lifting the vehicle to avoid climbing under and out repeatedly.
🔨 Step-by-Step Instructions
Follow these steps in order:
Step 1: Safely raise and support the vehicle
- Place wheel chocks behind the rear tires.
- Use the floor jack to lift the front of your Escape at the front jacking point or subframe (check your owner’s manual illustration).
- Position jack stands under the recommended front support points and slowly lower the vehicle onto them.
- Confirm the vehicle is stable by gently rocking it by hand.
Step 2: Remove the lower engine splash shield
- Place a piece of cardboard or pads under the transmission area to catch spills.
- Use an 8mm socket and Torx T30 bit with your ratchet to remove the bolts and screws holding the plastic splash shield under the engine and transmission.
- Lower the shield and set it aside.
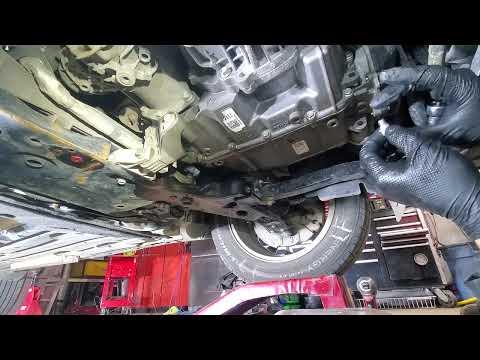
Step 3: Identify the transmission drain and level plugs
- Locate the transmission at the driver side of the engine bay, extending under the vehicle.
- From underneath, identify:
- The drain plug on the transmission pan bottom.
- The level check plug on the side of the transmission case or in a recessed standpipe fitting on the pan (small plug, usually hex or Torx).
- Wipe the area clean before opening plugs.
Step 4: Crack the fill point on top
- Open the hood.
- Look down at the transmission; there is typically a plastic or metal cap or plug on the top of the transmission used as the fill point.
- Use a flat-blade screwdriver or Torx/hex bit (depending on your cap type) to loosen the fill cap but do not remove it completely yet. This ensures the transmission can vent while draining.
Step 5: Drain the old transmission fluid
- Position the drain pan directly under the transmission drain plug.
- Use the appropriate socket or hex bit with your ratchet to slowly loosen the drain plug.
- Finish removing the plug by hand and let the fluid drain completely into the pan. This can take 10–15 minutes.
- Inspect the drain plug for metal particles; a light “sludge” paste is normal, chunks are not.
- Clean the plug with a rag and brake cleaner.
Step 6: Reinstall the drain plug
- Install a new drain plug gasket or sealing washer on the drain plug.
- Thread the drain plug in by hand to avoid cross-threading.
- Use your torque wrench and correct socket/bit to tighten the drain plug to 20 Nm (15 ft-lbs).
- Do not overtighten; the pan threads are soft.
Step 7: Measure the drained fluid (optional but helpful)
- Pour the used fluid from the drain pan into an empty, marked container using a funnel.
- Note how many liters or quarts came out. This helps you know roughly how much new fluid to add back.
Step 8: Add new transmission fluid from the top
- At the fill point on top of the transmission, remove the fill cap fully.
- Insert the long-nose funnel with hose or attach a fluid transfer pump hose to the fill opening.
- Slowly add fresh MERCON ULV fluid:
- Start by adding approximately the same amount you measured coming out (usually 4–5 quarts for a drain & fill).
- Reinstall the fill cap finger-tight for now to keep dirt out.
Step 9: Prepare to set fluid level at correct temperature
- Reconnect anything you removed under the hood so nothing can hit belts or fans.
- With the vehicle still safely on jack stands and in Park, start the engine.
- Connect your OBD-II scan tool to the diagnostic port under the dash and select live data.
- Find the parameter for Transmission Fluid Temperature on the scan tool.
- Let the engine idle until transmission fluid temperature reaches about 30–40°C (86–104°F).
- With your foot on the brake and parking brake applied, move the shifter slowly through all gears (P-R-N-D-S if equipped), pausing 3 seconds in each, then return to Park. This helps fill all internal passages.
Step 10: Check and adjust fluid level via level plug
- Leave the engine idling in Park with the parking brake set and wheels chocked.
- Go under the vehicle carefully; stay clear of rotating parts.
- Place the drain pan under the transmission level check plug.
- Use the correct Torx or hex bit with your ratchet to slowly loosen and remove the level check plug.
- Observe:
- If fluid drips in a thin, steady stream, the level is correct at this temperature.
- If no fluid comes out, the level is low; add more fluid from the top fill point in small amounts (about 0.25 quart at a time), waiting 30–60 seconds, until fluid just begins to run out of the level hole.
- If fluid pours out heavily, too much fluid was added; let it drain until it slows to a light stream.
- Level is correct when warm fluid barely dribbles from the level hole.
Step 11: Reinstall the level check plug
- Once the fluid has slowed to a gentle drip, install a new sealing washer on the level plug if required.
- Thread the level plug in by hand.
- Use your torque wrench and correct bit to tighten the plug to 8–10 Nm (71–89 in-lbs).
- Shut off the engine.
Step 12: Reinstall the splash shield and lower the vehicle
- Use brake cleaner and rags to clean any spilled fluid from the transmission, pan, and surrounding areas so you can spot leaks later.
- Reinstall the lower splash shield using the 8mm socket and Torx T30 bit.
- Tighten the shield fasteners snugly but not overly tight, about 5–7 Nm (44–62 in-lbs) if using a torque wrench.
- Use the floor jack to lift the vehicle slightly, remove the jack stands, and lower your Escape to the ground.
Step 13: Final checks and cleanup
- With the vehicle on the ground, start the engine again and let it idle for a few minutes.
- Check under the vehicle for any signs of leaks at the drain plug or level plug.
- Turn the engine off, remove the key, and clean any remaining spilled fluid.
- Pour the used fluid into sealed containers for proper recycling or disposal.
✅ After Repair
- Take your Escape for a gentle 10–15 minute drive. Shift through all gears and note how it feels.
- Park on level ground, set the brake, and inspect underneath for any new fluid leaks.
- If you feel harsh shifts or slipping, recheck fluid level (same temperature procedure) and inspect for leaks.
- Plan to repeat this drain-and-fill again in 10,000–15,000 miles if the fluid was very dirty; each service replaces more of the old fluid.
💰 DIY vs Shop Cost
Shop Cost: $260–$400 (parts + labor)
DIY Cost: $80–$130 (fluid + small supplies)
You Save: $130–$320 by doing it yourself!
Shop labor rates vary but typically run $100–$150/hour. This repair takes a shop approximately 1.5–2.0 hours.
🎯 Ready to get started?
HowToo makes it easy: same-day/2-day shipping on every part, plus all the tools and specialty tools you need! Check out the parts and tools sections above to add everything to your cart.
