









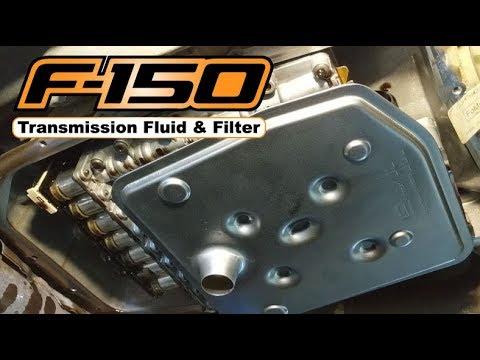







How to Change Transmission Fluid on a 2015 Ford F-150
Step-by-step drain and refill guide with tools, parts, torque specs, and safety tips for 2011, 2012, 2013, 2014, 2015, 2016, 2017, 2018, 2019
How to Change Transmission Fluid on a 2015 Ford F-150
Step-by-step drain and refill guide with tools, parts, torque specs, and safety tips for 2011, 2012, 2013, 2014, 2015, 2016, 2017, 2018, 2019


🔧 Transmission Fluid - Drain & Refill
Your F-150 uses a sealed 6-speed automatic transmission with no dipstick. A proper fluid service means draining the pan, replacing the filter if you are doing a full service, then refilling and checking the level at the correct fluid temperature.
Difficulty Level: Intermediate | Estimated Time: 2-3 hours
⚠️ Safety & Precautions
- Work on level ground and keep the parking brake set.
- Use jack stands. Never rely on a jack alone.
- Transmission fluid can be hot. Let the truck cool before draining.
- The level must be checked at the correct transmission temperature using a scan tool or temperature display.
- Do not overfill. Overfilled transmission fluid can cause shifting problems and leaks.
- No battery disconnect is required for this service.
🔧 Required Tools
You'll need the following tools for this repair:
- Floor jack (rated 3-ton minimum)
- Jack stands (rated for truck weight)
- Wheel chocks
- Drain pan
- Ratchet
- 8mm socket
- 10mm socket
- Torx T40 socket
- Torque wrench
- Fluid transfer pump
- Scan tool or OBD-II scan app with transmission temperature data
- Trim clip tool
- Safety glasses
- Nitrile gloves
- Shop towels
- Funnel
🔩 Required Parts
HowToo sells all the parts you need for this repair:
- Automatic transmission fluid (MERCON LV) - Qty: 8 quarts for drain and refill; up to 13 quarts for full service
- Transmission filter - Qty: 1
- Transmission pan gasket - Qty: 1
- Transmission pan drain plug seal - Qty: 1
📋 Before You Begin
- Park on a level surface.
- Set the parking brake and chock the rear wheels.
- Raise the truck safely and support it on jack stands if you need more room under the transmission pan.
- Have the new fluid ready before you start. You must fill the transmission before checking level.
- If your truck has a skid plate, remove it first.
🔨 Step-by-Step Instructions
Follow these steps in order:
Step 1: Remove the skid plate and access shields
- Use the 8mm socket or 10mm socket to remove the skid plate or lower splash shield, if equipped.
- Set the hardware aside in order.
Step 2: Drain the transmission fluid
- Place the drain pan under the transmission pan.
- Use the Torx T40 socket to remove the drain plug, if equipped.
- Let the fluid drain completely.
- Expect dark fluid on higher-mileage trucks.
Step 3: Remove the transmission pan
- Use the 10mm socket to loosen the pan bolts evenly.
- Leave a few bolts threaded in one side, then lower the pan carefully.
- Drain the remaining fluid into the drain pan.
Step 4: Replace the filter
- Use your hand or a trim clip tool to remove the old transmission filter.
- Install the new filter until it seats fully.
- Make sure the old filter seal comes out with the filter.
Step 5: Clean and reinstall the pan
- Clean the pan and magnets with shop towels and fresh fluid.
- Install the new transmission pan gasket.
- Reinstall the pan and hand-start all bolts.
- Use the torque wrench and 10mm socket to tighten the pan bolts evenly.
- Torque to 12 Nm (106 in-lbs).
Step 6: Refill with MERCON LV fluid
- Remove the transmission fill plug.
- Use the fluid transfer pump and funnel to add MERCON LV fluid.
- Add fluid slowly until it begins to reach the proper level-check point.
Step 7: Start the engine and circulate fluid
- Start the engine with the parking brake set.
- Use the scan tool or OBD-II scan app with transmission temperature data to monitor transmission fluid temperature.
- With your foot on the brake, move the shifter through each gear position, pausing a few seconds in each.
- Return the shifter to Park.
Step 8: Set the final fluid level
- With the engine idling and the transmission at the correct fluid temperature, remove the level/check plug.
- Add fluid through the fill opening with the fluid transfer pump until a small steady drip comes from the level port.
- Install the check plug and fill plug.
- Torque to 35 Nm (26 ft-lbs) for the plug, unless your plug marking states otherwise.
- Use only the specified fluid.
Step 9: Reinstall shields and lower the truck
- Reinstall the skid plate or splash shield with the 8mm socket or 10mm socket.
- Lower the truck off the jack stands.
✅ After Repair
- Test drive the truck for 10-15 minutes.
- Check for leaks at the pan, drain plug, and fill plug.
- Recheck the fluid level if shifting feels abnormal or if you had to add a large amount.
- Reset your service reminder if you use one.
💰 DIY vs Shop Cost
Shop Cost: $250-$450 (parts + labor)
DIY Cost: $90-$180 (parts only)
You Save: $160-$270 by doing it yourself!
Shop labor rates vary but typically run $100-$150/hour. This repair takes a shop approximately 2-3 hours.
🎯 Ready to get started?
HowToo makes it easy: same-day/2-day shipping on every part, plus all the tools and specialty tools you need! Check out the parts and tools sections below to add everything to your cart.