


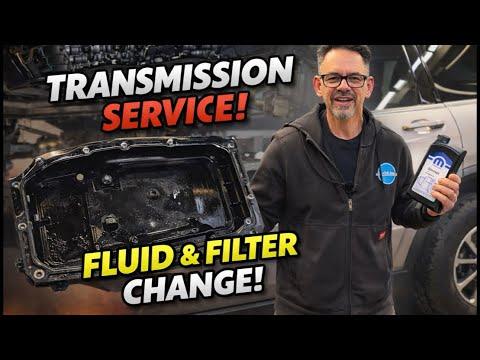


How to Change Transmission Fluid on a 2014-2021 Jeep Grand Cherokee (Engine: V8 5.7L)
Step-by-step sealed 8-speed ATF service with pan/filter, tools, fluid level, and torque specs
How to Change Transmission Fluid on a 2014-2021 Jeep Grand Cherokee (Engine: V8 5.7L)
Step-by-step sealed 8-speed ATF service with pan/filter, tools, fluid level, and torque specs for 2014, 2015, 2016, 2017, 2018, 2019, 2020, 2021
🔧 Grand Cherokee - Automatic Transmission Fluid Service
This service replaces the automatic transmission fluid by removing the transmission pan, replacing the integrated pan/filter assembly, and refilling with the correct fluid. Your Grand Cherokee uses a ZF-style 8-speed automatic transmission with no dipstick, so fluid level must be set from underneath at the correct fluid temperature.
Difficulty Level: Advanced | Estimated Time: 2-4 hours
⚠️ Safety & Precautions
- ⚠️ The vehicle must be lifted level and supported securely; never work under a vehicle held only by a jack.
- ⚠️ Transmission fluid can be hot enough to burn skin. Let the exhaust and transmission cool before starting.
- ⚠️ The engine must run during the final fluid-level check, so keep hands, hair, and clothing away from rotating parts and hot exhaust.
- ⚠️ This transmission has no dipstick. Overfilling or underfilling can cause shifting problems or transmission damage.
- ⚠️ Use only fluid that meets the required Mopar/ZF 8-speed automatic transmission fluid specification.
- ⚠️ Battery disconnect is not normally required for this service.
🔧 Required Tools
You'll need the following tools for this repair:
- Floor jack (rated 3-ton minimum)
- Jack stands (rated 3-ton minimum)
- Wheel chocks
- Safety glasses
- Nitrile gloves
- Drain pan (10-quart minimum)
- 8mm socket
- 10mm socket
- 13mm socket
- Ratchet
- Torque wrench (inch-pound)
- Torque wrench (foot-pound)
- Fluid transfer pump (specialty)
- OBD scan tool with live transmission temperature data (specialty)
- Infrared thermometer
- Plastic trim tool
- Shop towels
- Brake cleaner
🔩 Required Parts
HowToo sells all the parts you need for this repair:
- Automatic transmission pan/filter assembly - Qty: 1
- Automatic transmission fluid meeting Mopar/ZF 8-speed specification - Qty: 7-9 quarts
- Transmission pan bolts - Qty: 1 set
- Transmission fill plug seal - Qty: 1
- Transmission drain plug seal - Qty: 1
📋 Before You Begin
- Park your Grand Cherokee on a flat, level surface.
- Apply the parking brake and place wheel chocks behind the rear wheels.
- Lift the vehicle with a floor jack and support it level on jack stands.
- A scan tool is required because it reads transmission fluid temperature from the vehicle computer.
- A fluid transfer pump is a hand pump used to push new fluid into the transmission fill hole from below.
- Confirm the vehicle stays level while raised. This is critical for the correct fill level.
- Do not start this job unless you can safely run the engine while the vehicle is raised and level.
🔨 Step-by-Step Instructions
Follow these steps in order:
Step 1: Raise and Secure the Vehicle
- Use a floor jack to lift your Grand Cherokee at the approved lift points.
- Place jack stands under the approved support points.
- Use wheel chocks to keep the vehicle from moving.
- Gently shake the vehicle by hand to confirm it is stable before going underneath.
- Level height matters for filling.
Step 2: Remove the Lower Shield
- Put on safety glasses and nitrile gloves.
- Use an 8mm socket, 10mm socket, or plastic trim tool as needed to remove the lower splash shield fasteners.
- Lower the shield and set it aside.
- Keep the fasteners organized so they go back into the same locations.
Step 3: Find the Transmission Fill and Drain Plugs
- Use a shop towel to clean around the transmission pan area.
- Identify the drain plug at the bottom of the pan.
- Identify the fill plug on the side of the transmission/pan area.
- Always loosen the fill plug first. This prevents draining the fluid and then discovering you cannot refill it.
- Fill plug first, always.
Step 4: Loosen the Fill Plug
- Place a drain pan under the transmission.
- Use the correct socket from your tool set, commonly an 8mm socket or 10mm socket depending on plug style, to loosen the fill plug.
- Do not fully remove it yet unless the area is clean.
- If dirt is around the plug, use brake cleaner and a shop towel before removal.
Step 5: Drain the Old Fluid
- Position the drain pan directly under the drain plug.
- Use the correct socket from your tool set to remove the drain plug.
- Let the fluid drain until it slows to a drip.
- Inspect the old fluid. Dark fluid is common; burnt smell or metal chunks are warning signs.
- Install the drain plug loosely if needed to reduce dripping while removing the pan.
Step 6: Remove the Transmission Pan/Filter Assembly
- Use a 10mm socket and ratchet to remove the transmission pan bolts.
- Support the pan with one hand because more fluid may spill when it separates.
- Lower the pan/filter assembly carefully into the drain pan.
- The filter is built into the pan assembly, so the whole pan/filter is replaced together.
- Move slowly; fluid hides inside.
Step 7: Clean the Mounting Surface
- Use shop towels to wipe the transmission mounting surface clean.
- Use brake cleaner on a towel, not sprayed directly into the transmission.
- Do not scrape the sealing surface with metal tools.
- Make sure no old gasket material or debris remains.
Step 8: Install the New Pan/Filter Assembly
- Position the new automatic transmission pan/filter assembly against the transmission.
- Start all pan bolts by hand first to prevent cross-threading.
- Use a 10mm socket to snug the bolts in a crisscross pattern.
- Use an inch-pound torque wrench to tighten the pan bolts evenly.
- Torque to 10 Nm (89 in-lbs).
Step 9: Install the Drain Plug
- Install a new transmission drain plug seal.
- Use the correct socket from your tool set to install the drain plug.
- Use a foot-pound torque wrench to tighten the drain plug.
- Torque to 20 Nm (15 ft-lbs).
Step 10: Initial Fluid Fill
- Insert the hose from the fluid transfer pump into the fill opening.
- Pump in the correct automatic transmission fluid until fluid just begins to run back out of the fill hole.
- Install the fill plug finger-tight only for now.
- Wipe spilled fluid with shop towels.
Step 11: Warm the Transmission and Circulate Fluid
- Connect the OBD scan tool and select live data for transmission fluid temperature.
- Start the engine with the brake pedal firmly pressed.
- Use the shifter to move through P-R-N-D, pausing 3 seconds in each position.
- Return the shifter to Park and keep the engine running.
- Watch the scan tool and keep fluid temperature in the correct check range, about 30-50°C (86-122°F).
- Use an infrared thermometer only as a backup temperature check at the pan; the scan tool is preferred.
Step 12: Set the Final Fluid Level
- With the engine running, vehicle level, and transmission temperature in range, remove the fill plug using the correct socket.
- Use the fluid transfer pump to add fluid until it runs out in a thin stream.
- When the stream changes to a slow drip, the level is set correctly.
- Install a new transmission fill plug seal.
- Use a foot-pound torque wrench to tighten the fill plug.
- Torque to 35 Nm (26 ft-lbs).
Step 13: Reinstall the Lower Shield
- Shut the engine off.
- Use shop towels and brake cleaner to clean any spilled fluid from the pan and exhaust area.
- Reinstall the lower splash shield.
- Use the 8mm socket, 10mm socket, or plastic trim tool to reinstall the fasteners.
- Snug small splash shield fasteners by hand; do not overtighten plastic retainers.
Step 14: Lower the Vehicle
- Use the floor jack to lift slightly off the jack stands.
- Remove the jack stands.
- Lower your Grand Cherokee slowly to the ground.
- Remove the wheel chocks.
✅ After Repair
- Start the engine and check under the vehicle for leaks.
- Test drive gently for 10-15 minutes and confirm smooth shifts.
- Recheck for leaks after the test drive.
- No battery registration or infotainment reset is required for this repair.
- If shifting feels harsh, delayed, or slipping occurs, stop driving and recheck the fluid level procedure.
- Dispose of used transmission fluid properly at an approved recycling location.
💰 DIY vs Shop Cost
Shop Cost: $450-$750 (parts + labor)
DIY Cost: $220-$380 (parts only)
You Save: $230-$370 by doing it yourself!
Shop labor rates vary but typically run $100-$150/hour. This repair takes a shop approximately 2-3 hours.
🎯 Ready to get started?
HowToo makes it easy: same-day/2-day shipping on every part, plus all the tools and specialty tools you need! Check out the parts and tools sections below to add everything to your cart.
🔧 Grand Cherokee - Automatic Transmission Fluid Service
This job replaces the automatic transmission fluid and the transmission pan/filter assembly. Your Grand Cherokee uses a sealed 8-speed automatic transmission, meaning there is no dipstick, so the final fluid level must be checked from underneath at the correct transmission temperature.
Difficulty Level: Advanced | Estimated Time: 2-4 hours
⚠️ Safety & Precautions
- ⚠️ Work only on a cool vehicle. Exhaust and transmission parts can burn you.
- ⚠️ Support your Grand Cherokee level on jack stands. Never crawl under a vehicle held only by a jack.
- ⚠️ The engine must run during the final level check, so keep hands, clothes, and tools away from moving and hot parts.
- ⚠️ This transmission has no dipstick. Fluid level must be set with the vehicle level and the fluid at the correct temperature.
- ⚠️ Use only fluid approved for the ZF 8-speed automatic transmission. Wrong fluid can damage the transmission.
- ⚠️ Battery disconnect is not required for this repair.
🔧 Required Tools
You'll need the following tools for this repair:
- Floor jack (rated 3-ton minimum)
- Jack stands (rated 3-ton minimum)
- Wheel chocks
- Safety glasses
- Nitrile gloves
- Drain pan (10-quart minimum)
- 8mm socket
- 10mm socket
- 13mm socket
- Ratchet
- Torque wrench (inch-pound)
- Torque wrench (foot-pound)
- Fluid transfer pump (specialty)
- OBD scan tool with live transmission temperature data (specialty)
- Infrared thermometer
- Plastic trim tool
- Shop towels
- Brake cleaner
🔩 Required Parts
HowToo sells all the parts you need for this repair:
- Automatic transmission pan/filter assembly - Qty: 1
- Automatic transmission fluid meeting Mopar 8/9 speed ATF or ZF Lifeguard 8 specification - Qty: 7-9 quarts
- Transmission pan bolts - Qty: 1 set
- Transmission fill plug seal - Qty: 1
- Transmission drain plug seal - Qty: 1
📋 Before You Begin
- Park your Grand Cherokee on a flat, level surface.
- Set the parking brake and place wheel chocks behind the wheels.
- Raise and support the vehicle level. A sealed transmission must be level for the fluid check to be accurate.
- A fluid transfer pump is a hand pump that pushes new fluid into the transmission from below.
- An OBD scan tool plugs into the diagnostic port and lets you read transmission fluid temperature.
- Do not perform the final fill by guessing. The fluid temperature matters.
🔨 Step-by-Step Instructions
Follow these steps in order:
Step 1: Raise and Support the Vehicle
- Use a floor jack to raise your Grand Cherokee at the approved lift points.
- Place jack stands under the approved support points.
- Make sure the vehicle is level front-to-back and side-to-side.
- Use wheel chocks to stop the vehicle from rolling.
- Shake gently to confirm stability.
Step 2: Remove the Lower Splash Shield
- Put on safety glasses and nitrile gloves.
- Use an 8mm socket, 10mm socket, or plastic trim tool to remove the lower shield fasteners.
- Lower the shield and place it aside.
- Keep the clips and bolts organized for reinstallation.
Step 3: Loosen the Fill Plug First
- Place a drain pan under the transmission.
- Find the fill plug on the side of the transmission/pan area.
- Use the correct socket from your tool set, commonly an 8mm socket or 10mm socket, to loosen the fill plug.
- Do not drain the transmission until you know the fill plug can be removed.
- Fill plug first, always.
Step 4: Drain the Old Fluid
- Move the drain pan directly under the drain plug.
- Use the correct socket from your tool set to remove the drain plug.
- Let the fluid drain until it slows to a drip.
- Watch for metal chunks or a strong burnt smell. A small amount of fine gray paste is normal.
Step 5: Remove the Transmission Pan/Filter Assembly
- Use a 10mm socket and ratchet to remove the pan bolts.
- Support the pan with one hand as the last bolts come out.
- Lower the pan slowly into the drain pan. More fluid will spill out.
- The filter is built into the pan, so the whole pan/filter assembly is replaced.
Step 6: Clean the Sealing Surface
- Use shop towels to clean the transmission sealing surface.
- Use brake cleaner on a towel to remove oily residue.
- Do not spray cleaner directly into the open transmission.
- Do not use a metal scraper. It can gouge the sealing surface.
Step 7: Install the New Pan/Filter Assembly
- Hold the new automatic transmission pan/filter assembly in place.
- Start all bolts by hand first so they do not cross-thread.
- Use a 10mm socket to snug the bolts in a crisscross pattern.
- Use an inch-pound torque wrench to tighten the pan bolts evenly.
- Torque to 10 Nm (89 in-lbs).
Step 8: Install the Drain Plug
- Install the new transmission drain plug seal.
- Use the correct socket from your tool set to install the drain plug.
- Use a foot-pound torque wrench to tighten it.
- Torque to 20 Nm (15 ft-lbs).
Step 9: Add Initial Fluid
- Insert the hose from the fluid transfer pump into the fill opening.
- Pump in the correct automatic transmission fluid.
- Stop when fluid starts to run back out of the fill hole.
- Install the fill plug finger-tight for now.
Step 10: Warm and Circulate the Fluid
- Connect the OBD scan tool to the diagnostic port under the dash.
- Select live data and monitor transmission fluid temperature.
- Start the engine and keep your foot firmly on the brake.
- Move the shifter slowly through P-R-N-D, pausing about 3 seconds in each position.
- Return the shifter to Park and leave the engine running.
- Wait until the transmission fluid temperature is about 30-50°C (86-122°F).
Step 11: Set the Final Fluid Level
- With the engine running and the vehicle level, remove the fill plug using the correct socket.
- Use the fluid transfer pump to add fluid until it runs out in a thin stream.
- When the stream becomes a slow drip, the level is correct.
- Install the new transmission fill plug seal.
- Use a foot-pound torque wrench to tighten the fill plug.
- Torque to 35 Nm (26 ft-lbs).
Step 12: Reinstall the Lower Splash Shield
- Shut the engine off.
- Use shop towels and brake cleaner to clean any spilled fluid.
- Lift the splash shield into place.
- Use an 8mm socket, 10mm socket, or plastic trim tool to reinstall the fasteners.
Step 13: Lower the Vehicle
- Use the floor jack to raise your Grand Cherokee slightly off the jack stands.
- Remove the jack stands.
- Lower the vehicle slowly to the ground.
- Remove the wheel chocks.
✅ After Repair
- Start the engine and check underneath for leaks.
- Take a gentle 10-15 minute test drive.
- Confirm smooth shifting and no warning lights.
- Recheck underneath for leaks after the test drive.
- Recycle the used transmission fluid at an approved fluid recycling center.
💰 DIY vs Shop Cost
Shop Cost: $450-$750 (parts + labor)
DIY Cost: $220-$380 (parts only)
You Save: $230-$370 by doing it yourself!
Shop labor rates vary but typically run $100-$150/hour. This repair takes a shop approximately 2-3 hours.
🎯 Ready to get started?
HowToo makes it easy: same-day/2-day shipping on every part, plus all the tools and specialty tools you need! Check out the parts and tools sections below to add everything to your cart.
Guide for Transmission Oil Pan replace for these Jeep vehicles
| Year Make Model | Sub Model | Engine | Body Style |
|---|---|---|---|
| 2021 Jeep Grand Cherokee | - | V6 3.6L | - |
| 2021 Jeep Grand Cherokee | - | V8 5.7L | - |
| 2021 Jeep Grand Cherokee | - | V8 6.4L | - |
| 2021 Jeep Grand Cherokee | - | V8 6.2L | - |
| 2020 Jeep Grand Cherokee | - | V6 3.6L | - |
| 2020 Jeep Grand Cherokee | - | V8 5.7L | - |
| 2020 Jeep Grand Cherokee | - | V8 6.4L | - |
| 2020 Jeep Grand Cherokee | - | V8 6.2L | - |
| 2019 Jeep Grand Cherokee | - | V6 3.6L | - |
| 2019 Jeep Grand Cherokee | - | V6 3.0L | - |
| 2019 Jeep Grand Cherokee | - | V8 5.7L | - |
| 2019 Jeep Grand Cherokee | - | V8 6.4L | - |
| 2019 Jeep Grand Cherokee | - | V8 6.2L | - |
| 2018 Jeep Grand Cherokee | - | V6 3.6L | - |
| 2018 Jeep Grand Cherokee | - | V6 3.0L | - |
| 2018 Jeep Grand Cherokee | - | V8 5.7L | - |
| 2018 Jeep Grand Cherokee | - | V8 6.4L | - |
| 2018 Jeep Grand Cherokee | - | V8 6.2L | - |
| 2017 Jeep Grand Cherokee | - | V6 3.6L | - |
| 2017 Jeep Grand Cherokee | - | V6 3.0L | - |
| 2017 Jeep Grand Cherokee | - | V8 5.7L | - |
| 2017 Jeep Grand Cherokee | - | V8 6.4L | - |
| 2016 Jeep Grand Cherokee | - | V6 3.6L | - |
| 2016 Jeep Grand Cherokee | - | V6 3.0L | - |
| 2016 Jeep Grand Cherokee | - | V8 5.7L | - |
| 2016 Jeep Grand Cherokee | - | V8 6.4L | - |
| 2015 Jeep Grand Cherokee | - | V6 3.6L | - |
| 2015 Jeep Grand Cherokee | - | V6 3.0L | - |
| 2015 Jeep Grand Cherokee | - | V8 5.7L | - |
| 2015 Jeep Grand Cherokee | - | V8 6.4L | - |
| 2014 Jeep Grand Cherokee | - | V6 3.6L | - |
| 2014 Jeep Grand Cherokee | - | V6 3.0L | - |
| 2014 Jeep Grand Cherokee | - | V8 5.7L | - |
| 2014 Jeep Grand Cherokee | - | V8 6.4L | - |
