










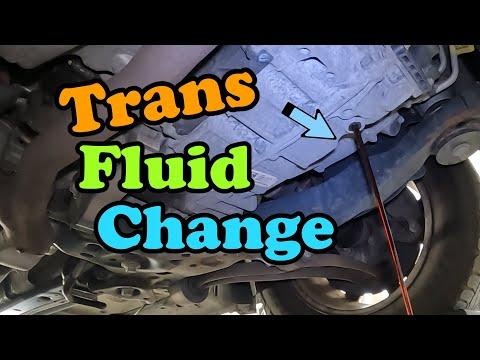






How to Change Transmission Fluid on a 2013-2019 Ford Explorer (Engine: V6 3.5L)
Step-by-step drain, filter, and refill guide with tools, torque specs, and level-check tips
How to Change Transmission Fluid on a 2013-2019 Ford Explorer (Engine: V6 3.5L)
Step-by-step drain, filter, and refill guide with tools, torque specs, and level-check tips for 2013, 2014, 2015, 2016, 2017, 2018, 2019


🔧 Transmission Fluid - Drain and Refill
Your Explorer uses a sealed automatic transmission, so the fluid change is done by draining through the pan and refilling through the level/fill plug. The key part is setting the final fluid level at the correct temperature, so don’t skip the warm-up and level-check steps.
Difficulty Level: Intermediate | Estimated Time: 2-3 hours
⚠️ Safety & Precautions
- Use jack stands on level ground. Never work under a vehicle supported only by a jack.
- Transmission fluid can be hot. Let the vehicle cool before draining.
- Keep dirt out of the transmission. Clean the area around all plugs before opening them.
- This transmission is level-sensitive. Overfilling or underfilling can cause shifting issues.
- No battery disconnect is required for this repair.
🔧 Required Tools
You'll need the following tools for this repair:
- Floor jack (rated 3-ton minimum)
- Jack stands (rated for vehicle weight)
- Wheel chocks
- Metric socket set
- 8mm socket
- 10mm socket
- 3/8-inch drive ratchet
- Torque wrench
- Drain pan
- Fluid transfer pump (specialty)
- Funnel with hose
- Scan tool with transmission temperature readout (specialty)
- Safety glasses
- Nitrile gloves
- Shop towels
🔩 Required Parts
HowToo sells all the parts you need for this repair:
- MERCON LV automatic transmission fluid - Qty: 10 quarts
- Transmission drain plug seal - Qty: 1
- Transmission pan gasket - Qty: 1
- Transmission filter - Qty: 1
📋 Before You Begin
- Park on level ground and set the parking brake.
- Chock the rear wheels.
- Raise the vehicle high enough to reach the transmission pan and level plug.
- Have the scan tool ready to read transmission fluid temperature.
- Work with the vehicle level.
🔨 Step-by-Step Instructions
Follow these steps in order:
Step 1: Warm the transmission slightly
- Start the engine and let it idle for a few minutes.
- Move the shifter through each gear position with your foot on the brake, then return to Park.
- Use your scan tool to confirm transmission fluid temperature is in a safe draining range.
- Warm, not hot, is best.
Step 2: Raise and support the vehicle
- Use the floor jack to lift the vehicle at the proper lift points.
- Set it securely on jack stands.
- Keep the vehicle as level as possible.
Step 3: Remove the underbody shield
- Use the 8mm socket and 3/8-inch drive ratchet to remove the fasteners holding the lower shield.
- Set the shield and hardware aside.
Step 4: Drain the transmission fluid
- Place the drain pan under the transmission pan.
- Use the correct metric socket set to remove the drain plug.
- Let the fluid drain completely.
- Inspect the drain plug and replace the seal if needed.
Step 5: Replace the filter and pan gasket
- Use the 10mm socket to remove the transmission pan bolts.
- Lower the pan carefully and drain the remaining fluid into the drain pan.
- Remove the old transmission filter and install the new one.
- Clean the pan and magnets with shop towels.
- Install the new transmission pan gasket.
- Reinstall the pan and start all bolts by hand.
- Torque to 10 Nm (89 in-lbs).
Step 6: Reinstall the drain plug
- Install the drain plug with the new seal.
- Torque to 25 Nm (18 ft-lbs).
Step 7: Add new fluid
- Use the fluid transfer pump and funnel with hose to add MERCON LV automatic transmission fluid through the fill/level opening.
- Add about the same amount you drained out to start.
- Reinstall the fill plug loosely for now.
Step 8: Set the final fluid level
- Start the engine with the vehicle still level.
- With your foot on the brake, move the shifter slowly through all gear positions and back to Park.
- Use the scan tool with transmission temperature readout and let the fluid reach the specified level-check temperature.
- Remove the level/fill plug and top off fluid until a steady thin stream drips out.
- Install the plug once the flow becomes a slow drip.
- Torque to 35 Nm (26 ft-lbs).
Step 9: Reinstall the shield and lower the vehicle
- Reinstall the lower shield with the 8mm socket.
- Lower the vehicle carefully from the jack stands.
Step 10: Verify operation
- Start the engine and check for leaks.
- Road test the vehicle for normal shift quality.
- Recheck for leaks after the test drive.
✅ After Repair
- Check the transmission area for drips after the first drive.
- Verify smooth shifting in all gears.
- If you see delayed shifts or harsh engagement, recheck fluid level at the correct temperature.
- Dispose of used fluid properly at a recycling center.
💰 DIY vs Shop Cost
Shop Cost: $250-$450 (parts + labor)
DIY Cost: $90-$160 (parts only)
You Save: $160-$290 by doing it yourself!
Shop labor rates vary but typically run $100-$150/hour. This repair takes a shop approximately 1.5-2.0 hours.
🎯 Ready to get started?
HowToo makes it easy: same-day/2-day shipping on every part, plus all the tools and specialty tools you need! Check out the parts and tools sections below to add everything to your cart.
Guide for Automatic Transmission Fluid replace for these Ford vehicles
| Year Make Model | Sub Model | Engine | Body Style |
|---|---|---|---|
| 2019 Ford Explorer | - | V6 3.5L | - |
| 2018 Ford Explorer | - | V6 3.5L | - |
| 2017 Ford Explorer | - | V6 3.5L | - |
| 2016 Ford Explorer | - | V6 3.5L | - |
| 2015 Ford Explorer | - | V6 3.5L | - |
| 2014 Ford Explorer | - | V6 3.5L | - |
| 2013 Ford Explorer | - | V6 3.5L | - |
