


How to Change Transmission Fluid & Filter on a 2016 Dodge Journey (62TE)
Step-by-step pan drop service with ATF+4 capacity tips, tools list, torque specs, and fluid level check temperature
How to Change Transmission Fluid & Filter on a 2016 Dodge Journey (62TE)
Step-by-step pan drop service with ATF+4 capacity tips, tools list, torque specs, and fluid level check temperature


🔧 Journey - Transmission Fluid & Filter Service
On your Journey’s automatic transmission, a proper fluid change is usually a pan drop service: you drain the old fluid, replace the internal filter, then refill with the correct fluid level at the correct temperature. Doing it this way protects the transmission and helps prevent harsh shifting caused by low/overfilled fluid.
Difficulty Level: Intermediate | Estimated Time: 2-4 hours
⚠️ Safety & Precautions
- ⚠️ Support the vehicle on jack stands before going underneath—never rely on a floor jack alone.
- ⚠️ Transmission fluid can be hot; let the transmission cool and wear gloves and eye protection.
- ⚠️ Keep the vehicle level while draining and filling, or the fluid level check will be wrong.
- ⚠️ Keep dirt out of the transmission—wipe around the fill tube and pan area before opening anything.
- ⚠️ Battery disconnect is not required for this service.
🔧 Required Tools
You'll need the following tools for this repair:
- Floor jack (rated 3-ton minimum)
- Jack stands (rated 3-ton minimum)
- Wheel chocks
- Safety glasses
- Nitrile gloves
- Drain pan (10-quart minimum)
- Rags
- Plastic scraper
- 3/8" drive ratchet
- 3/8" drive extension (6")
- 10mm socket
- Inch-pound torque wrench (0–250 in-lb range)
- Fluid transfer pump (specialty)
- Long neck funnel
- Transmission dipstick tool for Chrysler 62TE (specialty)
- Scan tool with transmission temperature data (specialty)
🔩 Required Parts
HowToo sells all the parts you need for this repair:
- Automatic transmission filter - Qty: 1
- Transmission pan gasket - Qty: 1
- ATF+4 automatic transmission fluid - Qty: 6 quarts
- Brake cleaner - Qty: 1
📋 Before You Begin
- Park on a level surface and chock the rear wheels with wheel chocks.
- Warm the transmission with a short 10–15 minute drive, then let it cool until it’s warm (not scorching).
- Make sure you have ATF+4 only. Do not use “universal” ATF.
- Torque wrench = tool that tightens accurately.
- Scan tool = plugs in and shows live data.
🔨 Step-by-Step Instructions
Follow these steps in order:
Step 1: Raise and level the vehicle
- Use a floor jack (rated 3-ton minimum) to lift the front and set it on jack stands (rated 3-ton minimum).
- If needed, lift the rear slightly so the vehicle sits level front-to-back.
- Confirm stability by gently rocking the vehicle before going underneath.
Step 2: Position the drain pan
- Slide a drain pan (10-quart minimum) under the transmission pan.
- Use safety glasses and nitrile gloves.
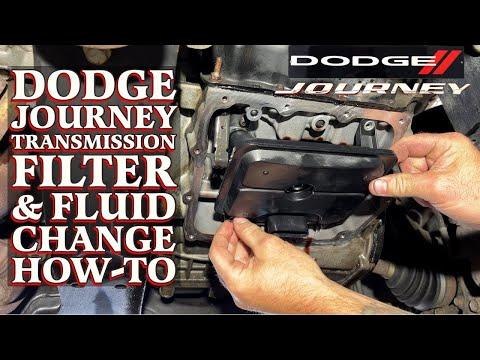
Step 3: Remove the transmission pan (controlled drain)
- Use a 10mm socket, 3/8" drive ratchet, and 3/8" drive extension (6") to loosen the pan bolts a few turns.
- Remove bolts from one end first, leaving a few bolts loosely installed on the opposite end so the pan tilts and drains slowly into the drain pan.
- Once most fluid drains, support the pan with one hand and remove the remaining bolts with the 10mm socket.
- Lower the pan carefully—there will still be fluid inside.
- Go slow—ATF runs everywhere fast.
Step 4: Remove and replace the transmission filter
- Locate the filter in the bottom of the transmission (above where the pan was).
- Remove the filter fasteners using the 10mm socket and 3/8" drive ratchet.
- Pull the old filter straight down. More fluid will drain—keep the drain pan underneath.
- Install the new filter and start the fasteners by hand to avoid cross-threading.
- Tighten with an inch-pound torque wrench (0–250 in-lb range): Torque to 35 in-lb (4 Nm).
Step 5: Clean the pan and install the new gasket
- Clean the pan with brake cleaner and rags.
- Use a plastic scraper to remove old gasket material only if it’s stuck. Do not gouge the metal sealing surface.
- Clean the pan magnets (if equipped) and reinstall them in the same locations.
- Install the new transmission pan gasket onto the pan.
Step 6: Reinstall the transmission pan
- Hold the pan in place and start all bolts by hand.
- Snug the bolts evenly in a crisscross pattern using the 10mm socket and 3/8" drive ratchet.
- Final-tighten with the inch-pound torque wrench (0–250 in-lb range) in a crisscross pattern: Torque to 105 in-lb (12 Nm).
- Even tightening prevents leaks.
Step 7: Refill with ATF+4
- Lower the vehicle enough to keep it level (or keep it safely level on stands).
- Remove the cap from the transmission fill/dipstick tube and insert a long neck funnel.
- Add 4 quarts of ATF+4 automatic transmission fluid to start.
Step 8: Circulate fluid and check for leaks
- Start the engine and let it idle.
- With your foot on the brake, shift slowly through P-R-N-D and back to P, pausing 2–3 seconds in each position.
- With the engine still idling, look underneath for leaks around the pan.
Step 9: Set the fluid level at the correct temperature
- Plug in a scan tool with transmission temperature data (specialty) and monitor transmission fluid temperature (TFT).
- With the engine idling and the vehicle level, insert the transmission dipstick tool for Chrysler 62TE (specialty) fully into the dipstick tube, then remove it to read the level.
- Add ATF+4 in small amounts using the long neck funnel (about 0.25 quart at a time), rechecking each time.
- Target the dipstick tool marking that matches the current TFT (your dipstick tool will have a temperature/level scale). Do not overfill.
- Small adds prevent overfilling.
Step 10: Final inspection
- Reinstall the dipstick tube cap securely.
- Wipe everything clean with rags so any future leak is easy to spot.
✅ After Repair
- Test drive 10–15 minutes, including gentle acceleration and a few normal stops.
- Recheck for leaks under the pan immediately after the drive.
- With the transmission warm and idling, recheck the fluid level again using the transmission dipstick tool for Chrysler 62TE (specialty) and scan tool with transmission temperature data (specialty).
- Dispose of old ATF responsibly (most parts stores accept used fluids).
💰 DIY vs Shop Cost
Shop Cost: $250-$450 (parts + labor)
DIY Cost: $70-$140 (parts only)
You Save: $180-$310 by doing it yourself!
Shop labor rates vary but typically run $100-$150/hour. This repair takes a shop approximately 2-3 hours.
🎯 Ready to get started?
HowToo makes it easy: same-day/2-day shipping on every part, plus all the tools and specialty tools you need! Check out the parts and tools sections below to add everything to your cart.