


How to Change Transmission Fluid (Drain & Fill) on a 2020 Hyundai Palisade
Step-by-step ATF service with required tools, fluid type, temperature-based level check, and torque specs
How to Change Transmission Fluid (Drain & Fill) on a 2020 Hyundai Palisade
Step-by-step ATF service with required tools, fluid type, temperature-based level check, and torque specs
🔧 Palisade - Transmission Fluid Drain & Fill
On your Palisade, the safest DIY-friendly way to service the automatic transmission fluid is a drain-and-fill. This refreshes the fluid without using a flush machine, and it lets you refill based on exactly what drained out.
Difficulty Level: Intermediate | Estimated Time: 1.5-3.0 hours
⚠️ Safety & Precautions
- ⚠️ Work on a level surface; support the SUV on jack stands, never the jack.
- ⚠️ Transmission fluid can be hot; let the drivetrain cool before opening any plug.
- ⚠️ Keep the engine running only when instructed; stay clear of belts/fans.
- ⚠️ Use wheel chocks so the vehicle cannot roll.
- ⚠️ Do not smoke; ATF is flammable.
🔧 Required Tools
You'll need the following tools for this repair:
- Floor jack (rated 3-ton minimum)
- Jack stands (rated 3-ton minimum)
- Wheel chocks
- Safety glasses
- Nitrile gloves
- Drain pan (10-quart minimum)
- Metric socket set 8–24mm
- 3/8" drive ratchet
- 3/8" drive torque wrench (10–100 Nm range)
- Metric hex key socket set 4–12mm
- Trim clip remover
- Funnel with flexible hose
- Fluid transfer pump (specialty)
- OBD2 scan tool with live data (specialty)
- Infrared thermometer
- Shop rags
🔩 Required Parts
HowToo sells all the parts you need for this repair:
- Hyundai-spec automatic transmission fluid (ATF) - Qty: 6 quarts
- Transmission drain plug crush washer - Qty: 1
- Transmission fill plug crush washer - Qty: 1
- Brake cleaner spray - Qty: 1
📋 Before You Begin
- Park on a level surface and keep the SUV level when checking the final fluid level.
- Chock the rear wheels and set the parking brake.
- If your Palisade has a large underbody cover, you’ll remove it for access.
- An OBD2 scan tool reads live transmission temperature from the computer so you can set the level correctly.
🔨 Step-by-Step Instructions
Follow these steps in order:
Step 1: Warm the transmission fluid (lightly)
- Drive 10–15 minutes so the transmission shifts normally, then park on a level spot.
- Shut the engine off and let things cool for 10 minutes so the fluid isn’t scorching hot.
Step 2: Lift and support your Palisade
- Place wheel chocks at the rear tires.
- Use a floor jack (rated 3-ton minimum) to lift the front and set it on jack stands.
- Keep it level for accurate fill.
Step 3: Remove the underbody cover (if equipped)
- Use a trim clip remover for plastic clips.
- Use a metric socket set 8–24mm with a 3/8" drive ratchet to remove the bolts.
- Set the cover and hardware aside in order.
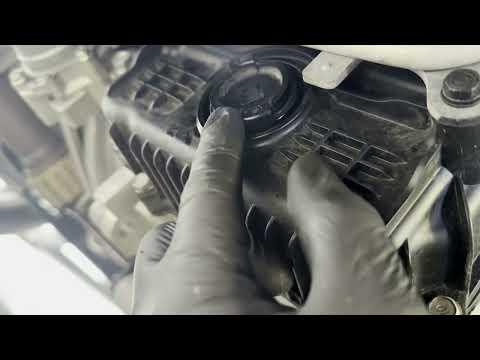
Step 4: Locate the fill plug first
- Before draining anything, locate the transmission fill plug on the transmission case.
- Use a metric hex key socket set 4–12mm or metric socket set 8–24mm (varies by plug style) to confirm you can loosen it.
- If the fill plug won’t loosen, stop here (you don’t want an empty transmission you can’t refill).
Step 5: Drain the old ATF
- Position a drain pan (10-quart minimum) under the transmission drain plug.
- Use a metric socket set 8–24mm with a 3/8" drive ratchet to remove the drain plug.
- Let it drain until it slows to a drip.
- Measure how much came out (this is your baseline refill amount).
Step 6: Reinstall the drain plug with a new washer
- Clean the drain plug and the area with shop rags and brake cleaner spray.
- Install a new crush washer on the drain plug.
- Thread the plug in by hand, then tighten with a 3/8" drive torque wrench.
- Torque to 39 Nm (29 ft-lbs).
Step 7: Refill with fresh ATF (initial fill)
- Use a fluid transfer pump (specialty) and/or funnel with flexible hose to add new ATF through the fill port.
- Add the same amount you measured coming out (typical drain-and-fill is several quarts).
- Install the fill plug finger-tight for now.
Step 8: Set the final level at temperature
- Connect the OBD2 scan tool with live data (specialty) and view transmission fluid temperature (often shown as “TFT” or “ATF Temp”).
- Start the engine and keep your foot on the brake.
- Slowly move the shifter through P-R-N-D and back to P, pausing 2–3 seconds in each position.
- With the engine idling, bring ATF temperature to 50–55°C (122–131°F).
- If you don’t have live data, use an infrared thermometer aimed at the transmission pan as a rough check (less accurate than scan data).
- Remove the fill plug using the correct tool from your metric hex key socket set 4–12mm or metric socket set 8–24mm, and top off slowly with the fluid transfer pump (specialty) until the level is correct.
Step 9: Tighten the fill plug
- Install a new crush washer on the fill plug (if your plug uses one).
- Tighten the fill plug using a 3/8" drive torque wrench.
- Torque to 39 Nm (29 ft-lbs).
Step 10: Reinstall the underbody cover
- Reinstall the cover using the metric socket set 8–24mm and 3/8" drive ratchet.
- Reinstall clips with the trim clip remover.
Step 11: Lower the vehicle
- Use the floor jack (rated 3-ton minimum) to lift slightly, remove the jack stands, and lower to the ground.
✅ After Repair
- Start the engine and check underneath for leaks around the drain and fill plugs.
- Test drive 10 minutes; verify smooth shifting and no slipping.
- Re-check for leaks after the drive.
- If shifting feels abnormal, stop driving and recheck the level (too low can cause damage).
💰 DIY vs Shop Cost
Shop Cost: $250-$450 (parts + labor)
DIY Cost: $60-$150 (parts only)
You Save: $100-$300 by doing it yourself!
Shop labor rates vary but typically run $100-$150/hour. This repair takes a shop approximately 1.0-1.5 hours.
🎯 Ready to get started?
HowToo makes it easy: same-day/2-day shipping on every part, plus all the tools and specialty tools you need! Check out the parts and tools sections below to add everything to your cart.
Guide for Automatic Transmission Fluid replace for these Hyundai vehicles
| Year Make Model | Sub Model | Engine | Body Style |
|---|
