


How to Change Transmission Fluid (Drain & Fill) on a 2018 Honda Odyssey 10-Speed
Step-by-step DIY guide with Honda ATF 2.0, required tools, fluid level check temp, and torque specs
How to Change Transmission Fluid (Drain & Fill) on a 2018 Honda Odyssey 10-Speed
Step-by-step DIY guide with Honda ATF 2.0, required tools, fluid level check temp, and torque specs


🔧 Odyssey - Transmission Fluid Change (Drain & Fill)
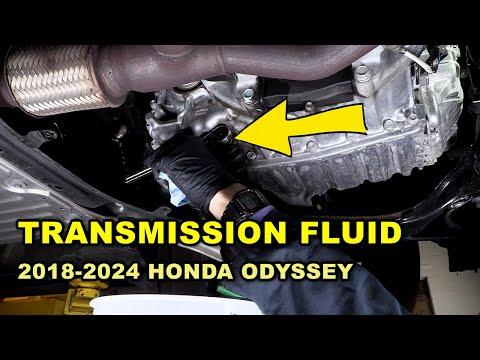
On your Odyssey (10-speed automatic), the standard DIY service is a drain-and-fill (not a power flush). You’ll drain the old fluid, refill with the correct Honda fluid, then set the final level at the correct temperature so shifting stays smooth and the transmission stays protected.
Difficulty Level: Intermediate | Estimated Time: 1.5-2.5 hours
⚠️ Safety & Precautions
- ⚠️ Work on a level surface and support the van with jack stands before going underneath.
- ⚠️ Transmission fluid can be hot—let it cool enough to avoid burns.
- ⚠️ Keep the engine running only when instructed, and keep hands/clothes clear of belts and fans.
- ⚠️ Do not use “universal ATF” or additives; your Odyssey requires Honda-specific ATF.
- 🔋 Battery disconnect is not required for this service.
🔧 Required Tools
You'll need the following tools for this repair:
- Floor jack (rated 3-ton minimum)
- Jack stands (rated 3-ton minimum)
- Wheel chocks
- Safety glasses
- Nitrile gloves
- Drain pan (at least 10-quart)
- Trim clip removal tool
- Phillips screwdriver
- 3/8" drive ratchet
- 10mm socket
- Torque wrench (10-80 ft-lbs range)
- Fluid transfer pump (specialty)
- Long funnel
- OBD-II scan tool with ATF temperature (specialty)
- Measuring container (marked quarts/liters)
- Shop rags
🔩 Required Parts
HowToo sells all the parts you need for this repair:
- Honda automatic transmission fluid (ATF 2.0) - Qty: 5 quarts
- Transmission drain plug crush washer - Qty: 1
- Transmission level check plug crush washer - Qty: 1
📋 Before You Begin
- Park on level ground, set the parking brake, and place wheel chocks behind the rear wheels.
- Warm the transmission with a 10-15 minute drive so the fluid drains more completely.
- Set up your OBD-II scan tool so you can watch “Transmission/ATF Temperature.”
- A “crush washer” is a soft metal washer that seals.
🔨 Step-by-Step Instructions
Follow these steps in order:
Step 1: Raise and secure the front
- Use a floor jack to lift the front at the proper jacking point.
- Set the van down onto jack stands and confirm it’s stable before crawling under.
Step 2: Remove the lower splash shield (if equipped)
- Use a trim clip removal tool and Phillips screwdriver to remove the clips/screws.
- Use a 10mm socket with a 3/8" drive ratchet for any 10mm bolts.
- Set all hardware aside so nothing gets lost.
Step 3: Drain the old transmission fluid
- Place the drain pan under the transmission drain plug.
- Use the correct socket with a 3/8" drive ratchet to loosen and remove the drain plug.
- Let it drain until it becomes a slow drip.
- Pour the drained fluid into a measuring container so you know how much to put back in.
Step 4: Reinstall the drain plug with a new crush washer
- Clean the drain plug and sealing surface with shop rags.
- Install a new drain plug crush washer.
- Reinstall the drain plug by hand first to avoid cross-threading.
- Use a torque wrench to tighten the drain plug: Torque to 49 N·m (36 ft-lbs).
Step 5: Refill with Honda ATF 2.0 (initial fill)
- Locate the transmission fill point and remove the fill plug/cap.
- Add the same amount you measured out using a long funnel or fluid transfer pump.
- Start by adding slightly less than measured, then you’ll set the final level in a later step.
- Clean spills now to spot leaks later.
Step 6: Circulate fluid and bring ATF to level-check temperature
- Start the engine and keep your foot on the brake.
- Move the shifter slowly through each position (P-R-N-D and back), pausing 2-3 seconds in each.
- Use the OBD-II scan tool with ATF temperature to monitor temperature.
- Bring ATF temperature to 35-45°C (95-113°F) before checking the level.
Step 7: Set the final fluid level (level check plug)
- With the engine idling and the van level on jack stands, locate the transmission level check plug.
- Place the drain pan underneath.
- Carefully remove the level check plug using the correct socket and 3/8" drive ratchet.
- If no fluid drips out, add ATF 2.0 in small amounts using the fluid transfer pump until fluid just starts to dribble from the level hole.
- Install a new level check plug crush washer.
- Use a torque wrench to tighten the level check plug: Torque to 12 N·m (9 ft-lbs).
Step 8: Reinstall the splash shield and lower the van
- Reinstall the splash shield using the 10mm socket, Phillips screwdriver, and trim clip removal tool.
- Use the floor jack to lift slightly, remove the jack stands, then lower to the ground.
✅ After Repair
- Start the engine and check underneath for leaks around the drain plug and level check plug.
- Test drive 10-15 minutes, then re-check for leaks on clean pavement.
- If shifting feels abnormal, re-check level at the correct ATF temperature range.
💰 DIY vs Shop Cost
Shop Cost: $250-$450 (parts + labor)
DIY Cost: $60-$120 (parts only)
You Save: $130-$390 by doing it yourself!
Shop labor rates vary but typically run $100-$150/hour. This repair takes a shop approximately 1.0-1.5 hours.
🎯 Ready to get started?
HowToo makes it easy: same-day/2-day shipping on every part, plus all the tools and specialty tools you need! Check out the parts and tools sections below to add everything to your cart.
