









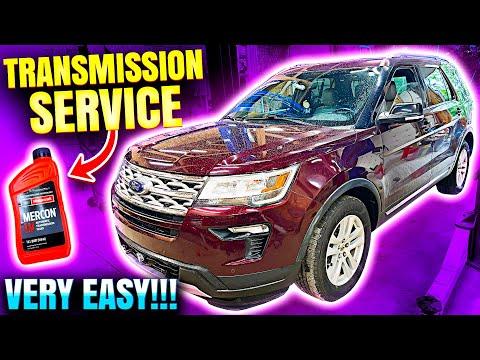







How to Change the Transmission Fluid on a 2011-2019 Ford Explorer (Engine: V6 3.5L)
Step-by-step drain-and-refill guide with tools, MERCON LV fluid, and level-check tips
How to Change the Transmission Fluid on a 2011-2019 Ford Explorer (Engine: V6 3.5L)
Step-by-step drain-and-refill guide with tools, MERCON LV fluid, and level-check tips for 2011, 2012, 2013, 2014, 2015, 2016, 2017, 2018, 2019


🔧 Transmission Fluid Change - Drain and Refill
This service replaces the old automatic transmission fluid with fresh fluid and restores proper shifting quality. On your Explorer, this is a drain-and-refill service with a level check at the transmission fill/check port, not a dipstick service.
Difficulty Level: Intermediate | Estimated Time: 1.5-2.5 hours
⚠️ Safety & Precautions
- Work only with the transmission fluid warm, not scorching hot.
- Support the vehicle securely on jack stands before going underneath.
- Keep dirt out of the transmission. Clean the area around the fill and drain plugs first.
- Do not overfill. The fluid level must be set at the correct temperature.
- Use only the specified automatic transmission fluid for this transmission.
🔧 Required Tools
You'll need the following tools for this repair:
- Floor jack (rated 3-ton minimum)
- Jack stands (rated 3-ton minimum)
- Wheel chocks
- Safety glasses
- Nitrile gloves
- 3/8-inch drive ratchet
- Metric socket set
- Drain pan
- Fluid transfer pump (specialty)
- Torque wrench
- Scan tool or temperature-reading scan app (specialty)
- Shop towels
- Brake cleaner
🔩 Required Parts
HowToo sells all the parts you need for this repair:
- Automatic transmission fluid meeting MERCON LV specification - Qty: 6-8 quarts
- Transmission drain plug washer - Qty: 1
- Transmission fill plug washer - Qty: 1
📋 Before You Begin
- Park on level ground and set the parking brake.
- Chock the rear wheels before lifting the vehicle.
- Warm the transmission with a short drive so the fluid drains more completely.
- Have the scan tool ready to read transmission fluid temperature.
- Cleanliness matters here.
🔨 Step-by-Step Instructions
Follow these steps in order:
Step 1: Raise and secure the vehicle
- Use the floor jack to raise the vehicle at the proper lift points.
- Support it with jack stands on level ground.
- Leave the vehicle level as possible for an accurate fluid level check.
Step 2: Locate the transmission drain and fill points
- Use a light and your eyes to find the transmission drain plug and fill/check plug.
- Clean both areas with brake cleaner and shop towels before loosening anything.
Step 3: Drain the old fluid
- Place the drain pan under the transmission.
- Use the metric socket set and 3/8-inch drive ratchet to remove the drain plug.
- Let the fluid drain fully.
- Install a new drain plug washer if equipped.
- Torque to OEM specification.
Step 4: Reinstall the drain plug
- Clean the plug and mating surface.
- Reinstall the drain plug by hand first, then snug it with the torque wrench.
- Torque to OEM specification.
Step 5: Refill with fresh fluid
- Remove the fill/check plug using the metric socket set and 3/8-inch drive ratchet.
- Use the fluid transfer pump to pump in the correct automatic transmission fluid meeting MERCON LV specification.
- Fill until fluid begins to reach the proper level check point.
- Install a new fill plug washer if equipped.
- Torque to OEM specification.
Step 6: Set the fluid level at the correct temperature
- Start the engine and keep the vehicle safely supported.
- Use the scan tool or temperature-reading scan app to monitor transmission fluid temperature.
- Shift slowly through all gear positions, pausing a few seconds in each one.
- Return the shifter to Park.
- With the fluid at the specified operating temperature, check the fill/check port.
- Add fluid with the fluid transfer pump until a small stream or dribble comes from the port, then reinstall the plug.
- Torque to OEM specification.
Step 7: Recheck for leaks
- Use the shop towels to wipe the transmission clean.
- Inspect the drain plug, fill plug, and pan area for leaks.
- Lower the vehicle carefully.
✅ After Repair
- Drive the vehicle and confirm normal shifting.
- Recheck for leaks after the test drive.
- If shifting feels abnormal, recheck fluid level at the correct temperature.
- Dispose of used transmission fluid properly.
💰 DIY vs Shop Cost
Shop Cost: $220-$420 (parts + labor)
DIY Cost: $60-$140 (parts only)
You Save: $160-$280 by doing it yourself!
Shop labor rates vary but typically run $100-$150/hour. This repair takes a shop approximately 1.5-2.5 hours.
🎯 Ready to get started?
HowToo makes it easy: same-day/2-day shipping on every part, plus all the tools and specialty tools you need! Check out the parts and tools sections below to add everything to your cart.
Guide for Automatic Transmission Fluid replace for these Ford vehicles
| Year Make Model | Sub Model | Engine | Body Style |
|---|---|---|---|
| 2019 Ford Explorer | - | V6 3.5L | - |
| 2019 Ford Explorer | - | Inline 4 2.3L | - |
| 2018 Ford Explorer | - | V6 3.5L | - |
| 2018 Ford Explorer | - | Inline 4 2.3L | - |
| 2017 Ford Explorer | - | V6 3.5L | - |
| 2017 Ford Explorer | - | Inline 4 2.3L | - |
| 2016 Ford Explorer | - | V6 3.5L | - |
| 2016 Ford Explorer | - | Inline 4 2.3L | - |
| 2015 Ford Explorer | - | V6 3.5L | - |
| 2015 Ford Explorer | - | Inline 4 2.0L | - |
| 2014 Ford Explorer | - | V6 3.5L | - |
| 2014 Ford Explorer | - | Inline 4 2.0L | - |
| 2013 Ford Explorer | - | V6 3.5L | - |
| 2013 Ford Explorer | - | Inline 4 2.0L | - |
| 2012 Ford Explorer | - | V6 3.5L | - |
| 2012 Ford Explorer | - | Inline 4 2.0L | - |
| 2011 Ford Explorer | - | V6 3.5L | - |