









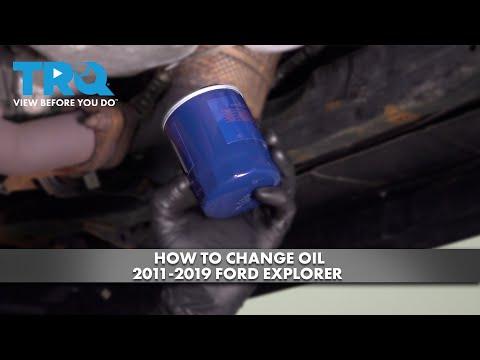






How to Change the Engine Oil and Oil Filter on a 2013-2019 Ford Explorer 2.3L (Trim: Base | Engine: V6 3.5L)
Step-by-step instructions with tools, parts, torque specs, safety tips, and oil reset guidance
How to Change the Engine Oil and Oil Filter on a 2013-2019 Ford Explorer 2.3L (Trim: Base | Engine: V6 3.5L)
Step-by-step instructions with tools, parts, torque specs, safety tips, and oil reset guidance for 2013, 2014, 2015, 2016, 2017, 2018, 2019


🔧 Engine Oil & Oil Filter - Change
Changing the oil and filter keeps the 2.3L turbo engine clean, helps control heat, and protects the turbocharger. On your Explorer, the oil filter is a cartridge-style filter, so you’ll replace the filter element inside the housing, not a spin-on can.
Difficulty Level: Beginner | Estimated Time: 1-1.5 hours
⚠️ Safety & Precautions
- Work on a level surface with the engine fully cooled down.
- Hot oil can burn you. Let the engine sit if it was recently running.
- Use jack stands if you lift the front. Never rely on a jack alone.
- Keep the oil drain pan centered under the drain plug before loosening it.
- Do not over-tighten the drain plug or oil filter cap.
- No battery disconnect is required for this service.
🔧 Required Tools
You'll need the following tools for this repair:
- 15mm socket
- 3/8-inch ratchet
- Oil filter cap socket (specific to Explorer 2.3L cartridge filter)
- Drain pan
- Floor jack (rated 3-ton minimum)
- Jack stands
- Funnel
- Torque wrench
- Shop towels
- Nitrile gloves
- Safety glasses
🔩 Required Parts
HowToo sells all the parts you need for this repair:
- Engine oil (5W-30 full synthetic) - Qty: 6 quarts
- Oil filter cartridge - Qty: 1
- Oil filter housing O-ring/seal - Qty: 1
- Drain plug washer - Qty: 1
📋 Before You Begin
- Park on level ground and set the parking brake.
- Let the engine cool so the oil is safe to drain.
- Gather all parts and tools before starting.
- If the undertray is fitted, be ready to remove it before reaching the drain plug.
🔨 Step-by-Step Instructions
Follow these steps in order:
Step 1: Raise and secure the vehicle
- Use a floor jack (rated 3-ton minimum) to raise the front of the Explorer.
- Place jack stands under the proper support points and lower the vehicle onto them.
- Make sure the vehicle is stable before going underneath.
Step 2: Remove the undertray if equipped
- Use the appropriate fastener tools if the splash shield blocks access to the drain plug.
- Set the fasteners aside in order so reassembly is easier.
Step 3: Drain the old oil
- Place the drain pan under the oil pan drain plug.
- Use a 15mm socket and 3/8-inch ratchet to loosen and remove the drain plug.
- Let the oil drain completely.
- Install a new drain plug washer if your plug uses one.
- Reinstall the drain plug and Torque to 19 Nm (168 in-lbs).
Step 4: Replace the oil filter cartridge
- Move the drain pan under the oil filter housing.
- Use the oil filter cap socket (specific to Explorer 2.3L cartridge filter) to loosen the filter cap.
- Remove the cap and pull out the old filter element.
- Replace the old oil filter housing O-ring/seal with the new one.
- Lightly oil the new O-ring with clean engine oil before installing it.
- Install the new oil filter cartridge into the housing cap.
- Reinstall the cap and Torque to 25 Nm (18 ft-lbs).
Step 5: Add new engine oil
- Lower the vehicle if needed so it sits level.
- Remove the oil fill cap on top of the engine.
- Use a funnel to add about 5.5 quarts of engine oil (5W-30 full synthetic) first.
- Install the cap, start the engine, and let it run for 30-60 seconds.
- Shut the engine off and wait a few minutes for oil to settle.
- Top off slowly until the oil reaches the full mark. Total fill is usually about 5.7 quarts with filter.
Step 6: Check for leaks and reinstall covers
- Use a shop towel to wipe the drain plug and filter housing clean.
- Look underneath for any oil leaks.
- Reinstall the undertray if equipped.
✅ After Repair
- Check the oil level again with the dipstick after a short drive and a few minutes of rest.
- Verify there are no leaks at the drain plug or filter housing.
- Reset the oil life monitor through the vehicle settings if needed. On many Fords, use Settings > Vehicle > Oil Life Reset.
- Dispose of used oil and filter at a proper recycling center.
💰 DIY vs Shop Cost
Shop Cost: $90-$160 (parts + labor)
DIY Cost: $35-$70 (parts only)
You Save: $55-$90 by doing it yourself!
Shop labor rates vary but typically run $100-$150/hour. This repair takes a shop approximately 0.8-1.2 hours.
🎯 Ready to get started?
HowToo makes it easy: same-day/2-day shipping on every part, plus all the tools and specialty tools you need! Check out the parts and tools sections below to add everything to your cart.
Guide for Engine Oil replace for these Ford vehicles
| Year Make Model | Sub Model | Engine | Body Style |
|---|---|---|---|
| 2019 Ford Explorer | Sport | V6 3.5L | - |
| 2018 Ford Explorer | Sport | V6 3.5L | - |
| 2017 Ford Explorer | Sport | V6 3.5L | - |
| 2016 Ford Explorer | Sport | V6 3.5L | - |
| 2015 Ford Explorer | Sport | V6 3.5L | - |
| 2014 Ford Explorer | Sport | V6 3.5L | - |
| 2013 Ford Explorer | Sport | V6 3.5L | - |