









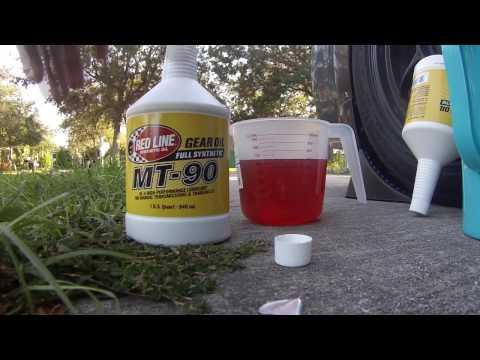







How to Change Manual Transmission Fluid on a 2007 Nissan Altima (Drain & Refill)
Step-by-step DIY guide with tools, fluid type/capacity, fill level check, and torque specs for 1993, 1994, 1995, 1996, 1997, 1998, 1999, 2000, 2001
How to Change Manual Transmission Fluid on a 2007 Nissan Altima (Drain & Refill)
Step-by-step DIY guide with tools, fluid type/capacity, fill level check, and torque specs for 1993, 1994, 1995, 1996, 1997, 1998, 1999, 2000, 2001


🔧 Altima - Manual Transmission Fluid Change
On your Altima’s manual transmission, a fluid change is a simple drain-and-refill service (no “flush”). Fresh fluid helps shift quality and protects the gears and bearings.
Difficulty Level: Intermediate | Estimated Time: 1.0-2.0 hours
⚠️ Safety & Precautions
- ⚠️ Support the car on jack stands; never rely on a jack alone.
- ⚠️ Let the drivetrain cool; hot gear oil can burn skin.
- ⚠️ Keep the car level while filling, or the fluid level will be wrong.
- ⚠️ Wear gloves; gear oil smell is strong and hard to remove.
🔧 Required Tools
You'll need the following tools for this repair:
- Floor jack (rated 2-ton minimum)
- Jack stands (rated 2-ton minimum)
- Wheel chocks
- Safety glasses
- Nitrile gloves
- Drain pan (at least 6-quart)
- 3/8" drive ratchet
- 3" extension for 3/8" ratchet
- Metric hex bit socket set (includes 10mm)
- Torque wrench (10–80 ft-lbs range)
- Trim clip tool
- 10mm socket
- Funnel with hose
- Brake cleaner spray
- Shop rags
🔩 Required Parts
HowToo sells all the parts you need for this repair:
- Manual transmission fluid (Nissan MTF 75W-85 GL-4 or equivalent) - Qty: 3 quarts
- Drain/fill plug crush washers (if equipped) - Qty: 2
📋 Before You Begin
- Park on a level surface, set the parking brake, and place wheel chocks behind the rear wheels.
- Warm the transmission slightly with a 5–10 minute drive, then shut it off. Warm oil drains faster.
- Lay out tools and position a drain pan under the transmission.
🔨 Step-by-Step Instructions
Follow these steps in order:
Step 1: Raise and support the front
- Use a floor jack to lift the front at the front center jacking point.
- Place jack stands under the left and right front pinch welds (or subframe points), then lower the car onto the stands.
- Give the car a gentle push to confirm it’s stable.
Step 2: Remove the lower splash shield (if equipped)
- Use a 10mm socket to remove the bolts.
- Use a trim clip tool to pop out any plastic clips (pry the center pin, then pull the clip).
- Set the shield and hardware aside.
Step 3: Locate the fill plug FIRST
- Find the fill plug on the side of the manual transmission case (it sits higher than the drain plug).
- Clean around the plug with brake cleaner spray and shop rags so dirt can’t fall inside.
- Loosen the fill plug before draining so you don’t get stuck with an empty transmission you can’t refill.
- If the plug has a square recess, use a 3/8" drive ratchet (and 3" extension if needed).
- If the plug has a hex (Allen) recess, use a 10mm hex bit socket with the 3/8" drive ratchet.
Step 4: Drain the old fluid
- Position the drain pan under the drain plug (bottom of the transmission case).
- Remove the drain plug using either the 3/8" drive ratchet (square recess type) or the 10mm hex bit socket (hex recess type).
- Let it drain until it slows to an occasional drip (usually 5–10 minutes).
- Clean the drain plug with shop rags. If it has a magnet, wipe metal “fuzz” off the magnet (a light paste is normal).
Step 5: Reinstall the drain plug
- Install a new crush washer if your plugs use washers.
- Thread the drain plug in by hand to avoid cross-threading.
- Use a torque wrench to tighten the drain plug: Torque to 34 Nm (25 ft-lbs).
Step 6: Fill with new manual transmission fluid
- Insert a funnel with hose into the fill hole.
- Pour in manual transmission fluid (75W-85 GL-4) slowly.
- Correct level is when fluid just starts to seep out of the fill hole while the car is level.
- Let excess drip until it becomes an occasional drip.
Step 7: Reinstall the fill plug
- Install a new crush washer if equipped.
- Thread the fill plug in by hand.
- Use a torque wrench to tighten the fill plug: Torque to 34 Nm (25 ft-lbs).
- Spray a little brake cleaner spray on the area and wipe clean with shop rags to help spot leaks later.
Step 8: Reinstall splash shield and lower the car
- Reinstall the splash shield using the trim clip tool and 10mm socket.
- Use the floor jack to lift slightly, remove jack stands, then lower the car.
✅ After Repair
- Start the engine and, with the clutch pressed, shift through all gears while parked (1st–Reverse) to circulate fluid.
- Take a short 5–10 minute drive and confirm smooth shifting.
- Park and check underneath for seepage around the fill/drain plugs.
- Dispose of used gear oil at an oil recycling location (many parts stores accept it).
💰 DIY vs Shop Cost
Shop Cost: $180-$320 (parts + labor)
DIY Cost: $45-$90 (parts only)
You Save: $135-$230 by doing it yourself!
Shop labor rates vary but typically run $100-$150/hour. This repair takes a shop approximately 1.0-1.5 hours.
🎯 Ready to get started?
HowToo makes it easy: same-day/2-day shipping on every part, plus all the tools and specialty tools you need! Check out the parts and tools sections below to add everything to your cart.