


How to Change Manual Transmission Fluid on a 2007 Honda Civic (MTF Service)
Step-by-step drain and refill instructions with tools, fluid capacity, crush washers, and torque specs
How to Change Manual Transmission Fluid on a 2007 Honda Civic (MTF Service)
Step-by-step drain and refill instructions with tools, fluid capacity, crush washers, and torque specs


🔧 Civic - Manual Transmission Fluid Change
Changing the manual transmission fluid keeps your Civic’s gears and bearings lubricated and helps shifting feel smooth. You’ll drain the old fluid from the transmission case, then refill it until it reaches the correct level at the fill hole.
Difficulty Level: Beginner | Estimated Time: 1-2 hours
⚠️ Safety & Precautions
- 🛑 Support the car with jack stands before going underneath.
- 🛑 Work on level ground so the fluid level sets correctly.
- 🛑 Let the exhaust and engine cool a bit to avoid burns.
- 🛑 Wear gloves and safety glasses; fluid can irritate skin and eyes.
- 🛑 Battery disconnect is not required for this job.
🔧 Required Tools
You'll need the following tools for this repair:
- Floor jack (rated 2-ton minimum)
- Jack stands (rated 2-ton minimum)
- Wheel chocks
- Safety glasses
- Nitrile gloves
- Drain pan (at least 6-quart)
- Shop rags
- 3/8" drive ratchet
- 3/8" drive extension (6")
- Torque wrench (10-80 ft-lbs range)
- 10mm socket
- Flat-blade screwdriver
- Trim clip removal tool
- Funnel with 3/8" ID clear hose
🔩 Required Parts
HowToo sells all the parts you need for this repair:
- Manual transmission fluid (Honda MTF or equivalent) - Qty: 2 quarts
- Transmission drain plug crush washer - Qty: 1
- Transmission fill plug crush washer - Qty: 1
📋 Before You Begin
- Park on level ground and place wheel chocks behind the rear wheels.
- Warm the transmission fluid with a short 5-10 minute drive, then shut the engine off.
- Lift the front with a floor jack and support it securely on jack stands.
- Tip: Always loosen the fill plug first. (That way you don’t drain it and then discover you can’t refill it.)
🔨 Step-by-Step Instructions
Follow these steps in order:
Step 1: Remove the lower splash shield (if equipped)
- Use a 10mm socket to remove the bolts holding the front lower cover.
- Use a trim clip removal tool and flat-blade screwdriver to pop out any plastic clips.
- Set the cover and hardware aside.
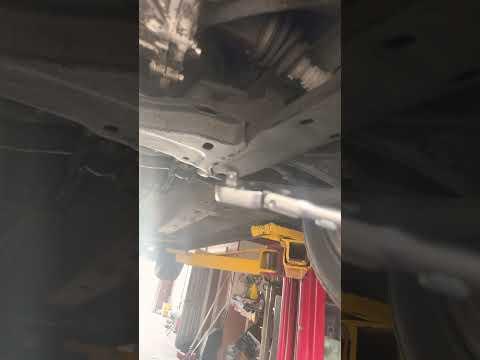
Step 2: Locate the transmission fill and drain plugs
- Look at the front/driver side of the transmission case (behind the driver-side front wheel area).
- The fill plug is higher up on the case; the drain plug is at the bottom.
- Most Civics use a plug that accepts a 3/8" drive ratchet directly (no socket). If yours does, insert the ratchet square end into the plug.
Step 3: Loosen the fill plug first
- Place the 3/8" drive ratchet (use a 3/8" extension (6") if needed) into the fill plug.
- Break it loose, then leave it threaded in a few turns (don’t remove it yet).
Step 4: Drain the old transmission fluid
- Position a drain pan under the drain plug.
- Use the 3/8" drive ratchet to remove the drain plug completely.
- Let it drain until it slows to an occasional drip (usually 5-10 minutes).
- Wipe the drain plug clean with shop rags.
- Replace the drain plug crush washer with the new one.
Step 5: Reinstall and torque the drain plug
- Thread the drain plug in by hand first to avoid cross-threading.
- Use a torque wrench (10-80 ft-lbs range) to tighten the drain plug: Torque to 49 Nm (36 ft-lbs).
Step 6: Fill the transmission with new fluid
- Remove the fill plug using the 3/8" drive ratchet.
- Replace the fill plug crush washer with the new one.
- Insert a funnel with 3/8" ID clear hose into the fill hole.
- Slowly pour in manual transmission fluid until it just starts to trickle back out of the fill hole (that’s the correct level).
- Tip: Pour slowly to prevent burping/overflow.
Step 7: Reinstall and torque the fill plug
- Thread the fill plug in by hand first.
- Use a torque wrench (10-80 ft-lbs range) to tighten the fill plug: Torque to 49 Nm (36 ft-lbs).
- Wipe the area clean with shop rags.
Step 8: Reinstall the splash shield and lower the car
- Reinstall the lower cover using the 10mm socket and the clips with the trim clip removal tool.
- Lower the Civic off the jack stands using the floor jack.
✅ After Repair
- Start the engine and, with the clutch pressed, shift through all gears (engine idling) to circulate fluid.
- Take a short test drive and confirm shifting feels normal.
- Park and look underneath for any seepage around the fill/drain plugs.
- Dispose of used fluid at a local recycling center or auto parts store that accepts oil/fluids.
💰 DIY vs Shop Cost
Shop Cost: $150-$250 (parts + labor)
DIY Cost: $25-$60 (parts only)
You Save: $90-$225 by doing it yourself!
Shop labor rates vary but typically run $100-$150/hour. This repair takes a shop approximately 1.0-1.5 hours.
🎯 Ready to get started?
HowToo makes it easy: same-day/2-day shipping on every part, plus all the tools and specialty tools you need! Check out the parts and tools sections below to add everything to your cart.
