









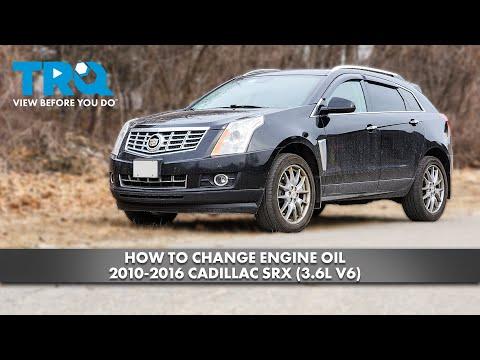







How to Change Engine Oil & Replace the Oil Filter on a 2011-2016 Cadillac SRX 3.6L (Engine: V6 3.6L)
Step-by-step DIY oil change with tools, parts list, oil capacity, torque specs, and oil life reset
How to Change Engine Oil & Replace the Oil Filter on a 2011-2016 Cadillac SRX 3.6L (Engine: V6 3.6L)
Step-by-step DIY oil change with tools, parts list, oil capacity, torque specs, and oil life reset for 2011


🔧 SRX - Engine Oil & Oil Filter Replacement
Changing the oil and filter keeps your SRX’s 3.6L engine lubricated and prevents engine wear. You’ll drain the old oil, replace the oil filter element, then refill with the correct oil and reset the oil life.
Difficulty Level: Beginner | Estimated Time: 1.0-1.5 hours
Assumption: 3.6L uses a top-mounted cartridge-style oil filter housing.
⚠️ Safety & Precautions
- ⚠️ Work on a level surface and use jack stands—never rely on a jack alone.
- ⚠️ Let the engine cool 10–20 minutes; hot oil can burn you.
- ⚠️ Chock the rear wheels with wheel chocks before lifting.
- ⚠️ Keep oil off belts and exhaust parts; wipe spills immediately.
- ⚠️ Battery disconnect is not required for this service.
🔧 Required Tools
You'll need the following tools for this repair:
- Floor jack (rated 3-ton minimum)
- Jack stands (rated 3-ton minimum)
- Wheel chocks
- Safety glasses
- Nitrile gloves
- Oil drain pan (10-quart minimum)
- Funnel
- Ratchet (3/8")
- Extension (3/8")
- 15mm socket
- 24mm socket
- Torque wrench (3/8")
- Flathead screwdriver
- Trim clip remover
- Shop towels
🔩 Required Parts
HowToo sells all the parts you need for this repair:
- Engine oil (5W-30 full synthetic, dexos1 approved) - Qty: 6 quarts
- Oil filter cartridge kit (includes new O-ring) - Qty: 1
- Oil drain plug gasket - Qty: 1
📋 Before You Begin
- Park on level ground, shift to P, and set the parking brake.
- Warm the engine for 2–3 minutes, then shut it off (warm oil drains faster).
- Open the hood and remove the oil fill cap to help the oil drain smoothly.
- Set out your drain pan and shop towels; oil changes can get messy.
🔨 Step-by-Step Instructions
Follow these steps in order:
Step 1: Safely raise the front of your SRX
- Place wheel chocks behind the rear tires.
- Use a floor jack (rated 3-ton minimum) to lift the front at the proper lift point.
- Set the vehicle down onto jack stands (rated 3-ton minimum) and give it a gentle shake to confirm it’s stable.
Step 2: Remove the lower splash shield (if equipped)
- Use a flathead screwdriver and trim clip remover to remove plastic push-clips.
- Use a ratchet (3/8") with the appropriate fastener socket (commonly 10mm socket if present) to remove any bolts, then lower the shield.
- Tip: Lay fasteners in a small tray.
Step 3: Drain the old engine oil
- Position the oil drain pan (10-quart minimum) under the oil pan drain plug.
- Use a 15mm socket with a ratchet (3/8") to loosen and remove the drain plug.
- Let the oil drain until it slows to an occasional drip (usually 5–10 minutes).
- Clean the drain plug and install a new oil drain plug gasket (if your gasket is a separate piece).
- Reinstall the drain plug by hand first, then tighten with a torque wrench (3/8"): Torque to 25 Nm (18 ft-lbs).
Step 4: Replace the oil filter cartridge (top-mounted housing)
- Move the drain pan under the filter area (a little oil will spill).
- Use a 24mm socket, extension (3/8"), and ratchet (3/8") to loosen the oil filter housing cap.
- Lift the cap and old filter cartridge out, then pull the old cartridge off the cap.
- Remove the old O-ring from the cap using a flathead screwdriver carefully. (The O-ring is the rubber seal that prevents leaks.)
- Install the new O-ring from the filter kit, and wipe a thin film of fresh oil on it using a shop towel.
- Push the new filter cartridge onto the cap (it should click/seat firmly).
- Reinstall the cap and tighten with a torque wrench (3/8"): Torque to 25 Nm (18 ft-lbs).
Step 5: Reinstall the splash shield
- Reposition the shield and reinstall clips using a trim clip remover (to align) and your hands.
- Reinstall any bolts using a ratchet (3/8") and tighten snugly (do not overtighten plastic).
Step 6: Refill with new oil
- Lower the vehicle off the jack stands using the floor jack.
- Insert a funnel into the oil fill opening.
- Pour in 5.5 quarts of 5W-30 full synthetic, dexos1 approved.
- Install the oil fill cap, then start the engine for 30–45 seconds.
- Shut the engine off and wait 5 minutes, then check the dipstick and top off as needed to reach the full mark (typically ends up close to 6.0 quarts total).
- Tip: Add oil in small amounts near “FULL”.
Step 7: Reset the oil life monitor
- Turn ignition to ON (engine off).
- Use the steering wheel buttons to navigate the Driver Information Center to Oil Life.
- Press and hold SET/CLR until it resets to 100%.
✅ After Repair
- Start the engine and check underneath for leaks around the drain plug and filter housing.
- Recheck the dipstick after a short drive and top off if needed.
- Dispose of used oil and the old filter properly (parts stores and many service shops accept used oil).
💰 DIY vs Shop Cost
Shop Cost: $120-$200 (parts + labor)
DIY Cost: $45-$85 (parts only)
You Save: $75-$115 by doing it yourself!
Shop labor rates vary but typically run $100-$150/hour. This repair takes a shop approximately 1.0-1.5 hours.
🎯 Ready to get started?
HowToo makes it easy: same-day/2-day shipping on every part, plus all the tools and specialty tools you need! Check out the parts and tools sections below to add everything to your cart.
Guide for Engine Oil replace for these Cadillac vehicles
| Year Make Model | Sub Model | Engine | Body Style |
|---|---|---|---|
| 2016 Cadillac SRX | - | V6 3.6L | - |
| 2015 Cadillac SRX | - | V6 3.6L | - |
| 2014 Cadillac SRX | - | V6 3.6L | - |
| 2013 Cadillac SRX | - | V6 3.6L | - |
| 2012 Cadillac SRX | - | V6 3.6L | - |
| 2011 Cadillac SRX | - | V6 3.0L | - |
| 2011 Cadillac SRX | - | V6 2.8L | - |